Tuesday, April 28, 2020

You're Owlsome! - Funky Fossil Designs!


Popping in quick to share this one using some new stuff I recently got over at Funky Fossil Designs!


Well, of course I had to get the Quirky Owls Stamp Set!  Did you ever doubt I would?  If you love artist Kimma Parish's designs, you should definitely check out the offerings over at Funky Fossil!  And of course this one with the glasses is my favorite...lol!


And while you're in the shop check out all of the awesome stencils!  And for the month of April (you still have a couple days left!) you can receive this Words of Friendship stencil free with any order!  I created this background using Kraft paper and some Wendy Vecchi Gold Embossing Paste while making all of my Christmas card backgrounds last week!  I used the cute frame die from A Jillian Vance Design to highlight the "You" word in the stencil.  (I love that the Instant Photo Frame set comes with a larger and this mini sized photo frame as well as a couple other dies including speech bubbles! And of course I scattered some of my favorite sequins from Trinity Stamps!


That's me for today!  Thanks so much for stopping by and do be sure to check out the Funky Fossil Shop!  This shop is in the UK and I am in the US... I ordered these items sometime after lockdowns started happening and waited patiently for this oh so Happy Mail to arrive in my mailbox.  It really didn't take that long and it was SO worth it.  If you've never ordered before you should give them a try!

And as always in these difficult times, please be patient with and support our friends that are running their small businesses through it all!

Come again soon!

Monday, April 27, 2020

A Sweet Hello - A Jillian Vance Design


I'm up on the blog over at A Jillian Vance Design sharing this one.  For more details and links hop on over and give us a visit!

Saturday, April 25, 2020

Crafty Elves’ Countdown to the Holidays - April 2020!


Welcome to another Crafty Elves post!  This one is gonna be short and sweet!  I've been working feverishly to be ready to go away this weekend (don't worry...just going from one quarantine to another...lol).  I will not be including links to products now, but please do let me know if there is anything you want that you need help finding.  I will mention who the company is that sells it though!  Although I'm working from home and saving 2 hours a day in travel time, I think that time and more has been taken up with other quarantine things like cleaning and staring into space!  So here we go!


I will be honest.  A couple days ago I hadn't made any cards for this month's post.  Not one.  And had no idea how I was going to get it done with some of my other commitments.  And then some cards I made for the CAS-ual Fridays release inspired me to pull out some stencils and make some quick cards.  I made all of these in an hour in a half.  From start to finish!  No lie!


For this one I used that beautiful stencil from Stencil Girl (I did add a link here because you may not be familiar with this company but you should definitely check them out!)  I applied some Crackle paste through the stencil and then splattered on some white acrylic paint and Heidi Swapp Gold Color Shine.  After it dried, I just added the white glitter heart cut using an MFT die and that cute sentiment from Miss Ink (ok... I'll give you a link to this set too because I LOVE it!)  Done!


Next I used the same paste with a Newton's Nook snowflake stencil... LOVE this stencil.  I use it quite often for backgrounds.  Then I added a Paper Smooches label die cut and that Jingle All The Way sentiment from Kat Scrappiness cut from Glitter Paper.  I'll mention on all of these I used my favorite sequins from Trinity Stamps.


For this one, I used the Newton's Nook stencil again with some Gold Wendy Vecchi Embossing Paste... love that stuff... and splattered it with the Gold Color Shine.  I used the same Paper Smooches label and added the Noel die cut from Lil' Inker.


And for this one I used another beautiful stencil from Stencil Girl along with some red glitter paste (from Nuvo I think).  I splattered it with white acrylic paint and added a red heart (MFT) and another sentiment from the Miss Ink set!


And here is the card I made that inspired me to create the rest... this one took me a little longer of course...lol!  I added lots of extras... but I knew I'd keep the ones for today simpler.

Thank you SO much!!  Be sure to head on over to Debra  Michael and Jessica's places to see what they have for you today!

And last month's winner:

Vanessa!  Please send me your snail mail address!

Thanks so much for stopping and hope you enjoyed your visit!!!  Come again real soon!  Off on my way for a weekend of relaxation and coloring.. and did I mention relaxing??

Stay safe and healthy!!


Friday, April 24, 2020

Wish I Could Hug You - Miss Ink Stamps!


Welcome!  I'm sharing another card using the adorable Unstoppable Stamp Set from Miss Ink Stamps!  It's not just about the TP you know!  (If you don't know what I'm talking about, check out my #SpreadJoyNotGerms post here or the Miss Ink Post here.. or both!)


There is so much to love about this cute dino set!  Check out the Reacher Grabber Thingies!!  This guy wishes he could hug you... but I'm not sure if he can't because of his little tiny arms... or because of social distancing... or because you're just so darn far away!  


I also used a few dies from Trinity Stamps like the little frame from the Slimline Frame and Fold Dies and the XOXO from the Bold Love Dies.


I created the background with some Distress Oxide and Color Fuse Inks and the Leafy Green Stencil and added some of the pretty Teal Posies from the shop.


Speaking of #SpreadJoyNotGerms, today is the last day to hop and comment for chances to win prizes!!  So many stops... so many chances to win!  You can start my post or start at the beginning over at Catherine Pooler's Blog!


Thanks for stopping and come again soon!


CAS-ual Fridays Stamps Release - Love Ribbon Stencil


Welcome to Day 6 of Inspiration for the New Release over at CAS-ual Fridays Stamps!  Today we are sharing projects using the Love Ribbon Stencil!

I started by creating a back ground by lightly blending some Tumbled Glass Distress Oxide onto Mixed Media Paper.  Then I used the Starlequin Stencil and blended a little of the same color through it.  I wanted a very light background so that it didn't compete with the ribbon.


Then I took another piece of the Mixed Media paper and the Love Ribbon Stencil and masked it off so that I could blend some Picked Raspberry on one side and Broken China on the other.  I removed the stencil and washed it off and then lined it back up and added some translucent embossing paste through it over the colors.  Once it was dry, I fussy cut it out and popped it up in the center of my background.  All that was left to do was add a sentiment from the previously released Heart Ribbon Stamp Set and a few sequins!

The Pink and Blue Ribbon is the Ribbon for Male Breast Cancer Awareness.

Thanks so much for stopping!  Be sure to head on over to the CAS-ual Fridays Stamps Blog and see what everyone else has created for you today!  And should you see something you must have I have this for you:


Come again soon!


Thursday, April 23, 2020

CAS-ual Fridays Stamps Release - Musical Elements Chipboard


Welcome to Day 5 of CAS-ual Fridays Release Inspiration!  Today we're playing with the Musical Elements Chipboard!

I decided to add mine to a Christmas card with a Caroling theme!  I used the Fa La La sentiment from the Mistletoe and Holly Stamp Set to create this heat embossed background.  I used this neutral palette again using white and kraft but threw in a little bit of gold this time.


I used a Versamark Dabber to add the ink to the chipboard pieces and then covered them with some chunky gold embossing powder.  I used my fine tweezers to heat them up and added a second layer to be sure I had good coverage.  Love the look of the chunky powder!


I created my sentiment strip using a strip of white cardstock and the top and bottom of a Bubble Box die cut.  I cut the Merry word from the Merry Christmas word dies once from gold glitter paper and twice more from white cardstock and stacked them.


That's me for today!   Now be sure to head on over to the CAS-ual Friday Stamps Blog and check out what everyone has created for you today!  Should you see something you need to have, I have this for you:


Thank you so much for stopping today and hope you enjoyed it!  Come back tomorrow for more New Release Inspiration!


Beauty In The World - Rubbernecker Stamps


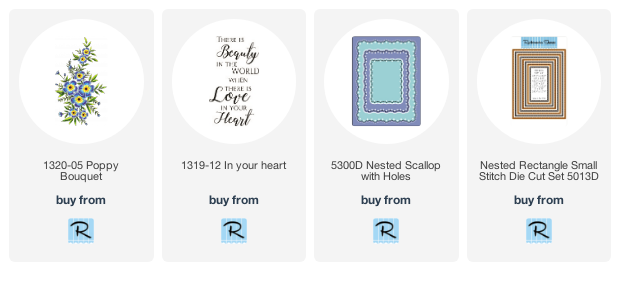
Hello there!  Lisa here and today I'm sharing this one using another one of the beautiful and uplifting sentiments from the shop!  And couldn't help but add the sweet Poppy Bouquet floral.


I knew I wanted to use this vintage rose design paper for this one and I loved the way the single roses in it were colored with dramatic shadows... so rather than carefully blending the petals, I tried to color them the same as the ones in the paper. 


I love the look I ended up with!  

And because I laid that beautiful sentiment over the floral, some of what I so carefully colored was covered up, so I snipped off portions that were hidden and stuck them underneath the main floral image.


I love the heritage look of this one!

Here's how I made it:

  1. I cut a base from white card stock, 5 1/2 x 4 1/4".
  2. I cut a piece of the wood grain Design Paper using the largest of the Nested Rectangle Small Stitch Dies.
  3. Next the floral design paper was cut using the largest of the Nested Scallop With Holes.
  4. I used the middle sized Nested Scallop With Holes to cut a piece of white cardstock.
  5. The sentiment was stamped onto the white die cut with Memento Tuxedo Black Ink using my Misti.
  6. I stamped the Poppy Bouquet using the same Memento Ink onto some Copic friendly paper and colored the image with Copic Markers R81, R83, R85, and R89 for the flowers and YG61, YG63 and YG67 for the foliage.
  7. The image was cut using the Scan N Cut first, and then I trimmed it down further using scissors because I wanted to get into the nooks and crannies.
  8. Finally I assembled all of my pieces using foam tape under the two scalloped layers, inserting the flowers between the two and strategically placing foam tape under the flowers in a few spots where they hang over those layers.
  9. Lastly I added some sequins and was happy to find the gray pearls because of the vintage feel.
That's me for today!  Thanks so much for stopping today.  I hope you enjoyed your visit!  Be sure to come again soon for more Rubbernecker Stamps inspiration!


Here are links to all of the Rubbernecker Stamps products I've used today.  If you choose to shop using these links, I will receive a small compensation at no additional cost to you.  And thank you!

Wednesday, April 22, 2020

Caffeine Fueled Paper Play - But First Coffee


I'm up on the Coffee Loving Cardmakers Blog and playing along over at DL Art's April Linky Party!  Hope you'll hop on over there and check it out!  Here's a sneak peek:


CAS-ual Fridays Stamps Release - Bold Flowers & Blossom Bubble Stencils


Welcome to Day 4 of CAS-ual Fridays Release Inspiration!  Today we're playing with the Bold Flowers and Blossom Bubble Stencils!  I created a couple coordinating cards using two different types of texture paste.


For this one, I applied some Grit Paste through the stencil and then splattered the panel with some Glitter Watercolors and white acrylic paint.  I added a band across the bottom so that Hello word die wouldn't get lost.


For this one, I used some Pearlescent Embossing Paste to add just the flowers (without the outline) from the Blossom Bubble stencil and splattered some white acrylic paint.  This time I used a couple banners as a resting place for my Hope word die.  I just love the pretty font of these word dies!  I like to cut them at least three time and layer them for dimension.

Now be sure to head on over to the CAS-ual Fridays Stamps Blog to see what everyone has created for you today!  And should you see something you need to have, I have this for you:

That's me for today!  Thank you so much for stopping and I hope you'll come again soon!


Tuesday, April 21, 2020

CAS-ual Fridays Stamps Release - Coffee'isms


Welcome back to Day 3 of CAS-ual Fridays Stamps Release Inspiration!  Today we're sharing makes using the new Coffee'isms Stamp Set and Coffee Bean Stencil!

I started by adding some Brushed Corduroy Distress Oxide Ink to my white cardstock panel.  Then I laid the stencil over the top and again used the Brushed Corduroy to start adding the coffee beans.  I followed up with some Rusty Hinge and Ground Espresso.  Finally I splattered some Glitter Watercolors over the top.


I cut one of the Bubble Box Dies from white cardstock and stamped the sentiment from Coffee'isms using Memento Espresso Truffle and splattered over that.  Then I cut two cups from glitter paper using the little Coffee Cup die and added some hearts and circles from the Paw Prints Chipboard pack as steam and colored them with gold gel pen.  Just a few sequins and I was done!


And there you have it!  I love that Michele has so many choices for the Coffee Lover!!  And now you have a couple more!

Now be sure to head on over to the CAS-ual Fridays Stamps blog to see what everyone else has created today with these new products!  And should you see something you must have, I have this for you:


Thank you for stopping and be sure to come back again tomorrow for more release inspiration!


Monday, April 20, 2020

CAS-ual Fridays Stamps Release - Jacks!


Welcome to Day 2 of CAS-ual Fridays Stamps Release Inspiration!  Today we're playing with the Jacks Stencil and Jacks Chipboard!


I used the stencil to apply some Deco Foil Transfer Gel and when it was dry, covered the panel with some Neon Flock and ran it through my Minc.  You can see in this pic a little that the Jacks background is ...well... Neon...lol... but also fuzzy to the touch... SO fun!


I stamped the Happy Birthday from the previous release with Versamark and heat embossed it in blue and then fussy cut it out.  Then I used a Versamark dabber to apply the ink to some of the Jacks chipboard and using the fine tweezers from the shop to hold them, added some of the same embossing powder that I used on the sentiment and heated them up.  I popped a Scallop Tag onto the front and then added the sentiment and Jacks.  I lined up the jacks that hang over the edge with the flock ones because I thought it was more pleasing to look at that way.


I just added a few sequins and I was done!  This one is bright for sure, but I love the blue with the Neon orange... it's fun!

Thanks so much for stopping and be sure to hop on over to the CAS-ual Fridays blog to see what everyone else has created with these new products and should you see something you need, I have this for you:


Be sure to come back tomorrow for more release inspiration!