Sunday, September 29, 2019

National Coffee Day With Miss Ink Stamps!


I'm honored to be guesting with Miss Ink Stamps this month and today is National Coffee Day so of course I had to use my favorite coffee set from Miss Ink.  The Brewtiful stamp set was perfect for some no line coloring!


I started off by creating a light patterned background with the Diamond Fade stencil and some Old Paper Distress Ink.  I stamped the gorgeous large coffee plant stamp from the Brewtiful set using Inkon3 Fadeout Ink onto some Copic friendly paper and colored it in.  I added some detail with colored pencils.


Next I stamped this awesome Have Heart stamp onto Kraft paper and cut it out; popped everything up and added the How You Bean sentiment from the Brewtiful set.


To celebrate National Coffee Day, Miss Ink is having a sale!  20% off all coffee related products including the Brewtiful set and I highly suggest you pick it up.  It really is one of my favorites!  No code is necessary!  Just add your favorite coffee products to your cart! (And anything else you feel you might need!)

Thanks for stopping and be sure to check out all of my National Coffee Day posts!  There are lots of sales going on and prizes being offered and you don't want to miss out!

Come again soon!

A-maize-ing Fall Wishes with Polka Dot Orchard


So happy to see you again!  I'm sharing some inspiration using a few Polka Dot Orchard digital sets.   Of course there is plaid!  Not to mention a little bit of foil!

Polka Dot Orchard is joining with several other companies in the National Coffee Day Hop that starts at the Coffee Loving Cardmakers Blog today.  In addition, there is a hop up on the Polka Dot Orchard Blog and we're all sharing projects using some of the newest digital sets in the shop-some caffeinated and some not!  I'm using the beautiful and fun Amaize-ing Fall Wishes set (the corn and sentiment), Leaves & Lattes (leaves), and Autumn is Calling (wood slice) sets!


It was fun and easy to color the corn from the Amaize-ing Fall Wishes set.. and isn't that a beautiful sentiment?


And of course I welcomed the opportunity to use some foil with my laser printed images!  And those leaves from the Leaves & Latte set... love them!


That's me for today!  Thanks so much for stopping by!  Now be sure to head on over to the Polka Dot Orchard Blog and see what is going on there!  You'll find links to everyone's projects and information as to how to get chances to win one of the prizes Polka Dot Orchard is giving away!

Thanks for stopping and be sure to check out all of today's posts!

Come back soon!


National Coffee Day With CAS-ual Fridays!


So happy to see you again!  And Happy National Coffee Day!  To celebrate, the Coffee Loving Cardmakers Blog is hosting a linky hop with 29 Super Sponsors full of prizes and inspiration!

I'm hopping with my teamies at CAS-ual Fridays Stamps and sharing some CAS-ual Fridays Coffee goodness!  Here's what I have for you today!


CAS-ual Fridays has one of the best collections of Coffee flavored products!   This Coffee Cup is among my favorite all time cups... I love the size, shape and that heart handle!!  And guess what!!  The whole coffee collection is on sale now!  You can find it all here!


And I have a code for an additional discount at the end of my post so hang around!


I started with a simple distress oxide background created with the Starlequin Stencil and some Antique Linen and Brushed Corduroy Distress Oxides.  And you may remember my project from the a few days ago where I created some paper with distress oxides to cut out the leaves and acorns from the Acorn Fri-Dies.  I thought they'd make the perfect "bouquet" in my cup and decoration on my cup and I don't know about you but I love them!  I also die cut some Casual Trees added those to the arrangement.


This sentiment from Peace, Love and Coffee is perfect for any kind of well wishes and I saved some of my autumn dies for underneath it.


Don't forget all coffee items are on sale in the CAS-ual Fridays Shop here and here's a code for you for extra savings!  And all of the Girl Fridays have one, so you don't have to use mine!  Use the code for whoever inspires you!


Head on over to the CAS-ual Fridays Blog for links to all of the design team's posts and to find out how to get your chances to win!  CAS-ual Fridays is giving away 3 prizes!  Yes 3!  One on IG, one on Facebook and one for hopping and commenting.

And we've got something special coming for World Cardmaking Day next Saturday so stay tuned!

Thanks for stopping!


National Coffee Day with Trinity Stamps!


It's National Coffee Day!  And today we have a special hop that starts over at the Coffee Loving Cardmakers Blog!  There are 29 Super Sponsors participating in this fun hop!    Hop and comment to win prizes-each Sponsor will have information regarding their prizes in their post!

And what's even more exciting is the Coffee Loving Cardmakers are hopping along with Trinity Stamps today to share a very special new stamp and die set with you!  Say hello to The Frappy Camper's Perking Spot:


SO cute right!?  The Trinity Stamps and Coffee Loving Cardmakers teams put our creative brains together and it culminated in this adorable and detailed set illustrated by Davina Cantrell and I LOVE it!  Nothing better than a truck full of coffee except maybe a really adorable one that looks like a camper!

And here's what I've created for you today:


Have I mentioned that I love this adorable set??  I used it along with a few other Trinity products to create an Autumn Scene.


I stamped, cut and paper pieced the camper and then popped it up for dimension.  I stamped the tiered pastry dish onto the background and added the stamped colored and cut espresso machine and stack of cups and our friendly server!

I love all of the details of this set!  That cute awning, the menu, the sandwich board, coffee cups, cupcake, syrup bottle, straw and tea bag!  And the Frappy Camper Die Set cuts out the camper window AND the Coffee word has a die too!  Details!

The pumpkins are from the Seasonal Sweetheart stamp and dies.


I built my sentiment using a stamp from the set and the Hello Senti Mini Die Set and the clouds and sun are from the Cloudy Day Scene Builder Die Set.


Oh!  And she's drinking Pumpkin Spice... I thought that might be important to you!

So that's me for today!  I'm playing along with a few challenges!  Over at Simon Says Stamp's Wednesday Challenge it's Anything Goes.  At SSS Monday Challenge, it's all about Stitch It (Real or Faux).  And today is the last day for Something Plaid over at Double Trouble Challenges.  Check them all out!

You can find the entire Trinity Hop List up on the Trinity Blog here!  Trinity Stamps is giving away a $20 gift code to the shop!  For all of the details see the Trinity Stamps post.  And for the entire National Coffee Day hop list and links to all of the Sponsor posts, head on over to the Coffee Loving Cardmakers Blog here!

I've got a lot going on here today, so come back soon and see what else I have for you!  But for now head on over to see what everyone has created with these awesome new stamp and die sets!

National Coffee Day With Rubbernecker Stamps!


Woo Hoo!  It's National Coffee Day and if you know me at all, you know I'm celebrating!  And Rubbernecker Stamps is celebrating too with a hop that starts at the Rubbernecker Blog here!  We're sharing projects made with some pretty awesome Rubbernecker Coffee related products (and then some)!  It's a short hop with just a few stops so it won't take you long!

And there are prizes!!  Hop and leave us some comment love along the way for your chances to win a $10 or $25 gift code to the Rubbernecker shop!

You may have arrived here from the Rubbernecker Blog!  And when you're done here you'll head on over to my oh so talented teamie, Marilyn's place!   Should you get lost along the way just head on back to the Rubbernecker Blog for the complete hop listing!

So here's what I've made for you today:


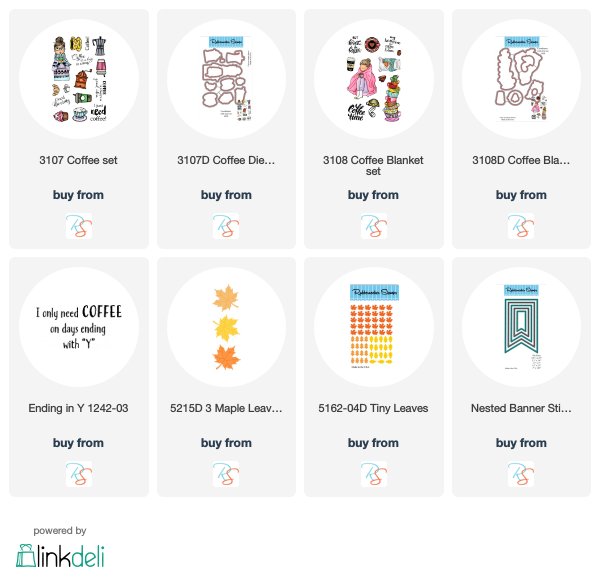
I love the two clear Coffee stamp sets that Rubbernecker has!  The Coffee and Coffee Blanket stamps and dies are SO fun with SO many great images!  They were perfect to fill up a box card.  I picked up some very cool, quick and easy pre-cut box cards in the Rubbernecker booth at the Scrapbook Expo a couple weeks ago!  There are 5 in a set (including envelopes!) and they're made by The Paper Cut.  Pretty cool!  If you're not familiar with box cards, they fold flat for shipping and then you just pop them open and stand them up.


After I added my layer papers to the inside and outside of my box (sizing for those is included) I assembled the it.  I stamped, colored and diecut all of the images from the Coffee Stamp Set and a few from Coffee Blanket (including that adorable kitty cat) and began adding them to the box card either directly to the box or by using some upcycled clear plastic packaging cut into strips when I wanted the images to float.  I decided some autumn leaves floating around would be fun too, so I die cut some out of design paper using the Tiny Leaves die and attached those with the plastic also.


To the front flap I added the Ending With Y sentiment to a banner and some more coffee images and leaves.


And to the side flaps I added a larger leaf that I cut using the 3 Maple Leaves die and more coffee of course (I need enough for ALL the days after all).  Love the veins these dies add to the leaves!


You know I love my dimension and box cards are the ultimate!  


And that's me for today!  I'm playing along over at Simon Says Stamp's Wednesday Challenge which is Anything Goes this week!

Now it's time to head on over to Marilyn's blog and see what she's created for your viewing pleasure today!  Be sure to leave some love here and there and everywhere for your chances to win a $10 or $25 gift code to the Rubbernecker shop!  And don't forget if you get lost just head on over to the Rubbernecker Blog for the full hop list.

Thursday, September 26, 2019

An Autumn Hello With CAS-ual Fridays


Welcome to some CAS-ual Fridays inspiration!  Today I'm sharing a card I made using all Die Cuts... not a stamp to be seen!  And CAS-ual Fridays has some of the best in town!

I started with a neutral but beautiful background layering a base of Kraft with a Kraft layer of the Trellis Cover Die.  When it came time to cut the pieces of the Acorn Fri-Dies I thought I'd use some pretty design papers, but they were too distracting... cardstock was too flat... so I pulled out a 6X9 piece of white cardstock and a bunch of autumn colors in Distress Oxides and decided to make my own:


I started with some Antique Linen and Brushed Corduroy that I applied to the whole sheet.


Then I added some Fossilized Amber to the entire sheet except for one corner that I wanted to leave very light for the bottom part of my acorns and I wanted an area with some green for some of the leaves, so I added the bundled sage just to one corner.


I added Rusty Hinge and Vintage photo (for some leaves) to all of the areas except where the Sage and Antique Linen areas were.  And for my acorn tops and leaf veins I darkened up an area with the Ground Espresso.  So I had all of the colors I needed on one sheet and slowly started taping down the dies to the colors I wanted and ran them through my Gemini.


And I ended up with all of these!  And my favorites are the ones that overlapped the various color "blocks"


I cut a large Scallop Tag from some cool "graph paper" patterned design paper.  Added my leaves and acorns and splattered some gold, bronze and white glitter watercolors over the whole thing.  Then I added and a gold Hello using a die from the Sweet Friend Fri-Dies across them, using popup tape, cut very thin in the middle to support it.


I also cut a couple of the Casual Tree die cuts from some darker kraft and added those to my foliage clusters.


And I still have lots of die cuts left over for another project!  You'll be seeing that soon!


In the meantime, if you've seen something you must have today, I have this for you:


And there are lots of awesome things on sale here!


Wednesday, September 25, 2019

Crafty Elves' Countdown To Christmas - September 2019 Edition


Welcome to the Crafty Elves' Countdown to Christmas!  Can you believe it's already September!!  And it's a very busy month around here... work deadlines and lots of crafty stuff going on... it's been so much fun!

If you're new here, then you'll want to know that my friend Debra Davison from Meticulosity agreed that for 2019 we would make a Christmas card a week and on the 25th of each month, we'd share the cards we've made that month!  And by December we'll have all of our Christmas cards ready to go!  We've both stuck to it and have a nice health pile of holiday wishes to send out.

Here's what I have for you today:


You may remember that in the beginning of the month I made a card for the Paper Smooches challenge for September and used the Wavy Wishes stamp set along with the Wavy Pattern dies.  That one was a little bit of a rainbow and after cutting the dies from all those different colors I had a whole bunch of leftovers!  So I created some backgrounds with them and have been sharing cards all month.  If you're interested you can find Wavy Card 1 here, Card 2 here and Card 3 here!  And this one makes 4!  I have a couple more to go too!

I love that Wavy Wishes includes a Merry Christmas sentiment!  I knew I wanted to use it for my monthly Christmas card post.  One of my fave stamp sets, Warm Hearts was just right to finish it up!  And of course my snowman has some coffee!  There's always a coffee cup in my Christmas Card post and always some kind of theme.  This time around the theme is Local Papercraft stores!  I'm so lucky and I have no less than 3 full blown papercraft stores and did you know that Paper Smooches' Artist and Owner Kim also has a Paint & Wine Studio not to far from me in Goodyear, AZ, called Our Creative Escape and up front in the studio there are some wonderful little giftie items, a Paper Smooches section and a limited selection of awesome papercrafting supplies.  It's an inspiring setting and lots of fun!

The rest of my cards today are made using an adorable paper collection called Gnome For the Holidays from another one of my favorite stomping grounds, Scraps of Love!  I picked mine up at the Scrapbook Expo and made a few quick cards for today:


This paper was designed by Scraps of Love and printed by Color Play.  The patterns are fun and there's even a plaid! #madforplaid  It also includes a 12x12 set of images that can be colored (on Copic friendly paper) and cut out (either in just a rectangle or fussy cut or cut with a Scan N Cut like I did!)  The flip side of that sheet has a random pattern that you can also choose to color if you'd like.  And Scraps of Love has some beautiful stamp sets too!  Most are Arizona themed and I picked the Christmas Cactus set!  The Cactus on this one is from the pre-printed images and the sentiment was stamped with the stamp set and fussy cut.  I used a polaroid die from A Jillian Vance Design to frame my images.

I'm playing along over at Double Trouble Challenges Something Plaid AND they are partnering with Use Your Stuff's Frames/Tags (which is also the twist at DT!)... I've used that awesome Polaroid Frame from AJVD!


For this one I stamped, colored and used my Scan N Cut to cut the images and fussy cut the sentiment from the Christmas Cactus stamp set.  I kept my designs simple and just added a few snowflakes from Lawn Fawn and sequins to embellish.

I'm playing along over at Simon Says Stamp's Monday Challenge which is Stitch It (Real or not)... I have some faux stitching in my die cuts!

And the Collection also includes some journal card sized images perfect for a quick and simple bunch of cards!  I used just a few to make these four cards along with more snowflakes sequins and some twine:


Hoping to have some more local shop fun in my next post.

Now before you go I've been choosing one lucky commenter from each Crafty Elves post to win some Happy Mail!  And it's time to announce the winner from last month:

Theresa!

And we're doing it again!  Leave me some love so I can send you some!

Thanks for stopping!  Now be sure to head on over to Debra's blog to see what she's cooked up for you today... there is some real cuuuteness going on over there!!


Monday, September 23, 2019

A Monster Family Portrait - Rubbernecker Stamps


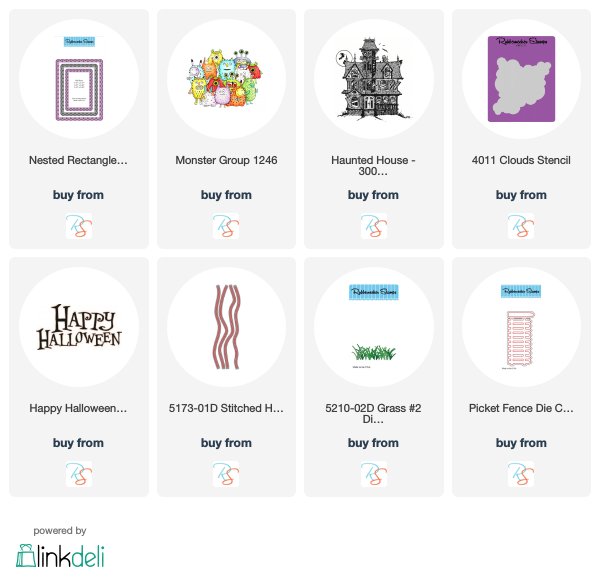
Welcome to some Halloween fun with Rubbernecker Stamps!  When I saw this adorable Monster Group stamp I thought it looked like a family portrait.  And what better place to take a family portrait than in front of your homestead?  The Haunted House stamp was perfect!

I started by using the Clouds stencil with Black Soot Distress Ink.  I wanted the majority of my background to be Black/Gray/White.  Then I stamped the Haunted House over it using my Misti so I could stamp it a couple times to be sure it was dark.  I colored in the open areas with some grays and although most of it is covered, I added hills, a little piece of fence and some grass to the background in black.


I left all of the color for these guys... I think that one looks like one of my uncles... you know.. the hairy one...lol!  I had fun coloring these guys up with various textures and colors... you really can't go wrong!


I love how the cloudy background slightly shows through the Haunted House... as if it's not really there...  I decided to add just a touch of color to the background by coloring in the moon and then stamped, embossed and cut out the Happy Halloween sentiment and popped it up.


Such a happy family!

Thanks for stopping by and hope you enjoyed your visit!


I've included affiliate links below to all of the Rubbernecker products I've used today: