Thursday, October 31, 2019

CAS-ual Fridays 7 Years Release - This Sucks!


Welcome to Day 5 of the CAS-ual Fridays 7th Anniversary Release!  Today we're sharing with you projects using the awesome new sentiment stamp set, This Sucks.

I LOVE this set!  Such fun sentiments!  I started this one with a background I created using the Starlequin Stencil and Ken Oliver Colorbursts.  This was the 2nd background I made in one application of the beautiful Colorbursts.  For the first I applied the colors through the stencil and then I took the stencil with the ink on it and smooshed it onto some watercolor paper... that is this one... you'll see the first tomorrow!


Love this fantastic bold sentiment!  I stamped it with my Misti so I could stamp it over a couple times and make sure it was solid.  Then I cut it out and popped it up over the background.


Things could always be worse!  Just one of the many sentiments I love on this set.


I think you might need this one....

Thank you so much for stopping!  Be sure to head on over to the CAS-ual Fridays Blog and see what everyone else has created for you today and to see how you could win some free stuff!  And should you see something you want, I have this for you:


Come back tomorrow!  It's the start of the 2019 Fall/Winter Coffee Lovers Blog Hop and we have a couple (more) really cool sets to show you!

See you then!

Wednesday, October 30, 2019

CAS-ual Fridays 7 Years Release - Hearty Horse!


Welcome to Day 4 of the CAS-ual Fridays Anniversary Release!  Today we're sharing projects using the Hearty Horse stamp set!  Isn't he a cutie??

I created another Deco Foil background using the Tin Roof Stencil, Deco Foil Transfer Gel and some beautiful Amber Waterfall Deco Foil.


I just love this cutie pie!  I decided to make my Hearty Horse brown.  I created a shaker frame using the second and third largest Bubble Box dies.  Then I attached the horse to the inside of the frame and glued some acetate over the back of the frame including the horse.  I added some pop-up tape and sequins and there you go!  I created my own mix of sequins using some browns and golds and clear sequins and beads.


Isn't that Deco Foil gorgeous???  Ok... I love the Tin Roof stencil too... it's also my favorite...lol!


I chose Hooray as my sentiment so that I could use the card for a variety of reasons... encouragement, birthday, congrats... and added a few of the single hearts, colored in gold and added some Liquid Glass over them.


Hooray!

Thanks for stopping!  Be sure to hop on over to the CAS-ual Fridays Blog to check out what everyone has created for today!  Find out there how you could win some free stuff!

All of the new products are available in the shop now!  We'll be sharing more inspiration through Friday and should you see some things you must have, you can use this if you'd like:


Come back tomorrow for more release inspiration and don't forget, Friday is the start of the Fall/Winter 2019 Coffee Lovers Blog Hop!!  CAS-ual Fridays is a sponsor again!  Be there or be square!

Coffee Loving Cardmakers - Paper Smooches Caffeinated Collaboration


So excited!  Today the Coffee Loving Cardmakers and Paper Smooches Design Teams are hopping together to show you the awesome new Caffeinated, Caffeinated Icons Dies and Caffeinated Two sets!  I LOVE these sets... take a look:


The fun starts at the Coffee Loving Cardmakers Blog where you will find the complete hop listing!  Hop and comment at each stop for your chances to win a $25 gift code to the Paper Smooches shop!  You have until November 6th at 11:59pm to comment at each stop.

You should have come here from my oh so talented teamie Helen's place!  Here's how I was inspired:


For this one I used papers from an Amy Tangerine paper pad that I got at Our Creative Escape which is a Paint & Wine Studio owned by Kim from Paper Smooches where you can find lots of Paper Smooches stamps and dies, along with a small supply of papercrafting items, and some adorable gifty items.  I thought those circles in the background panel were perfect for a Bubble Tea card!  (Um... did I mention there is a donut shop right next door to OCE that has bubble tea??).  When I go... I Paint & Bubble Tea... or shop and Bubble Tea... or whatever and Bubble Tea.


OMG... the glasses... and those little popping bubbles!!!  I fell in love with this stamp set as soon as I saw it!  I cut a tag using the Gift Tags 2 Dies for a backdrop for that adorable cup.  My favorite is Matcha Green Milk Tea with Blueberry Popping Bubbles.


This Speech Bubble die was PERFECT for this sentiment!  


In.  Love.

And then... this came to me when I was supposed to be sleeping:


Tee hee!!  This one made me giggle in my craft room!

I started with the background... I ink blended the background and then sprayed some water infused with Inkon3 Liquid Pixie Dust and soaked up the excess water with a paper towel.  Once it was dry, I used the same colors and the Stackers Stencil and added some triangles and circles which you can barely see here because I've covered a lot of it up, but I love the way it looks and I can't wait to do it again!


This guy... Frankenstein has long been one of my favorite monsters.  I colored my cup green and then used the Halloween Card Dies for his hair, stitches, and bolts.  It was so fun to make little Frankensteins out of my little poppers too!  Do you see that one little guy up there..... being all cannibalistic?...lol!  And I used this awesome Geo Frame Die to highlight Frankie.


Then I built my sentiment using the Boo! from the Halloween Icons Dies and part of one of the sentiments from the Caffeinated Two stamp set.


So there you have it!  I'll be sharing some more Caffeinated fun with you over the next week!  Be sure to hop and comment by the 6th for your chances to win!


Now after you leave me some love here, head on over to my talented teamie Robyn's place to see what she's created for you today!

Thanks for stopping!  Come again soon!  And don't forget Friday is the start of the Fall/Winter 2019 Coffee Lovers Blog Hop!  Be there or be square headed... you know... like Frankenstein!


Tuesday, October 29, 2019

CAS-ual Fridays 7 Years Release - Ever After


Welcome to Day 3 of CAS-ual Fridays 7th Anniversary Release!  Today we've got an awesome sentiment sent to share with you called Ever After.

I created my background using some Deco Foil Transfer Gel along with Gold Shattered Glass Deco Foil and the Starlequin Stencil.


I used this Happily Ever After sentiment to create a card that could be for a wedding or an anniversary.  I love the gold and white pallet.  For behind my sentiment strip, I cut the second largest Bubble Box die from glitter paper, trimmed off the ends to make it shorter and then popped the sentiment up over it.


I tucked some Casual Trees cut from white vellum underneath the sentiment strip and added a few flowers from the Garden Fri-Dies in Gold.


Yummy gold.

Thanks for stopping!  Be sure to head on over to the CAS-ual Fridays Stamps Blog to see what everyone else has created using the Ever After stamp set, and find out there how you can win some free stuff!

All of the new products are available in the shop now and should you see some things you must have, I have this for you:


Be sure to come back tomorrow for some more CAS-ual Fridays Release goodness!


Monday, October 28, 2019

CAS-ual Fridays 7 Years Release - Doing Great!


Welcome to Day 2 of the CAS-ual Fridays 7 Year Anniversary Release!  Today we're sharing projects using a fantastic new sentiment set, Doing Great!


If you ever need a card of encouragement for someone for any reason, what a great sentiment this is!  And it's true!  If you are reading this, you have survived anything you've gone through so far!


I decided this bold and uplifting sentiment needed a pretty background, so I used the flowers and leaves from the Pretty Posies stamp set and heat embossed them on the edges of a die cut panel.  Then I ink distressed the panel in some blues and added a little bit of stenciling using the Starlequin stencil.  Next I colored in the images using my Zig markers and finally splattered just a little bit of glitter watercolors over the top.


We hope you're enjoying this fun release!  And be sure to hop on over to the CAS-ual Fridays blog to see what everyone has created and find out how you could win some free stuff!

You will find all of the new release products in the shop now right here!  And should you see some things you must have, I have this for you:


Thanks so much for stopping and be sure to come back tomorrow for some more release inspiration!

Sunday, October 27, 2019

CAS-ual Fridays 7 Years Release - Angels


Today is the day!  It's the first day of the new CAS-ual Fridays Release and we've got some sweetness for you!  Say hello to Flower Angel!  Isn't she sweet??

I started by creating my background with some distress oxides.  Then I used the Tin Roof Stencil to apply some pearl embossing paste and set it aside to dry.


While I waited for that to dry, I stamped, colored and fussy cut my Flower Angel.  I added some Wink of Stella to her wings which of course you can't see ... lol... and used a gold Wink of Stella pen on her halo.


This set has the most beautiful sentiments in it!  The Heart Board Fri-Dies were perfect for a little bit of embellishment.


Love her!

I'm entering her into the Simon Says Stamp Instagram Challenge for October which is your favorite technique!  I love to ink distress a background and then add some embossing paste using a stencil!

And we're also sharing projects using the new Angel Hugs set!


Not just one but two beautiful angels and more beautiful sentiments!

I started this one with the Four Petals stencil and some Glitter Water Colors.


I cut a Scallop Tag from watercolor paper and heat embossed one of my favorite sentiments ont o it and then smooshed a bit of watercolor onto the bottom of it.  I also stamped and embossed these cuties in gold and colored them, cut them out and popped them up over the watercolored area.


I just love all of the shimmer!


I just love today's releases!  So easy to make a beautiful card for many different occasions!

I'm playing along with the Simon Says Stamp IG challenge here!  This month the theme is your Favorite Technique!  One of my favorite techniques is watercoloring through a stencil.

Thanks for stopping here!  Be sure to head on over to the CAS-ual Fridays Stamps Blog see what everyone has created for you today and for information about the giveaway!

You can shop for all of the New Release products right now, right here!  Should you see something you must have, I have this for you:


Be sure to come back tomorrow for some more New Release goodness!


Saturday, October 26, 2019

A Colorful Celebration With Miss Ink Stamps


I've got a little bit of color here for you today... just a little!  I started with the Diamond Fade Stencil 2 and used it to apply some Deco Foil Transfer Gel.  I ran it through my Minc with some Rainbow Shattered Glass Deco Foil.


I stamped a bunch of the rosettes from the Pinata Party Background Stamp set and the streamers from the Streamers Stamp Set, colored them in rainbow colors and cut them out using the coordinating dies.  I added them using varying thicknesses of foam tape.  These are two of my very favorite Miss Ink stamp sets... but I have a lot of favorite Miss Ink stamps!


I added an angled border at the top to hold that awesome Celebrate word die that is included in the coordinating dies to the Streamers set.  I used a gem in the center of each of the rosettes.


This one was so fun to put together and even more fun to look at!

I'm playing along with the Simon Says Stamp Instagram Challenge for October which is Favorite Technique... I LOVE to add foil to a project using a stencil and Deco Foil Transfer Gel!  Foil is awesome anyway, but the added dimension when using the gel... perfect!

Thanks so much for taking this ride with me as I guested at Miss Ink Stamps this month!  I've had a lot of fun and I hope you've enjoyed it too!

Friday, October 25, 2019

Crafty Elves' Countdown to Christmas - October 2019 Edition


Welcome to this month's Crafty Elves post!  If you're new here, my friend Debra Davison from Meticulosity and I made a deal to create a Christmas card a week for the year so that come December, all we have to do is mail them!  We've both stuck to it all year and this month is no different!  Be sure to head on over to Debra's place when you're done here and see what she's made for you too!  And be sure to stay 'til the end to see who won some Happy Mail from last month!  

I've been dreaming of a blue-ish Christmas and here's how I was inspired:


I've got tons of Rubbernecker Stamps Holiday inspiration for you today!  And of course there is some caffeine included!  This adorable Elf Stirring Coco image won my heart as soon as I saw it! Isn't this he adorable??  It's one of the many new holiday stamps over in the Rubbernecker shop.   I colored him up with my Copics and cut him out.  I decided a cup of... Mocha..(my hot chocolate always has coffee added).. would possibly be sitting on a counter in front of a window with a beautiful view of the snowfall outside.  Any reason to create a shaker, right??...lol! 


He looks content... I wonder if he's gonna drink this one or if he's making it for someone.  I mean... the size?  So what...  most mornings I could use a cup big enough to sit on.  Just give me a straw.

I blended some distress inks in light blues and ever so lightly added some clouds with the cloud stencil.  Then I added acetate to the inside of the window die cut and popped it up to create my shaker.  I used a mix of snowflakes, beads, and translucent round sequins... my own mix of sorts.


And isn't the Merry and Bright sentiment sweet?  I love that light and fun font!  I hand cut the banner after heat embossing the sentiment onto the cardstock.


There are also some really beautiful and fun Holiday sentiment stamps in the shop that are good enough to be the main focus of a card! 


They are made of fantastic iconic images and beautiful fonts... I heat embossed this one onto the blue cardstock and fussy cut it out.


And this Rectangle One Piece Die is quickly becoming one of my faves... It cuts multiple frames at once and you can use one or put two or more together to create your custom frame.  I used three frames here... two cut in the woodgrain and one in the white.  I popped up my frame and placed a white piece of cardstock behind it that I embossed with a snowflake folder.  Finally I just popped the sentiment stamp up in the center.


Next I used two of the smaller frames cut from blue cardstock to create this shaker card.  I started by blending some blues on the cardstock and then used the Stars Stencil to apply gold Deco Foil Metallix Gel.


While that panel was drying, I heat embossed the sentiment onto white cardstock using Wow Gold Embossing Powder.  Then when the background was dry, I added the shaker with some more gold stars (sequins) along with a few others.   I popped the fussy cut sentiment up over the top.  It's a beautiful image, isn't it?


I just love the shimmer of all of that gold!  And don't you just love shakers?  So much fun and I love the sound they make as those sequins and beads roll around.


And last but certainly not least, this adorable Snowmen with Animals image!  I decided to use some non-traditional colors for it so I stuck with blues and purples and just a touch of blue green.  


I love how the bunny is eating a carrot... although it's good to see none of his snowman friends are missing their noses...lol!  I had to trim this image a bit to fit it in the Snow Globe... there are actually two more birds in the image.  I also cut the snow fall dots from the Cabin Die in white glitter paper as well as the ground die included with the Snow Globe for a touch of shimmer.


I just love that globe and I'm looking forward to using it a bunch more this holiday season!

I have one more Holiday card that I made this month using some fun Rubbernecker products.  You may have seen it the week following National Coffee Day:


If you didn't see it the first time around and you want to check out the details you'll find them at this post here!

Now for the winner of some Happy Mail from all the love you left on September's post!
Drumroll.....


Julie!!  Send me your snail mail so I can drop you some Happy Mail!

Of course we're playing again!  Leave me some love and I'll choose someone to send some Happy Mail to and announce the winner in November's post!

Thank you so much for stopping today and I hope you enjoyed your visit as much as I enjoyed creating these cards!  Come back soon!  And don't forget to hop on over to Debra's place and see what she's got for you!


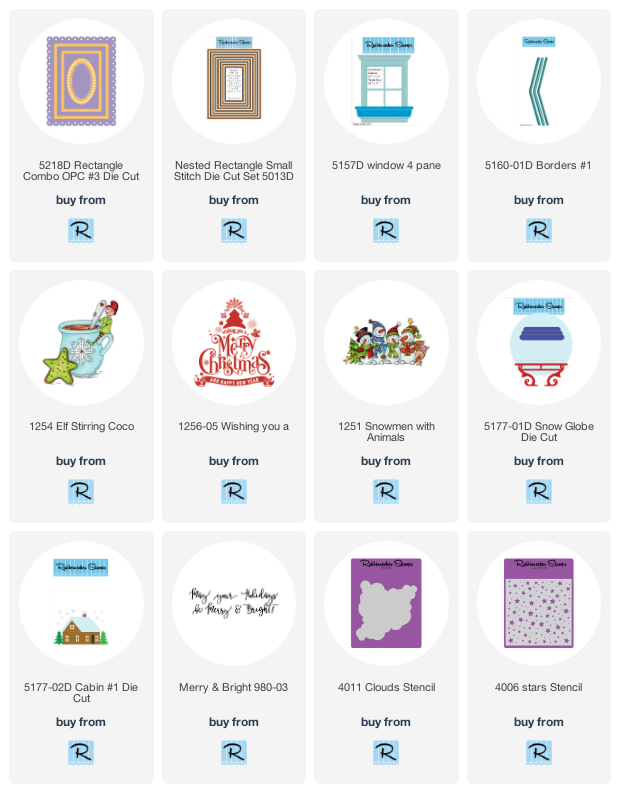
I've included links below for all of the Rubbernecker products I used today.  If you choose to purchase using these links I will receive a small compensation at no additional cost to you.