Wednesday, September 30, 2020

National Coffee Day 2020 - We Love Our Sponsors!


Welcome back!  You may have been here once or twice or three times today!...lol!  After all, it's National Coffee Day Week!  (LOL!  Well, we can't just celebrate one day!)

Today I'm joining Christine and Robyn up on the Coffee Loving Cardmakers Blog and here's what I have for you:


I've used some stuff from lots of sponsors for this one!  

That adorable pup is from Topflight Stamps along with the sentiment.  Although it isn't a coffee set I thought it was perfect for a coffee card... dogs and coffee... the two things I'd take to a deserted island if I had a choice.


I used a Coffee Bean stencil from Funky Fossil Designs and some Thermoweb Transfer Gel Blanco to apply Rina K Neon Flock in Poppin' Pink. I cut the beautiful cup from Stamplorations and the stitched Rectangle and Heart are from A Jillian Vance Design.


That's me for today!  Be sure to head on over to the Coffee Loving Cardmakers post from the 29th for links to all of the sponsors who are participating in the hop!  Each one is giving away a prize!

Thanks for stopping and if you haven't already, you may want to check out my other cards for National Coffee Day!  Come again soon!


CAS-ual Fridays Release Day 3 - Celebration & Hooray Fri-Dies!


Welcome to Day 3 of CAS-ual Fridays Stamps Release!  Today we're sharing the so fun Sassy Celebration Stamp Set and Hooray Fri-Dies!

I just love the font on these Fri-Dies and I didn't set out to make a shaker but when I die cut the celebrate I had the perfect makings of a shaker!  Lucky I kept track of the little pieces from the e's, b, and a so I could add them back to the Celebrate word once my acetate was on.


And I filled it up to the brim with the perfect sequin mix!  It still shakes, but it is full!

I created the background using some Catherine Pooler Inks and the Jacks stencil.  The "Well done you!" sentiment is from Sassy Celebration and the rest of the pieces are all from the Slimline Pinked Fri-Dies.

That's me for today!  Be sure to head on over to the CAS-ual Fridays Blog to see what everyone else has created for you today and to see how you could win a prize!

Should you see something that you need to have I have this for you:


And the National Coffee Day Hop is still going on!  More chances to win prizes and CAS-ual Fridays is a Sponsor!  Check out that post from yesterday (September 29th) for more chances to win!

Hope you enjoyed it!  Come again soon!


Tuesday, September 29, 2020

CAS-ual Fridays Release Day 2 - Everyday Dragonflies


Welcome to Day 2 of the CAS-ual Fridays Stamps Release!  Today we're showing off the new Everyday Dragonflies and Dragonflies Fri-Dies!  I paired them with the To Go Cup because... well... I love coffee and today is National Coffee Day!

I started with a base of purple and cut the pinked die from white cardstock and another panel from white using the smaller stitched layer.  I blended some Distress Oxides in Picked Raspberry, Broken China, and Wilted Violet.  I splattered some water over it and then dabbed it dry.


  I stamped a few dragonflies using Grape Crush Catherine Pooler Ink on the upper half of the card as well as some hearts from the Somebunny set.  I filled in the dragonflies' bodies and the hearts with some pink and purple Wink of Stella markers.

I stamped the dragonfly again using the Be Mine CP Ink along with Grape Crush and die cut it out.


Finally I cut all of the pieces of the To Go Cup and assembled it, placing the die cut dragonfly on the wrap.  I popped the cup onto the bottom half of the slimline background; stamped one of the sentiments from the dragonflies set onto a banner from the Pinked die set and popped it up onto the card.  Finally I added some Glossy Accents to the dragonfly bodies and hearts on the background as well as a few sequins.

That's me for today!  Now be sure to head on over to the CAS-ual Fridays Stamps Blog and see what everyone else has created for you today and how you could win a gift code to the shop!

And if you see anything here that you just must have, I have this for you!


AND CAS-ual Fridays is a sponsor for the Coffee Loving Cardmakers' National Coffee Day Hop!  So be sure to check that post out today too for another chance to win!


National Coffee Day - A Jillian Vance Design!

Hello!  We are having a lot of fun today!  Today is National Coffee Day and we're celebrating with a hop!  So many Super Sponsors of the Coffee Loving Cardmakers are participating and offering prizes!  Just hop and comment for your chances to win!

A Jillian Vance Design is a sponsor and has some fantastic Coffee offerings in the shop and I used one of my favorite cups today along with a few other things.  Here's how I was inspired:


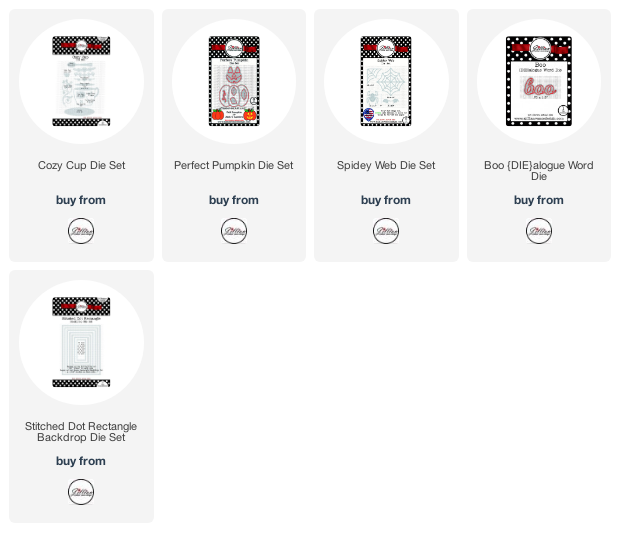
Cute, right??  I decided to use the face from the Perfect Pumpkin Die set along with the cup from the Cozy Cup die set to create this cute pumpkin coffee cup... I'd buy that cup!  I die cut it from white cardstock and colored it with my Copics.  (I cut the cup first, and then ran it through again with the face because it doesn't quite fit inside the coffee cup die.)  I did place a piece of paper in between my die cut and my cutting mat to avoid getting lines on it from my mat.


I used a few other Halloween themed products from the shop along with some cute papers to decorate my card and I love that coffee steam from Cozy Cup and extra love it cut from black glitter paper!


I hope you are celebrating today if you love coffee!  You can be sure I'm enjoying a cup, or two or three!  Be sure to hop and leave some love at each stop for your chances to win prizes!


National Coffee Day 2020 - Rubbernecker Stamps!


It's National Coffee Day!  Rubbernecker Stamps is a sponsor for the special hop hosted by the Coffee Loving Cardmakers!  There's bunches of new coffee stamps in the shop!  I've used the adorable new Coffee Cats stamps and dies:

I had fun using the Slimine Skyline die along with the Slimline Squares die and created some distress ink clouds for the background.

Be sure to head on over to the Rubbernecker Stamps Blog for your chance to win!

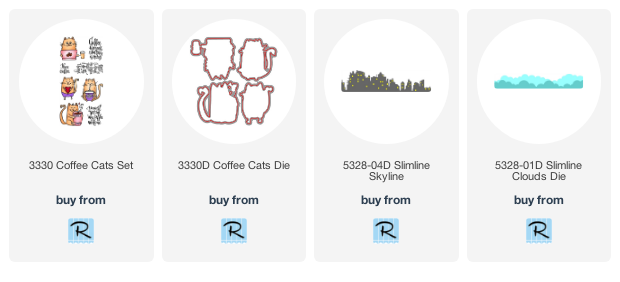
Below are the links to the Rubbernecker Stamps products I used today and should you choose to purchase using these links I will receive a small compensation at no additional expense to you.  And Thank You!
National Coffee Day 2020-Miss Ink Stamps!


I've got some more National Coffee Day fun for you today!  Miss Ink Stamps is a sponsor for the NCD hop and is giving away a $20 gift code to the shop!


I'm sharing some new release goodness... the adorable Pumpkin Spice Latte stamp is one of my faves:


Hop and comment for your chance to win!    Head on over to the Miss Ink Stamp blog for the details!

And Happy National Coffee Day!


Monday, September 28, 2020

CAS-ual Fridays Stamp Release-Slimline Pinked Fri-dies!


Today is Day 1 of the new CAS-ual Fridays release!  And today we're sharing a fun new die set with you... meet the Slimline Pinked Fri-Dies!


I cut the largest pinked die from plaid paper and the next smallest die from white cardsstock.  I blended on some Spiced Marmalade and Squeezed Lemonade Distress Oxide Inks and then used the Modern Petals Stencil and applied some more Spiced Marmalade through it.  Then I centered a smooth circle inside one of the pinked circles to create a frame, taping it in place on my paper and then cutting two more just like it.  Popped them up onto the front of the ink distressed panel and added my stamped, cut and colored images from Mon Ami.


Finally, I cut the hello from Sweet Friend Fri-dies three times and stacked them.  I added the sentiment to the card and carefully covered it with Glossy Accents.  Just a few sequins scattered around and I was done!

Thanks so much for stopping!  Be sure to check out what my teamies created for you today!  And head over to the CAS-ual Fridays blog for more fun!

Should you see something you absolutely need, I have this for you:


Thanks for stopping!  Come again soon and don't forget to come back tomorrow for more New Release!


Autumn Blessings - A Jillian Vance Design


Happy Monday!  I'm up on the blog over at A Jillian Vance Design with this one!  If you'd like more details and links, hope you'll join me over there.

Thanks for stopping and come again soon!


Saturday, September 26, 2020

I Like Big Mugs - Miss Ink Stamps Release Day!


Welcome back!  It's Release Day over at Miss Ink Stamps and all of the new sets are available in the shop today!  I've used another coffee gnome set, Big Mugs!


I used a couple stencils for this background; Leafy Green and the new Floral Wave... I was going for the feeling of lots of autumn leaves flying and the sun rays kind of peaking through and I used a little bit of Distress Embossing Glaze too!  I do miss the so colorful foliage of a New York autumn....


And those mushrooms from the new Pumpkin Spice Gnomes are SO fun and perfect with or without a gnome!  This guy just makes me giggle... how his beard is dipped in his mug... personally I'd have to shave it off...lol!

Don't forget you still have time to comment over on Instagram on each day's Release Graphic post for your chance to win one of the new sets!  And check our the new Miss Ink Stamps YouTube Channel for even more inspiration!

Thanks so much for stopping and I hope you enjoyed it!  Come again soon!


Friday, September 25, 2020

CAS-ual Fridays Stamps and Catherine Pooler Designs Collaboration Hop!


Hello!  I've got some fun for you today!  CAS-ual Fridays Stamps is joining Catherine Pooler Designs for a Blog Hop!  We've all used some beautiful CP Inks along with some fantastic stamps and dies from the CFS shop!  And both are giving away a $30 gift code!  Hop and leave some love at each stop for your chance to win!

You should have arrived here from Jen Carter's Blog!  Here's how I was inspired: 


I decided to pull out the Full on Floral background stamp for today because it's so pretty and I thought it would be perfect in these beautiful colors from the Party Collection Carnivale Mini Ink Pads.  I used the Misti and applied the Limoncello ink first and inked up the bottom right corner of the stamp and stamped onto a panel of white cardstock.  When I do this I like to apply the ink with a sponge to avoid lines and get a better blend.  It will take me a couple applications which is why I use the Misti.  I cleaned off my stamp in between colors and followed with Coral Cabana and Be Mine.


Then I left the stamp on the Misti and covered it with some Wow Embossing Ink and stamped over the inked background.  I added some Wow Changers Sparkle and heated it up.  It added a really pretty sparkle to all of the beautiful color.


I stamped, cut and colored that sweet bunny from the Somebunny stamp set and then diecut the Sweet from the Sweet Friend die set three times from white cardstock.  I added more of the same colors of ink again using a sponge to one of the word diecuts and then heat embossed it with the Sheen from the Changers kit and then again using some clear powder.  I stacked my three word diecuts together and then popped the bunny and "sweet" onto my base.  I stamped a sentiment from the Be A Unicorn set and cut out the top and bottom parts to arrange around the Sweet to build my sentiment.


I added a few sequins and this one was done!

I've been using these inks lately ... I just love the beautiful and rich colors and the pads are nice and juicy!  Here's a couple more projects I made recently using CAS-Fridays products along with these inks:


If you come here often, you know how I love my coffee cards!  That background was made using the By The Beans stencil and CP inks topped with a little translucent texture paste and some "texture" Wow Changers.  If you'd like more details you can visit this post here!


And oh look!  More Coffee....lol... and you can find this one here if you'd like more details.

That's me for today!  Now head on over to see what Karen Baker has created for you today!  Remember!  Be sure to hop and visit each post and leave some love for your chance to win one of two $30 gift codes to one of the shops!  You'll find all of the details when you stop at the CAS-ual Fridays and Catherine Pooler blogs... links to those are at the top of this post!

 Thank you so much for stopping by today!  I hope you enjoyed your visit and you'll come back real soon!

Crafty Elves' Countdown to the Holidays - September 2020 Edition!


Hello!!  This is one of two posts for today!  If you like to win stuff, then after you are done with the Crafty Elves, see my second post for today for a chance to win some stuff!

Welcome back to the Crafty Elves!  Every 25th of the month my fellow elves and I share the Christmas cards we made during the month!  It's a very very hectic time for me right now.  The 15th was a tax deadline and October 15th is another so I went the quick and easy route! 

 Here's how I was inspired:


A Jillian Vance Design has a new release this week and part of that is this awesome Bold Snowflake Die!  I love the size of it!  It's big enough to be the star of your card and that's just what I made it for these!  I used some pretty Gina K Designs papers and used a rectangle die and taped the snowflake centered inside of it and cut them both at the same time.  I did those twice from two different papers.  That left me with two panels for shakers and two snowflakes!


I cut two sizes of rectangles for these ones and used a snowflake embossing folder on the smaller panel.  then I cut the snowflake twice more from white cardstock and stacked my three snowflakes together for support.   I added all of my layers and popped the snowflake up over it.  Then I stamped my sentiment from the Let It Snow onto a Sentiment Strip and then added that and instead of trimming the strip I wrapped it around to the back of the card.


I used the same basic design for all of the cards... and the white layer behind the shaker is also embossed with snowflakes!  I stamped my sentiments using Color Fuse Inks from Rubbernecker Stamps.


And that is me for today!

Whew!  9 months and we're still going strong!  Before you know it it will be time to address the envelopes and mail them out again!

Now be sure to check out my fellow elves' projects... I'm pretty sure you're gonna saw "Wow" more than once!


Now leave me some love here and you could win some happy mail from me!  Last month's winner is:


Denise, send me your snail mail at bzscrapper66 at gmail dot com!

Thanks so much for stopping and don't forget to check out my second post for today for more chances to win stuff!  (Goes live at 6 am Pacific time)


Thursday, September 24, 2020

Chillin' With My Gnomies - Rubbernecker Stamps

Welcome back!  I'm excited to be sharing some new stamp sets available in the shop!  I've used the new Garden Gnomes, Woodland Animals #2, and Woodland Animals #3 and I decided this gang of images would be perfect for a box card!  If you love box card, but hesitate to make them because it seems hard, then I've got a secret for you!  (They're not!)  Especially if you use one of the pre-cut and pre-scored kits from The Paper Cut.  And I've got a few tips for you too!

The kits come with all the pieces you need for the base of the box card and it's easy to cut the layers you want to use because it comes with a sheet of measurements.  

  • Lay the box base flat on your table and choose the papers you wanted to use on the outside of the box and cut them to size per the instructions included in the kit.
  • Adhere each piece with your favorite adhesive.
  • Note that if you're using a paper that has a continuous pattern such as a plaid and even this woodgrain, you may want to be careful to keep them in order so that the pattern flows smoothly around the bottom.  It doesn't have to be perfect, but some patterns are more random and easier to use with less planning.

  • Next flip the base over and lay it flat and repeat the steps to layer on whatever papers you choose to use.  Note that for the inside of the base, the top pieces will show when the box is open and the bottom pieces won't show because they will be inside the box so you don't need to decorate those.
  • The back of the box will not be scored and should not be folded.  It will serve as your backdrop and remains straight from flat to popped up.
  • Once you have all of your panels decorated, just apply adhesive to the tab and fold it into a box shape.

  • Take three of the tabbed strips included in the kit and you can if you'd like attach some papers to them.  You could just decorate the flat piece with decorative paper, or I usually like to add grass, waves, hills, snowy or otherwise when I'm creating a scene type box card.  I chose grass for this one and it was so easy to use the Slimline Grass dies because I was able to cut them in my die cutting machine once and then just trim pieces to the size I needed.
  • Once the strips are ready, fold the tabs and adhere the strips to the inside of the box at equal spacing, near the top of the box.
  • Use all of your favorite images and dies to decorate your box!

I like to really layer it up and although you can't always see all of the details from the front of the box card, there are surprises to be found when you look closely:


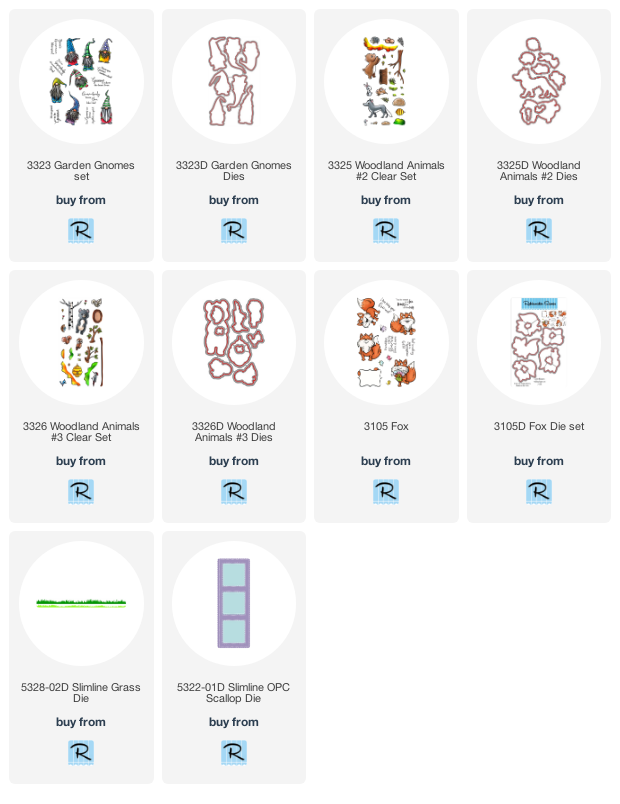
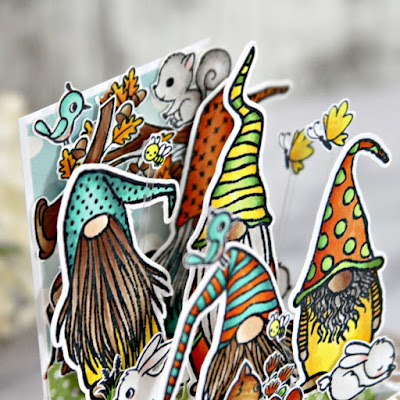
I mixed and matched images from the four stamp sets and used lots of different thicknesses of foam tape, liquid adhesive and double sided tape.  Some were attached right to the grass but it's really fun to make some images "float".  (And by the way.. .aren't these stamp sets just the cutest??)


I save my clear plastic packing for just such an occasion.  I attached the bees, butterflies, birds and even the jumping bunny but cutting strips of the plastic and then attaching the image to the top of the strip with liquid adhesive like Glossy Accents and then position it and attach the bottom part either directly to one of the strips on the base, or to the back of one of the other images.


And here are some of those hidden treasures I talked about... way in the back.. an adorable little owl.... and what's really cool is these box cards fold "flat"... I mean... mine are never totally flat...lol!  But this one does fit in an envelope for a standard A2 card... and sometimes if I need a little extra room, I just make my own envelope or put it in a larger envelope.


You can decorate the outside too if you'd like... and then... as it's opened....


Bam!  Surprise!


I do like to decorate at least the front flap with a sentiment for when the box is open and standing because of course that's how it will be for a while once it's opened by the recipient!

For this one, I used one of the squares from a Slimline die that of course I always save for use in the future.


And there you have it!  Thanks for sticking with me!  This was such a fun project and hope it's inspired you to give one a try!

And you don't have to buy a pre-cut kit... there are lots of instructions out there on the interweb on how to make your own... lots of measuring, cutting and scoring.  But I love how easy these are!