Tuesday, July 31, 2018

Paper Sweeties Plan Your Life Series - August 2018!


Welcome to the August edition of the Paper Sweeties Plan Your Life Series!  AND it also happens to be the start of Paper Sweeties 6th Anniversary Celebration!  Lots of stuff going on all month, so if you're not already a member in the Paper Sweeties group on Facebook, you should definitely join it here!

Here's what I've got going on for the next couple of weeks:


August is a big celebration around here!  It's not only Paper Sweeties 6th Anniversary this month, but I've got LOTS of birthdays on my calendar!  So in celebration of all of it, I gave my planner pages a birthday theme... in Debbie's favorite color combo of course and I used some cute Doodlebug papers from various paper pads and some washi from my stash for fun!


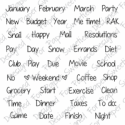
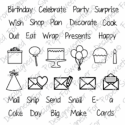
I marked all of the birthday days with the balloons from the Celebrate Planner set.


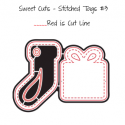
The Stitched Tag #3 dies were perfect to cut out my presents with.  And I used the Get Your Craft on planner set to mark all of my important crafty dates!  (I think I'm purposely ignoring all of my chores this month!)


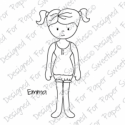
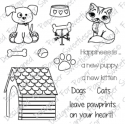
I invited my favorite Sweetie, Emma and she wore her prettiest polka dot dress and brought her best friend from the Sweeties Pets set.  Her party hat was stamped using the Birthday Banners stamps and dies.


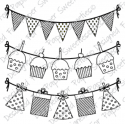
The Cupcake Banner from the Birthday Banners set was the perfect decoration for this birthday page!  And then there's this:


Tee Hee!

So be sure to check out what my teamies are up to:

Debbie Marcinkiewicz – Paper Sweeties
Lilian Forsyth 
Lisa Bzibziak (You Are Here!)

And be sure to stop at the Paper Sweeties Blog and Facebook Group often this month so you don't miss any of the fun!


Friday, July 27, 2018

Coffee Loving Cardmakers - Stamplorations Collaboration Hop


We are so excited because today is the day the Coffee Loving Cardmakers team up with Stamplorations to feature some of the awesome Stamplorations products including this fantastic Zen Coffee 2 Cover Plate! (Be sure to stick around through the end of my post to find out about a special you can take advantage of now!)


How about even more awesome?  Comment on each stop along the way for a chance to win a $25 Stamplorations gift certificate!  You should have come here from Laurel's place!

And here's what I have for you:


For this one, I cut the cover plate once out of purple cardstock.  Then I placed a piece of white glitter paper towards the top of the cup so that it covered the steam parts of the piece.  Then I chose my other papers and just put a piece of paper that covered the part I wanted to fill in.  So I cut a strip of the lavender design paper and placed it only where the cup is and cut my pieces for that and the same for the coffee in the cup.  I used two of my purple cardstock pieces for the plate.  Once all of my pieces were cut out, I took a floral piece of design paper and cut it the same size as the cover plate (pretty much 4 1/4 x 5 1/2) and adhered my frame to that.  Then I proceeded to place my pieces like a puzzle where they belonged.  I left a good part of my frame empty so that the floral showed through.  I love the way it looks!   I do suggest that as you cut your pieces you place each on a separate piece of paper to carry to your workspace so you don't lose any.  But if you do, it's easy enough to take a smaller piece and cut a new one!  I can tell you it's easy because of course I lost one (or more!)...lol!


I cut some fishtail banners from coordinating design paper, added a few flowers and sequins and used that pretty sentiment and bird from the Hello Coffee stamp set.

I'm linking this one up to the Cutplorations Challenge that's going on for the Summer!  Also, to this week's Twisted Thursday over at the Outlawz which is Anything Goes!


Then for my second, I did the same except for this one I used a white background:


I die cut the cover plate layer out of white cardstock and then smushed some Versamark all over it for full coverage...


Then I heat embossed the frame using some Verdigris embossing powder... LOVE the way it came out!  And aren't these sentiments from the Hello Coffee set SO pretty??


And then I did this:


I hardly ever leave so much white!  But with an awesome background like this there is so much interest it doesn't bother me at all!  I kept all of my pieces and decided to fill some of them in to make the coffee and steam stand out a bit more.


For the sentiment I used this awesome sentiment stamp, Bliss from the Say It Big Series... LOVE!!   I stamped it in Versamark and embossed it with some more yummy Verdigris embossing powder and then fussy cut it out.  I placed a strip of vellum across the front of the card and then popped my cut out sentiment on top of it.  A few pretty flowers and sequins from my stash along with a leaf die cut that was sitting on my desk leftover from a prior project finished it off.

I'm linking this one up to the Summer CAS Challenge!


And one more for you... had to use the Hello Coffee set I just recently got from the shop...


I love the Luggage Tag Nesting Dies from Stamplorations!  Love the shape of them and I love to cut all three sizes and layer them together for one tag.  I used some Graphic 45 design papers that I've had for a while.  I colored and cut the floral, cup and bird from the Hello Coffee stamp set and then stamped the sentiment from the same set directly onto the tag.


  A few sequins from my stash and some baker's twine (I did use a regular old hole punch to put a larger hole in the smallest tag so I could fit all of that yummy twine into it)... done!

I'm linking this one up to the Tagplorations Challenge for the Summer!


AND to make it even better!  Here's a special treat for you!  Thanks so much to Shery from Stamplorations!


That's it for me!  And Thanks a Latte for stopping by my place!  From here you're scheduled to hop on over to Robyn's place!  If you get lost along the way you can always head back to the Coffee Loving Papercrafters blog or the Stamplorations blog where you'll find the entire hop list!  And don't forget to leave some love at each stop for your chance to win!  And while you're at it, why not create something using some of Stamplorations awesome products and link it up to one or more of these challenges!

Good luck!


Stamplorations Blog Hop ReDirect


If you're looking for the Stamplorations hop, please click here!

Thank you!


Sunday, July 22, 2018

Stamplorations Sweet 16 Card


A co-worker asked me to create a card for her to give her Granddaughter for her 16th birthday.  I always ask for a couple details about the person so I can make it personal and she said simply... she loves horses!  I realized I didn't own any horse stamps and I was browsing Stamplorations website one evening right before bed and stumbled upon this awesome Live, Love, Ride Stamp Set and it was perfect!

I started this one by ink blending some Distress Oxides in Broken China and Mermaid Lagoon.  After I was done blending I splattered with some water droplets and when that was dry, I dotted some white Nuvo Drops (I've noticed these seem to soak up the color they are placed on) in a random pattern and then some Heidi Swapp Color Shine in white.  Once that was dry, I used some powder to avoid static and stamped the horse outline stamp with Versamark and embossed it with white powder in the bottom left corner.


Then I die cut a stitched oval in Copic friendly paper and scalloped oval in vellum using some dies from my stash.  I stamped the horse with flowers in it's mane onto the Copic friendly paper using some Memento Tuxedo Black ink and colored it in with my Copics.

Once I was done with that I layered my scalloped oval first, then popped up my stitched oval with the horse image and proceeded to embellish with some paper flowers from my stash mimicking the colors of the flowers in the horse's mane.  I had that pretty Cute Cluster Wise Die from Paper Smooches sitting on my desk from another project and cut it in half and placed that beneath the flowers... tucking the cut end underneath the oval.  Then just a few Shimmer Sequins from CDD to finish it off!


Before I added any layers, I used some Kat Scrappiness number dies to cut 16 out of my distressed layer before adding it to a white piece of cardstock.  Then I cut 4 more of each number to stack them, placing the ink distressed layer at the top and then placing them back into the negative space that was die cut.  Once they were stacked and attached I added liquid glass to the top to help it stand out a bit more and once that was dry used a Sweet word die from my stash to complete the sentiment!

That's it for me today!  I'm playing along with the Outlawz Twisted Thursday Anything Goes challenge that has an optional twist of Country & Western this week.  I'm not sure that this meets the Country Western theme, but I'll let them decide (I'm good either way!)  But I know it at least fits the Anything Goes...lol!  I'm also playing along with the Simon Says Stamps Wednesday Challenge to use a Die and/or Punch, and the Stamplorations Summer Theme & Sketch Challenge which is Anything Goes for the summer, and the Stamplorations Never Ending Anything Goes Challenge!  You should check all of these out!

Also!  Speaking of Stamplorations... this is happening on Friday:


Don't miss it!


Saturday, July 21, 2018

The Cutting Cafe Christmas In July - Part 2


Welcome to some Cutting Cafe Inspiration for Christmas in July!  I love the Elisha Jean and Friends stamp set that is available in the Cutting Cafe Shop.  But did you know that you can get printable sets for these sweet little girls in the Cutting Cafe store as well?!  You can check them all out here!  I chose to use the Sweet Angels set...and I decided to use Ruby J for this one... I am imagining she's up on stage at her Christmas Pageant.

I used some paper from the Sugar Plum paper from My Minds Eye... the pretty pink and the gold stars made the perfect backdrop.  I used my dies to cut the banner, star, cloud and snowflakes from white glitter paper.


This is Ruby J.  Isn't she sweet?  I printed, colored and fussy cut her out and popped her up.  I think she's getting ready for her solo.

I'm playing along with the challenges over at Double Trouble and Heart2Heart ... it's Christmas in July over at their places too!


The Sweet Angels set has some really sweet sentiments in it.  However, since this was to be a Christmas card, I printed out the Christmas Mini Words printable set and decided what my sentiment would be.  I cut my words out into little rectangles and then foiled them in my Minc and popped them up on my card.

That's it for me today!  Thanks so much for stopping by!  Be sure to head on over to the Cutting Cafe Blog to see what everyone has created for you today!  Comment there for a chance to win three files of your choice from The Cutting Cafe!

Friday, July 20, 2018

CAS-ual Fridays Challenge #204 Inspiration - Rainbows & Butterflies


It's time for a new challenge over at CAS-ual Fridays!   This time around it's all about Rainbows and Butterflies and I think I've got plenty of both for you:


I started by creating my rainbow background using my Distress Oxides... I just ink blended from one corner to the next going back over to make a nice smooth transition to each color...I love all of the extra colors the inks create as they blend together.  After my ink was all blended I splattered on some water droplets and dabbed them with a paper towel.  I heat set the inks and also used an EK Success Powder Tool to remove the static before I stamped my butterflies from the Be Stamp Set in a diagonal pattern in Versamark and then heat embossed them in white.


I love to use the Bubble Box Fri-Dies for sentiments and background layers.  I cut the black and vellum piece from two of the dies from that set.  This beautiful sentiment is also from the Be Stamp Set!  (It's quite an awesome set and you should definitely check it out here!)  I heat embossed it in white on the black layer and the vellum was simply to give the sentiment some bulk without covering too much of my background up.


I wanted to add one more butterfly... as if one had strayed from the group and decided to take a break... so I stamped another style of butterfly from the Be Stamp set in Memento Sand ink.  I like to use this ink when I'm going to attempt some no line coloring because it's light.  I colored all of the butterfly pieces with Copics, blending along the way in a rainbow pattern and fussy cut it out.  Then to finish the card off, I added some Nuvo drops in white and black in a random pattern and a few sequins!

That's me for today!  Be sure to check out what the rest of the team has created for you today and then get creating!  I can't wait to see yours!

Hope I've inspired you!  What are you playing for? 10 winning entries will be highlighted on the CAS-ual Fridays Blog the Thursday before a new challenge goes live!  We call it the Happy Hour!  In addition a $25 gift certificate goes to the overall winner.  AND if the chosen winner uses CAS-ual Fridays stamps and/or dies as the main focus for the card, the gift certificate increases to $50!

So what are you waiting for!  Nothing to lose and $25 to $50 of awesome stuff to gain!  Hope to see you over there