Monday, June 29, 2020

A Fourth of July Hootie! - A Jillian Vance Design


Welcome back!  I'm up on the blog over at A Jillian Vance Design sharing this cutie patootie Hootie The Owl!  If you'd like links and more details you can hop on over there!

I'm playing along with the Double Trouble Challenge which is Something, Anything and Everything right now!  I've also played along with the twist which is to use Red, White and Blue.  And I'm playing along with one of this month's partners over at Double Trouble... Crafting Happiness Challenges has Anything Goes!  You should check it out!

Thanks so much for stopping and hope you'll come back soon!

Friday, June 26, 2020

Celebrate - Miss Ink Stamps!


Welcome back!!  So if you come here often you know I've been playing with a bleach technique this month and I keep finding new ways to use it!  This one wraps up my month of bleach...lol... but I am in no way done with using it.  You'll see it pop up here and there for sure because I really am enjoying the look!  My friend Mare introduced me to this technique and she learned about it in a Gina K Facebook Live that you can check out here if you'd like!


So this technique isn't just for florals!  I've used the included images from the Pinata Party stamp and dies and the Streamers stamps and dies.  You can use any stamp sets for a different look.  I think I love painting with bleach so much because I love to play with Mixed Media... I love a vintage look (and you can definitely use this technique for a more clean looking card, but that's not what we're doing here today for sure...lol!).  I should say that this time around I did not stamp in Memento ink first before covering it with clear embossing powder.  I simply stamped in Versamark and used clear embossing powder for my images.  I love that the lines aren't as defined... perfect for this look I love so much!


And this word die from the Streamers stamp and die set!  I LOVE it... even with the included background die attached it takes up very little real estate on a card... perfect when you spent all that time making your card pretty and you don't want to cover any of it up!

This time I made my colors a little brighter using my Prismacolor pencils... because it's a party!  I colored the red, purple and blue pencil dark and then went over it with Putty Beige which is perfect for muting and blending the brighter colors just enough to keep the vintage feel.


I used an old Lil Inkers die as a topper to give me a nice blank space to add my extra images that I stamped and die cut.  I popped everything up with various thickness of foam tape and finished it off with some of my favorite sequins from Trinity Stamps!


And that's me for today!  I hope you enjoyed it and I sure hope you have fun playing with this technique!  Do be careful with the bleach.  You don't want to be inhaling lots of fumes while you are coloring.  I put a very small amount in a dish and move it away from me as soon as I'm finished... usually I'll leave it on the bathroom sink and then rinse it out when I'm positive I don't need to touch anything up.

Hoping your are all safe and happy!  Things here with COVID in Arizona are ramping up so I am spending lots of time still at home... which I don't mind at all!  I don't seem to have any extra time though somehow so I guess I may have been a bit of a homebody anyway...lol!

Have a wonderful weekend!  Come again soon!

Thursday, June 25, 2020

I Need to Quit! - Rubbernecker Stamps


Welcome back!  I'm sharing with you a fun shaker to send to anyone just because!  With a red, white and blue color scheme it's perfect for summertime giving!


I started by die cutting the shaker cover using the Nested Scallop with Half Holes largest rectangle and the Star Bursts/Fireworks dies together by taping the fireworks in place where I wanted them and running them through my Gemini.  Then I flipped it over and added a piece of acetate over the cutout fireworks and then foam tape around the entire panel.  I used the foam tape to block off the area where the sequins would go so they wouldn't just fall to the bottom of the shaker and then some additional foam tape for support on the rest of the shaker.


I eyeballed where the sequins would go and placed them onto my blue base and popped the top over them!


I cut the margarita glass and contents from Copic friendly paper and colored the pieces before gluing them together.


I colored my margarita slush in a red, white and blue and then added some sparkles using red and blue gel pen and just dotted it on and then some Wink of Stella for the white center.  I colored the straw in stripes and added gel to that also.  I popped the glass up onto my base.


Finally, I stamped my sentiment onto some white cardstock using Serene Color Burst Ink and then centered it with a banner die and cut it out and added it to the card.


Finally a few more sequins as if they escaped from my shaker and I was done!  I'd drink that drink!  

Thanks so much for stopping by today and hope you come again soon!


Below are links to all of the Rubbernecker products I've used today.  Should you choose to purchase using these links I will receive a small compensation.  And thank you!

Crafty Elves' Countdown to the Holidays - June 2020 Edition


Welcome to a new Crafty Elves' Countdown to Christmas!  It's the 25th of the month and time for me, Debra, Michael and Jessica to share the Christmas cards we've made this month!  This one is gonna be short and sweet!  Here's how I was inspired:


I've used lots of new dies and stamp sets from A Jillian Vance Design this month!  I've provided links below to all of the products.


I used two die sets and two stamp sets for my cards along with a few other things!


The sweet papers I used are from Your Next Stamp.  Those snowflakes come with the AJVD Cool Friend Coordinating die!


And of course I added some of my favorite sequins from Trinity!

That's me for today!  Don't forget to visit my fellow Crafty Elves to see what they have for you today!

And now for the winner of some happy mail from last month's post:


Alyson!  Send me your snail mail address and I your Happy Mail will be on the way!

And we're doing it again this month... so leave me some love and check back next month to see if you won!

Here are links to all of the AJVD products I've used today... all other items have links if you click on their names above.

Wednesday, June 24, 2020

Happily Ever After! - Waffle Flower Stamps


Happy Wednesday!  We're halfway there!  I'm sharing a card with you today that a friend asked me to put together for her.  She had sent me a pic of the images from this adorable Waffle Flower Wedding Day stamp set and of course I had to buy it!  It was so sweet!


I mean... so cuuute right??  And the sentiment from the CAS-ual Fridays Ever After stamp set was perfect!  I heat embossed it in gold and fussy cut it out.  I created my scene using some dies and the images from the Waffle Flower set inside a rectangle frame.


And that Lacy Panel Die???  Love it.  And now I must mention that I wanted to make this one a little bigger so I went with a 5x7 size.  And how happy was I that when I was on vacation a while ago I visited Buffalo Stamps & Stuff and purchased the A7 Lacy Layers set as a souvenir...lol... worth it!!


And the best part is... she said it was perfect!  I mailed it off Monday and she'll have it for the wedding!

Thanks so much for stopping and hope you'll stop by tomorrow... there is a lot going on here!

Monday, June 22, 2020

Hoot Hoot Hooray - A Jillian Vance Design


I'm up on the blog over at A Jillian Vance Design and have another card using the new Hootie The Owl Die Set!  You can hop on over there if you'd like more details and links!  Thanks so much for stopping by hope you'll come back again soon!

Saturday, June 20, 2020

Seriously, You're The Best - CAS-ual Fridays Stamps!


Welcome back!  Today I'm sharing a fun background and way to create some dimension with your stencils!


I started by ink blending some Milled Lavender and Dusty Concord Distress Oxides in an ombre like pattern... dark at the bottom and lighter at the top through the Modern Petals Stencil.


After the ink was applied, I lifted the stencil and shifted it over just a bit...


And applied some Inca Gold over the purple.

As you can see, my Inca Gold has grown hard and cracked.. but I don't mind.  I just add a little water before I use it and I keep that little sponge right in the jar so it's always there.


I love the shadowy look it gives to the background!


I stamped, colored and die cut the floral from Mon Ami and framed it with two circles.. one from vellum and one from gold cardstock.  Then I added one of the sentiments from the set to a strip and attached it to my card.

Should you see something you need to have, I have this for you:


That's me for today!  Thanks so much for stopping and I hope you enjoyed it!  Come back again soon for more CAS-ual Fridays inspiration!


Friday, June 19, 2020

Thinking of You - Miss Ink Stamps!


I'm back again and sharing a card that coordinates with the card I shared yesterday!  (You can find my post on the Miss Ink Stamps blog here)  If you prefer videos, here is a link to a Gina K Facebook Live where my friend Mare saw the technique!

This one kind of happened by mistake.  I was creating my card for yesterday and I messed up the top corner because my mind wandered...lol... so the bottom was perfectly good still and I set it aside and started over knowing I'd use it. 


So, I just stamped another couple flowers, embossed and painted them all with bleach and then colored with my Prismacolor pencils (details are in the post from yesterday) and then cut them out to use them on this card!  I used coordinating papers in the Coredination paper pack I had and then popped the images up onto the card.  That sentiment is from the Magnolia Sympathy set.


I just love the vintage look these cards have!  I hope you're not getting bored with bleach because I'll have (at least) one more for you next Friday.. I have an idea brewing in my head and I'm really hoping it works out because I'm excited about it!

Hope you'll come back soon!  Thanks for stopping!!


Thursday, June 18, 2020

Hey Beautiful - Miss Ink Stamps!


I'm up on the blog over at Miss Ink Stamps with some more Bleachy goodness and I've tried a few new things!  I have a photo tutorial and share how I put this one together.  If you'd like details and links, please do hop on over there to check it out!

Thanks so much for stopping and hope you'll come again soon!

Wednesday, June 17, 2020

Caffeine Fueled Paper Play - Stamplorations Joy In A Cup


I'm up on the Coffee Loving Cardmakers Blog and playing along with some challenges over at Stamplorations!  Head on over there for more details and links if you'd like them!  Thanks so much for stopping and hope you'll come again!


Monday, June 15, 2020

#BESTDAD - A Jillian Vance Design


I'm up on the blog over at A Jillian Vance Design with this cutie patootie Hootie!  Hop on over there for more pics and details if you'd like them!

Thanks so much for stopping!  Come again soon!

Saturday, June 13, 2020

A Multi Medium Birthday Card - CASual Fridays Stamps


Welcome back!  If you like to play with different mediums this is the card for you! I I came across the Bubble Box layer with green and gold Alcohol Inks on it in my stash.  I had made it for a different project, but it wasn't right for that one.  Turns out it was perfect for this one and it set the tone for the rest of the card!


I used the Jacks stencil to blended some greens through it onto a white cardstock layer and then because my alcohol ink layer had gold in it I decided to add some Inka Gold randomly before removing the stencil.  Mine was dried up so when I use it I just add a little water to it and apply it with a sponge.  After that dried, I layered that onto my white base, then a vellum Bubble Box and then popped up the Alcohol Ink layer.


Finally I stamped the Happy Birthday in the same greens I used on the background and then without moving the stamped image in my Misti, I dabbed on some Ranger embossing ink that comes in a bottle with a dauber tip to the stamp set, stamped it over the ink stamped image and then used clear embossing powder over the top.  I got a kind of textured embossed look which I decided I liked because it kind of makes the  sentiment sparkle!  And then I cut it out and popped it up over the top.  I just added a few sequins and I was done!

That's me for today!  I hope you enjoyed your visit and you'll come back again soon for some more CAS-ual Fridays Stamps inspiration!


Friday, June 12, 2020

Sending Hugs - Miss Ink Stamps


Welcome back!  I've been playing with bleach again and learning some things!

I had a hard time finding paper to use for one!  Most of my paper is from Close To My Heart from many years of being a consultant and guess what!  It's no good for the bleach technique...lol!  I believe there is a coating on it that doesn't allow the bleach to do it's thing believe it or not!  It barely made a whisper of a mark.  After searching high and low I finally found a pad of Core'dinations Color Core Cardstock and tested a corner and was happy with the result so I cut a panel of it to use.


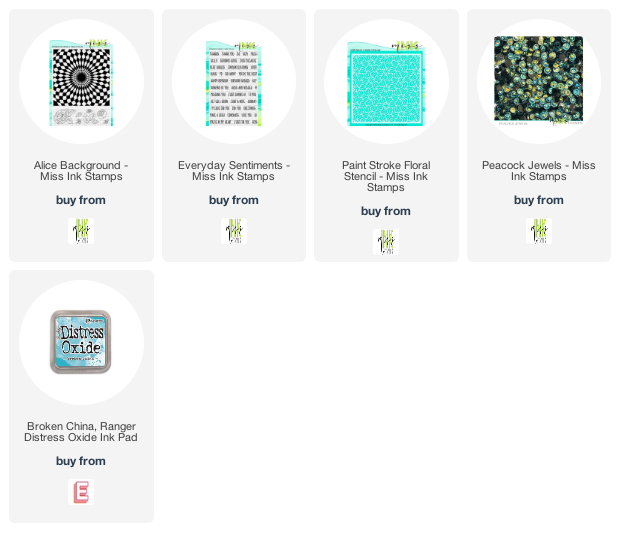
I used my Misti and stamped flowers and leaves from the Alice Background stamp set.  I did some masking so I had to work methodically.  I stamped in Black Memento Ink in the Misti and then without moving the paper again in Versamark and then embossed the lines with clear embossing powder.  Then I masked and did it all over again with the next flower or leaf.  It surprisingly didn't take very long... and you know how I feel about masking (hate it!), however, it wasn't too bad and I'm happy with how it came out. 


Once I was done stamping, I took a paintbrush and a small bowl of bleach and painted inside the embossed lines.  You don't have to be careful and can go right over the lines because they're embossed in clear... you don't have to worry about them getting bleached out!  After I was done coloring, I splattered some bleach over the entire piece.   I loved the look of the added colored pencil last week so I decided I was going to do that again.  There may come a day when I just leave it plain... but today is not that day!  I stenciled some Broken China Distress Oxide onto the upper right corner of the panel... just cause I wanted to!


Next I added a couple flowers and leaves in the upper right so I could have a cluster around the sentiment.  I wasn't happy with the way I layered them, so I stamped one of the flowers onto a scrap piece of the same paper in the same fashion, bleach painted it, colored it, cut it out and popped it up over my goof and I LOVE it... so I'll be doing that again.  Then I stamped my sentiment from Everyday Sentiments onto a little die cut piece in Versamark and embossed it in white.  This sentiment is all one line, but I stamped the words separately over each other so they'd fit on my die cut piece.  Finally I popped it up over my cluster of flowers and leaves.


I added some Peacock Jewels around because the colors were perfect and I was done!

That's me for today!  I hope you're enjoying my play with the bleach!  If you've never tried it before I highly recommend!  I love the vintage feel that I've been getting!

Thanks for coming and hope you'll come back soon!