Friday, May 29, 2020

Coffee Lover's Blog Hop - Day 8 Erin Lee Creative!


Hello!  Welcome to the Coffee Lovers Blog Hop!  Sniff Sniff... It's Day 8.  You have until this evening to link up and play along!    This is my last post for the hop and right now I'm sharing with you some Erin Lee Creative!   Erin Lee Creative is one of the many sponsors offering up awesome prizes for linking up to the hop!  

To play along, you just need to create something with a coffee, tea, or cocoa theme and link it up for your chance(s) to win!  (Yup! You can link up multiple new creations for multiple chances!).  For all of the rules and to check out who the sponsors are, link up or just start hopping, check out the main hop post here up on the Coffee Loving Cardmakers Blog!  And for even more fun, if you're not already a member, join us over in the Coffee Loving Papercrafters Group on Facebook here where we share caffeinated inspiration all year long!  (Be sure to answer all of the questions to get added right away!  You have until the end of the day today to link up!

Here's how I was inspired:


As soon as I saw this Coffee Girl stamp set I knew I had to have it!  And I imagined those swirls in rainbow colors immediately!


I had created this cloudy rainbow background a while ago using a die cut from the Bubble Box dies over at CAS-ual Fridays Stamps... it wasn't right for the project I was working on then but I'm so glad I saved it because it was perfect for this one!  Too much rainbow???  Never!!


And once again that stitched cloud from Lawn Fawn was perfect for her to float on while she sips her brew!

That's it.  I can't believe how fast it went.  I'm still visiting as many blogs as I can and I'm loving everything I see.  I hope you enjoyed the hop as well and you still have a few hours to play along!  Thanks so much for all of your visits and you should be hearing from me soon too!

Come back again soon!

Coffee Lovers Blog Hop - Day 8 1/2 - Polka Dot Orchard


Hello!  Welcome to the Coffee Lovers Blog Hop!  It's Day 8.  You have until this evening to link up and play along!    This is my second post for today and right now I'm sharing with you some Polka Dot Orchard!   Pollka Dot Orchard is one of the many sponsors offering up awesome prizes for linking up to the hop!  

To play along, you just need to create something with a coffee, tea, or cocoa theme and link it up for your chance(s) to win!  (Yup! You can link up multiple new creations for multiple chances!).  For all of the rules and to check out who the sponsors are, link up or just start hopping, check out the main hop post here up on the Coffee Loving Cardmakers Blog!  And for even more fun, if you're not already a member, join us over in the Coffee Loving Papercrafters Group on Facebook here where we share caffeinated inspiration all year long!  (Be sure to answer all of the questions to get added right away!  You have until the end of the day today to link up!

Here's how I was inspired:


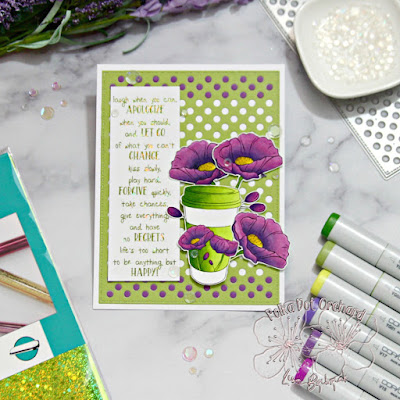
I've used two different Polka Dot Orchard digital sets for today... the Lifetime of Happiness set for the sentiment and Flowers in Bloom for the Cup and Florals!

I started with the fun polka dot background from AJVD!  I cut it in green and filled some of the holes with purple dots to create two borders.


One of my favorite things about digital stamps is you can play with the size and flip them if you want once you pull them into whatever program you use to edit!  I pulled these into Word and changed a little of all of those things!  I printed, colored and fussy cut them out!


My second favorite thing about digital stamps is because I print them with a laser, I'm able to foil them!  I used some Gina K sparkly green foil on the sentiment!  I arranged everything onto my card base and added a few of my favorite Trinity sequins!

And that's me for this one!  I'm gonna have one more for you today for the Coffee Hop so hope you'll come back and visit again!

Coffee Lovers Blog Hop Day 8 - Miss Ink Stamps!


Hello!  Welcome to the Coffee Lovers Blog Hop!  It's Day 8.  Yup... the last day!  I'm gonna have a couple posts today and right now I'm sharing with you some Miss Ink Stamps!   Miss Ink Stamps is one of the many sponsors offering up awesome prizes for linking up to the hop!  

To play along, you just need to create something with a coffee, tea, or cocoa theme and link it up for your chance(s) to win!  (Yup! You can link up multiple new creations for multiple chances!).  For all of the rules and to check out who the sponsors are, link up or just start hopping, check out the main hop post here up on the Coffee Loving Cardmakers Blog!  And for even more fun, if you're not already a member, join us over in the Coffee Loving Papercrafters Group on Facebook here where we share caffeinated inspiration all year long!  (Be sure to answer all of the questions to get added right away!  You have until the end of the day today to link up!

Here's how I was inspired:


If you've been here before you know that one of my all time favorite caffeinated sets is the Brewtiful set from Miss Ink!  From the beautiful Coffee Plant images to the cups, beans, and so many fantastic sentiments!  


I love to color these florals!  I use some of my favorite Copic colors... for the leaves I usually use YG01, YG03 and YG17... a little YG01 and YG03 in the centers of the flowers and the ever challenging but beautiful reds!... R24, R27, R29, and a tiny bit of R59 I believe are the ones I used here.   And don't you just love that there's an XO in the set... of course the "O" is a cup!


I started with the background... I used some Squeezed Lemonade and Twisted Citron Distress Oxides and the Backgammon 2 stencil.  Then I applied some Glitter Gel over the top of it which is super pretty especially in person... although that beautiful green kind of gets lost in these pics... it's a nice gradual shift from the bright green at the bottom to yellow at the top.


I popped the frame up onto the background once and then added my images using various thicknesses of popup tape.  My most used product in my craft room is popup tape.  I have all kinds but a few faves which I'll share with you in a future post!


And finally a sentiment perfect for checking in with a friend and a few of my favorite Trinity sequins!

Thank you so much for stopping by today!  I hope you enjoyed yourself and that you'll come back again... I am hoping to have two more coffee cards for you today and don't forget to link up before the end of today for your chance to win!

Come again soon!

Thursday, May 28, 2020

Coffee Lovers Blog Hop - Day 7 1/2 Funky Fossil


Hello!  Welcome to the Coffee Lovers Blog Hop!  It's Day 7 I have a couple posts today and here I'm sharing with you some Funky Fossil Designs Inspiration!  Funky Fossil Designs is one of the many sponsors offering up awesome prizes for linking up to the hop!  

To play along, you just need to create something with a coffee, tea, or cocoa theme and link it up for your chance(s) to win!  (Yup! You can link up multiple new creations for multiple chances!).  For all of the rules and to check out who the sponsors are, link up or just start hopping, check out the main hop post here up on the Coffee Loving Cardmakers Blog!  And for even more fun, if you're not already a member, join us over in the Coffee Loving Papercrafters Group on Facebook here where we share caffeinated inspiration all year long!  (Be sure to answer all of the questions to get added right away!

Here's how I was inspired:


I am in love with the pups on the Pugs and Hugs stamp set!!  And I love love that one of them is a pup in a cup!


With all of the wonderful details these little guys are so easy to color up!


And for my background I blended some Distress Oxides on and then used the Words of Friendship stencil I got for free in April to apply some beautiful Iridescent Gina K Glitz Glitter Gel!  (I got mine in the Butterfly Reflections Ink shop!)  I think it made the perfect soft backdrop for a card to send to just about anyone!  Look at that wonderful sparkle!!


I just added a few sequins and I was done!

Thanks so much for stopping by again today!  Come back again tomorrow because I'll have some more coffee goodness for you before the end of the hop (you have until tomorrow night, Friday, May 29th, to link up!)


Coffee Lovers Blog Hop - Day 7 With Rubbernecker Stamps


Hello all!   Lisa here and today I'm sharing a card for the Coffee Lovers Blog Hop!  Did you know that Rubbernecker Stamps is a Super Sponsor for the hop?  You can find the Rubbernecker Hop Post here and check out all of the DT makes for Day 1 of the hop!  You have until end of day tomorrow to link up a newly created Coffee, Tea or Cocoa themed project for a chance to win one of many prizes!

There is lots of caffeinated goodness in the Rubbernecker shop and I used a couple of my faves today!  Here's how I was inspired:


I just love the owls available over in the shop!  And Campbell here is having his Monday morning coffee... he looks like he needs it right?


And of course I used this Graduated Horizontal Stripe background!  I've been playing with it all month and if you'd like you can see how I used it on this post here and this one here!  For today I used Lemon, Citrus and Apricot Color Fuse Inks to create a sunrise feel.


Isn't he a cutie!?  I added a few die cuts and a sun for the feel of a scene without creating a full scene.


This is one of my very favorite sentiments in the shop!  I love the font and it's a great wish for any of your coffee loving besties!


I had a lot of fun creating this one and here's how I did it:

  1. I started with a 6x6 piece of white cardstock and placed it in my Misti butted right up to the corner.   Since this a cling mounted rubber stamp, I took the extra pad out of the Misti before putting the paper it into place.  Also,  using a larger piece of cardstock and stamping before you die cut your panel makes it easy to use the magnets to keep the piece in place while you stamp the background.  Then using the lightest color first I started inking up the stamp.  This time I used a sponge to apply the ink and it took a little bit longer and a few more impressions, but I like how the the ink blended in more smoothly.  Once I had the Lemon ink as solid as I wanted, I used the Citrus ink overlapping the Lemon a bit and then the Apricot and let that overlap the Citrus.
  2. Once the background was complete, I used the largest of the Nested Deckle Rectangle Dies to cut my stripey panel.  I placed the die onto the paper and used some washi tape on the outside edges of the die to keep it in place.  Then I attached that to a white base cut 5 1/2 x 4 1/4".
  3. I used the Misti again to stamp my sentiment onto a white piece of cardstock and then cut it with the largest of the Nested Banner Stitch dies again holding the die into place with some washi.  I place it on the outside edges when I can in case the washi sticks a little too good to the paper so it doesn't tear the fronts of my die cuts.
  4. I attached the banner to the front of the card offset to leave room for Campbell and used some foam tape to give it some dimension.
  5. I stamped, die cut and colored Campbell with my Copics and popped him up next to the sentiment. 
  6. I die cut the sun, grass and flowers from cardstock and design papers in the colors I wanted and then placed them around Campbell to create my mini scene... popping up some parts and using glue for others.  I love that the sun die cuts the inside circle out separately so I can pop the center up higher than the outside rays!
  7. I just added a few sequins to finish it up.
Hope you'll join us over at the Coffee Lovers Blog Hop!  I can't wait to see what you create!


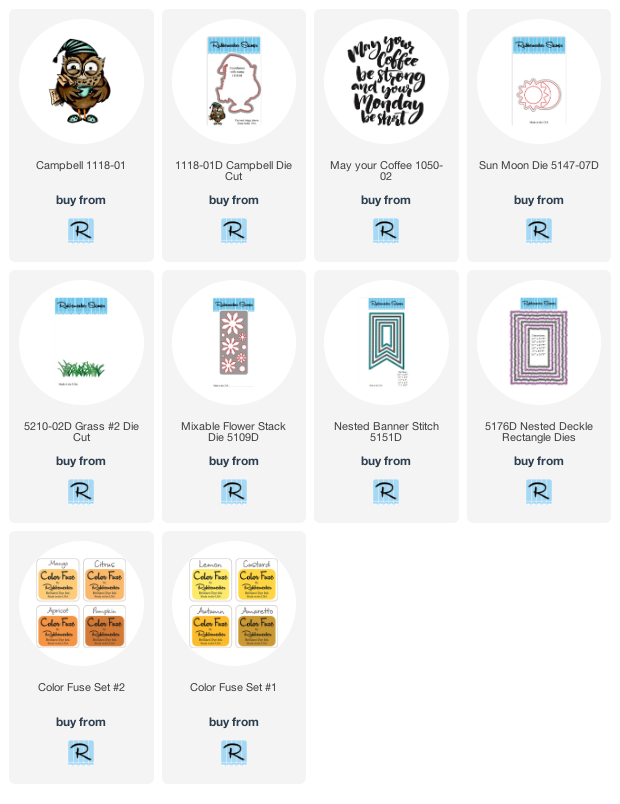
Below are links to all of the Rubbernecker Stamps products I've used today.  If you choose to purchase using them, I will receive a small compensation at no additional cost to you... and thank you!

Wednesday, May 27, 2020

Coffee Lovers Blog Hop - Day 6!


Hello!  Welcome to the Coffee Lovers Blog Hop!  I have a few posts today and here I'm sharing with you some Kat Scrappiness Inspiration!  Kat Scrappiness is one of the many sponsors offering up awesome prizes for linking up to the hop!  

To play along, you just need to create something with a coffee, tea, or cocoa theme and link it up for your chance(s) to win!  (Yup! You can link up multiple new creations for multiple chances!).  For all of the rules and to check out who the sponsors are, link up or just start hopping, check out the main hop post here up on the Coffee Loving Cardmakers Blog!  And for even more fun, if you're not already a member, join us over in the Coffee Loving Papercrafters Group on Facebook here where we share caffeinated inspiration all year long!  (Be sure to answer all of the questions to get added right away!

Here's how I was inspired:


I am up on the Coffee Loving Cardmakers Blog today with more pics and all of the details and links if you are would like them!

Thanks so much for stopping by today and please come again tomorrow for more caffeinated inspiration!


Tuesday, May 26, 2020

Love You A Latte - Coffee Lovers Blog Hop Day 5!


Welcome back!  Today I'm sharing a card for the Coffee Lovers Blog Hop and I've used the new Coffee Chips Chipboard along with a few other things! 


I started by applying some Deco Foil Transfer Gel onto my base panel using the By The Beans stencil and a spatula.  When it was dry, I layed the rainbow foil over the top and ran it through my Minc.

 For this one, I added white glitter to the chipboard and thought I'd share with you how I like to glitter chipboard:


When I add glitter to brown chipboard I like to paint or color the chipboard first to make sure the glitter color is nice and solid without any spots that show through.  So for this one, I started by using some white acrylic paint and painted the pieces I wanted to use.


Once that was dry, I used my cleaned paint brush and painted on some glue... sometimes chipboard can bend or warp when you add glue so I like to apply it with a paintbrush so I can get nice even coverage, yet not over apply it.


While the glue was still wet, I poured the glitter over the top of the chipboard.  I find my fine tweezers from the shop really help with this whole process and to move the chipboard around without ruining anything with my fingers.  I do like to turn it over and press it into the glitter as well to be sure I get as much as possible to stick and then I tap it off and set it aside to dry.  Once it's dry, and before I add it to my project, I'll take a fine brush and brush off the excess onto a scrap piece of paper.


I love the sentiments on the Coffee'isms Stamp Set!  And they are perfect to use along with the Coffee Chips because you can easily substitute the chipboard version of the Coffee words instead of the stamp with some easy masking or with this sentiment, the Love You A is separate completely... so... easy peasy!  I just cut the pieces of the To Go Cup and heat embossed the Love You A onto the wrap and then once my Latte word was dry, I added that underneath it.  Then popped the whole thing onto the rainbow background!


Fun, right?

I'm linking this one up to the Coffee Lovers Blog Hop which has over 600 entries as I type.  There are close to 80 sponsors for the hop and CAS-ual Fridays is one of them.  You can check out the CAS-ual Fridays Day 1 post here for more information and lots of ideas for the new Coffee Chips Chip Board and the main Coffee Hop post here to link up!

And the Coffee/Tea section of the shop is on sale now!


And since there is no code needed, you can also use one of the DT codes... mine is below!  Each of the DT has one and be sure to use the code for who inspired you for an additional 15% off!


That's me for today!  I hope you enjoyed your stop and come again soon for more CAS-ual Fridays Inspiration!


Monday, May 25, 2020

Coffee Spoons - A Jillian Vance Design


Hello!  Welcome to the Coffee Lovers Blog Hop!  Today I'm sharing with you some A Jillian Vance Design Inspiration!  A Jillian Vance Design is one of the many sponsors offering up awesome prizes for linking up to the hop!  

You just need to create something with a coffee, tea, or cocoa theme and link it up for your chance(s) to win!  (Yup! You can link up multiple new creations for multiple chances!).  For all of the rules and to check out who the sponsors are, link up or just start hopping, check out the main hop post here up on the Coffee Loving Cardmakers Blog!  And for even more fun, if you're not already a member, join us over in the Coffee Loving Papercrafters Group on Facebook here where we share caffeinated inspiration all year long!  (Be sure to answer all of the questions to get added right away!

Here's how I was inspired:


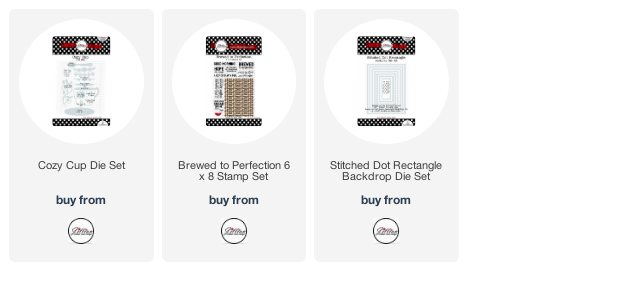
Meet the new Cozy Cup Die Set and the Brewed To Perfection Stamp Set!  That coffee bean background is so cool isn't it??  I stamped mine in Versamark using my Misti and then heat embossed with some Wow Caramel Macchiato embossing powder.  I let it cool for a minute and then put it back in the Misti (my stamp was still waiting patiently in position) and stamped over that again in Versamark (tip... make sure you put it back in in the right direction... don't ask how I know) and then sprinkled on a bit of Stampendous Shabby White embossing Enamel..not completely covering it.. just enough to add a little extra texture and a kind of splatter... and heated it up again.


I cut all of my cup pieces from white except for the spoon.  And see the pretty flower pattern die I used?  I cut a second cup in some gold cardstock to layer behind the white.  You could just cut a strip if you wanted the same look, but it was just so easy to line up the extra cup.  I cut the spoon from some matte gold foiled cardstock.  I used some Antique Linen Distress Oxide on the cup and saucer, colored the coffee insert with some brown Copics and then covered the steam die cut with Wow embossing ink in a dauber applicator and heat embossed the whole thing in that Shabby White powder... I love how it came out! And my tweezers came in quite handy for that one!  Then I assembled all of my pieces and to have enough room for my sentiment, I positioned the cup and saucer over the edge of the card and then cut the overhanging part off.


Finally I stamped, trimmed, and distressed my sentiment with the same ink as I applied to the cup for that aged look.  Don't you just love that sentiment??  A few sequins and I was done!


Well... that was a lot of words and thanks for sticking with me!  I had so much fun with these new sets and already have lots of ideas for them!  I hope you are having fun and playing along with the Coffee Lovers Blog Hop and good luck!  Come back again soon!


Follow A Jillian Vance Design on: