Friday, January 31, 2020

I Love You This Much! - Miss Ink Stamps


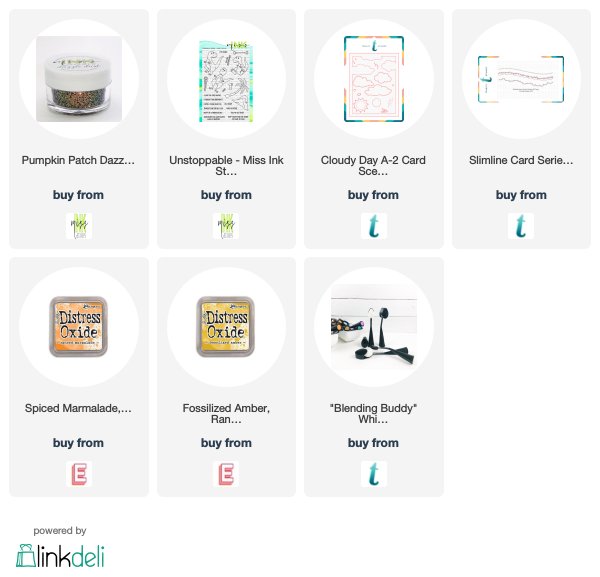
I'm playing with some Miss Ink Dazzle Dust again!  This time I've used the Pumpkin Patch Dazzle Dust along with the Unstoppable Stamp Set!  This adorable Dino has taken some time out during all of this chaos to try to show you exactly how much he loves you... with a little help from his grabber tools!  They sure do come in handy when you're a BIG dino with little tiny arms...


This is the Pumpkin Patch Dazzle Dust in the jar.  The colors shift from a Pumpkin-y orange to green!


It's hard to photograph the changes, but this pic has a pretty good representation of the Pumpkin Patch colors from that wooden butterfly, heart, and the rays.. and I used orange glitter paper below it and you can see how the glitter paper is pretty much the same orange from one end to the other compared to the burnished Dazzle Dust that appears to change as your eyes move across the picture.  Very cool in person as you move the card around!


 Is that a sunset, sunrise, or perhaps a huge meteor has just struck the earth and that's an explosion!  And that poor dinosaur amidst all of this chaos just wants you to know ... he loves you!  How much??  This much!

I love you guys too!  I appreciate every visit and comment and hope you'll come back soon for some more inspiration!


Wednesday, January 29, 2020

As High As The Sky - CASual Fridays Stamps


Welcome back!  Today I'm sharing this sweet card that could be a Valentine or just to let someone know that you love them!  And I'll show you how I used the Bubble Box Fri-Dies to create this cloudy background!


I started by cutting a background layer from white cardstock.  Then I cut the largest Bubble Box die also from white... you could cut it out of any cardstock or even a light cardboard or chipboard depending on how often you intend to use it.  Although even just out of simple card stock this one is in my stash ready to use again!  I laid the bubble Box die over the background panel starting at the bottom at various angles, blended ink lightly over the top and then moved the die cut over and repeat... always tilting at different angles to give the feel of various shaped clouds.


I just kept my ink blending to the top of the diecut careful not to go over the straight edge too much!


This background took just a few minutes and I love it!  I added a little ink to the bottom of the panel as well... 'cause we're WAY high up in the sky...


... 'Cause that's how much I love you!!  Aren't those bunnies from the Somebunny Stamp set SO adorable!!  This one was floating hanging onto a balloon, but I cut the balloon and string off and covered the extra lines with white gel pen.  Then I cut his hand off (sorry bunny) so I could make it look like he had it wrapped around that largest heart from the Heart Board Fri-Dies.  And can we talk about the heartwarming sentiments on the Somebunny Set?!  Love them all, but I thought this one was perfect!


And seriously... those Heart Board Fri-Dies are one of my favorite go to die sets... I cut them once from the design paper I wanted to use and once out of some thin crafters foam for a little bit of dimension.  And the hearts from the Somebunny set were perfect to scatter around along with a few sequins.


And that's me for today!  Thanks so much for visiting and hope you enjoyed it!

Should you decide there is something that you must have, I have this for you:


And you can still get some great deals on retiring sets right here!

Come again soon and often for more inspiration!


Friday, January 24, 2020

Crafty Elves' Countdown to Christmas-January 2020


Happy New Year!  So Debra and I are at it again this year!  We were so happy with ourselves in 2019 for getting all of our Christmas cards made throughout the year that we're creating a card a week again in 2020 AND we have some wonderful crafty friends joining us!  For 2020, the so talented crafty dude, Michael Trent is joining us along with the ever creative and innovative Jessica Pickeral!  That's right!  You get four Crafty Elves for the price of two!  (Which is free!)  Without further ado, here's how I was inspired:


What do you do when it's January and you work in an accounting firm and you're losing your ever loving mind???  You make some quick cards using a beautiful stencil from Newton's Nook along with some big and awesome word dies from Paper Smooches and Lil' Inker Designs!


I made two of these pretty much the same.  I started with the stencil and some Nuvo glitter paste I've had around a while.  I decided pink was the color of the month... 'cause I love it!


I cut the Peace on Earth from Lil' Inker from white glitter paper once and then two more times from white cardstock and stacked them for dimension.  I used an old die from my stash for the background and all I needed to finish it up was a few sequins!


For the background on these two, I used the same stencil to apply some Deco Foil Transfer Gel and when it was dry, I ran it through my Minc with some Opal Deco Foil.  The Opal foil on white idea came directly from Paper Smooches Kim herself... it was so beautiful I just had to use it after seeing it on one of her cards.


The Opal foil is so pretty with an ever so slight tint of pink and blue it was perfect with the colors I used.  The banner die comes from Gina K Designs and I stacked the Big Old Snowflake and Joy from Paper Smooches in the center.  I cut the Joy once from white glitter paper and once from the Lagoon cardstock and switched the insides for two different looks.  A few more sequins and done!

I did make a couple more Christmas/Winter cards this month which if you visit often you may have seen.  First, this so handsome gnome from Paper Smooches:


If you had decided you wanted him, but couldn't get him because he was out of stock, you're in luck!  There's a fresh batch of Forest Whimsy stamp sets over in the Paper Smooches shop so you can get yours right now if you want!

And then I guess I was in a pink mood because there was this one too:


I don't think you can have too many different snowflake dies, do you?  And these from A Jillian Vance Design are beautiful!

So!  we have some unfinished business to attend to!  As you know each month I draw a name from the previous month's commenter's for the Crafty Elves post and we have a winner from December to announce!

Denise!  PM me your snail mail so I can get your Happy Mail out to you!

And yes, I'm doing it again this year!  This month's prize is going to be one of those lovely Peace on Earth dies from Lil' Inker.  You may have heard that she sadly (for us) is going to be closing down the shop and in preparation for that everything that's left is 70% off.  I was able to pick up some prizes for 2020.  You can find her post here about her decision to take her life in a different direction (and maybe leave some love) and the shop here if you'd like to help her clear out her inventory.  I wish Laura all the best in what she does next and sending love and hugs for what I'm sure was not an easy decision.

Whew!  Now be sure to head on over to Debra, Michael and Jessica's places to see what they've created for you today!


Sending Big Hugs - Miss Ink Stamps


I'm back again with some more Miss Ink Dazzle Dust!  Today I'm playing with the Rose Garden variety!


It's a beautiful pink to green shift that made me think of Spring!


I made a paste again by mixing the glitter along with some Glossy Accents and applied it through the Halftone Lines Bold Edges stencil.


Once it was dry, I laid it under my Misti and placed a heavy box on top of it because it was a little curly.  I left it over night and it worked very nicely to flatten it.  I used strong adhesive from Scrapbook Adhesives along all of the edges to be sure it stayed that way!  And the adorable bunny and beautiful florals and sentiment ribbon from Springtime Bunnies and Springtime Banners were perfect to decorate along with a sentiment from the Decaf Background set (I just curved it a little on my block so that it would fit perfectly in the banner).


And there you have it!  I think this would make a beautiful Springtime or Valentines card for anyone!

Thanks for stopping!  Be sure to come back soon and often for more inspiration!

Thursday, January 23, 2020

Coffee Loving Cardmakers and The Cat's Pajamas Collaboration Hop


So excited because today the Coffee Loving Cardmakers and The Cat's Pajamas Design Teams are hopping together to show off this adorable new stamp set, Make Tea... just have a look:
Super adorable, right??

Please join us as we share inspiration featuring this adorable new set that is available today over in the shop at The Cat's Pajamas!  Hop along with the Cat Pack and the Coffee Loving Cardmakers Team and check out the tea-lightful projects we've created for you!  Be sure to comment along the way for your chance to win an awesome prize from The Cat's Pajamas!  A winner from today will be chosen from one of the comments left on today's posts and announced on the TCP blog tomorrow!

Here's how I was inspired:


I have two cards for you today using this set... I have so many more images cut out and ready to go too... I just love these sweet bunnies.. not to mention that adorable little mouse with his adorable big ears!


This one I kept fairly clean and simple using the beautiful Scalloped Duo Die to cut the beautiful frame and little embellishment by my sentiment.  And speaking of, I love the sentiments on this set!  This one might be my favorite...

And then I did this:


I used that beautiful Scalloped Duo die again but as an embellishment behind my bunnies.  Aren't they just the absolute cutest??  And can you tell I'm ready for Spring?...lol!

I'm playing along over at Double Trouble Challenge Blog's Say Cheese challenge... create anything that makes you smile... everything about these bunnies makes me smile!

Below is the entire hop list!  Be sure to stop at each blog and leave some love for your chance to win!

You are invited to the Inlinkz link party!


Be That Kind of Woman - Rubbernecker Stamps


Lisa here and excited to be sharing with you one of the pretty new florals in the shop!  You'll find step by step directions below.


I used some beautiful Deco Foil Opal Sheets for this one and I just love it.  It allows the color behind it to show through and it's got a beautiful shimmer.
   

And this floral!!  So fun in any colors.  I've been in a mood for spring lately so I used some pinks, oranges, and yellows.  The sentiment was speaking to me today... Are you this kind of woman?  I try  to be... some days it's more like... Oh crap... I'm up...lol!  (Enter my good friend Mr. Coffee)


Here's how I created this card:
  • First, I cut a panel of the Smoothie colored cardstock using the Stitched Rectangle Dies.
  • I placed the Honey Combs stencil over the panel and used masking tape around the edges just inside the stitched lines on the panel so that my honeycomb pattern wouldn't go right to the edge.
  • I used a spatula to apply Thermoweb Deco Foil Transfer Gel through the stencil; lifted off the stencil and set it aside in a safe place to dry.
  • Once the panel was dry, I placed the foil over the honeycomb pattern, colored side facing up and ran it through the Minc machine.  Once it came through the other side, I pulled the foil off of the top and Voila!
  • While I was waiting for the gel to dry, I colored in my pre-stamped Flower Bouquet image that I cut using the Scan N Cut.  I started with Copic markers and added some detail with a little bit of colored pencil.
  • I cut white cardstock and that pretty plaid using the Square Combo die.  I chose the two frames I wanted to put together and nestled them upside down on my table.  I added some adhesive with my runner to keep them together so that I could easily add foam tape to the underside and then added the combined frame to my foiled base.
  • I stamped that awesome sentiment onto a one of the nested banner dies that I cut from white cardstock and popped that up inside the frame.
  • Finally, I nestled the beautiful floral around the sentiment.
Thank you so much for stopping by today!  I hope you enjoyed it.  Come back soon and often for more Rubberneck inspiration!

These are links to the Rubbernecker products I've used today.  Should you choose to shop using them I will receive a small compensation at no additional cost to you.  And thank you!

Wednesday, January 22, 2020

Caffeine Fueled Paper Play - Flora & Fauna Part II


I'm up on the Coffee Loving Cardmakers Blog and playing along over at Double Trouble Challenge Blog using an adorable stamp set from Flora and Fauna!  Hope you'll hop on over and check it out... here's a sneak peek!


Monday, January 20, 2020

Happy Bird Day! - A Jillian Vance Design


It's the last day of the 10th Birthday Celebration over at A Jillian Vance Design!  Be sure to hop on over there and comment and enter the Rafflecopter drawing for one more chance to win!

It's been such a fun release with lots of inspiration!  Here's how I was inspired today:


For more details, head on over to the AJVD Blog and check it out!


Follow A Jillian Vance Design on: