Showing posts with label Backgrounds. Show all posts

Friday, March 26, 2021

Coffee Lovers Spring/Summer 2021 Blog Hop-Last Call With Miss Ink!


Welcome to the last day of the Spring/Summer 2021 Coffee Lovers Blog Hop!  You have until the end of today to create and link up for chances to win some fabulous prizes from even fabulous-er Sponsors!

Here's how I was inspired today:


This Jitters stamp set from Miss Ink Stamps is SO fun and awesome!  It's a background stamp, but also includes those fun images and some wonderful sentiments!


I started by stamping the background in Versamark and heat embossing with some Mixed Media Powder from Ranger.  This is easiest using a stamp positioner like the Misti so you can be sure to get great coverage as with all background stamps.  Then I blended some Distress Oxides over it and wiped it off with a paper towel.


It turned out I had that awesome square frame in my stash and the colors were perfect and although it's plaid I thought it was perfect even with the busy background... probably because the colors were SO close... I love the patterns together!

I just added my stamped, cut and colored images with popup tape and the sentiment.

There is a sale going on all caffeinated products in the Miss Ink shop and this one is on sale at a great price!  So worth adding to your stash!  The images are great on their own or as part of a larger scene.

Thank you for stopping today!!  Be sure to play along with the hop.  Have fun and good luck!!  It is tax season and I'm hopping a bit... I won't be able to comment everywhere I stop, but I will be visiting each one of you for sure.  


Monday, May 25, 2020

Coffee Spoons - A Jillian Vance Design


Hello!  Welcome to the Coffee Lovers Blog Hop!  Today I'm sharing with you some A Jillian Vance Design Inspiration!  A Jillian Vance Design is one of the many sponsors offering up awesome prizes for linking up to the hop!  

You just need to create something with a coffee, tea, or cocoa theme and link it up for your chance(s) to win!  (Yup! You can link up multiple new creations for multiple chances!).  For all of the rules and to check out who the sponsors are, link up or just start hopping, check out the main hop post here up on the Coffee Loving Cardmakers Blog!  And for even more fun, if you're not already a member, join us over in the Coffee Loving Papercrafters Group on Facebook here where we share caffeinated inspiration all year long!  (Be sure to answer all of the questions to get added right away!

Here's how I was inspired:


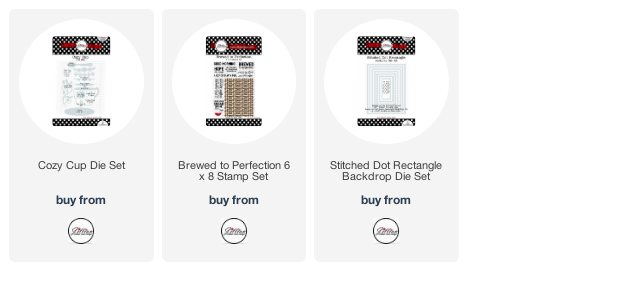
Meet the new Cozy Cup Die Set and the Brewed To Perfection Stamp Set!  That coffee bean background is so cool isn't it??  I stamped mine in Versamark using my Misti and then heat embossed with some Wow Caramel Macchiato embossing powder.  I let it cool for a minute and then put it back in the Misti (my stamp was still waiting patiently in position) and stamped over that again in Versamark (tip... make sure you put it back in in the right direction... don't ask how I know) and then sprinkled on a bit of Stampendous Shabby White embossing Enamel..not completely covering it.. just enough to add a little extra texture and a kind of splatter... and heated it up again.


I cut all of my cup pieces from white except for the spoon.  And see the pretty flower pattern die I used?  I cut a second cup in some gold cardstock to layer behind the white.  You could just cut a strip if you wanted the same look, but it was just so easy to line up the extra cup.  I cut the spoon from some matte gold foiled cardstock.  I used some Antique Linen Distress Oxide on the cup and saucer, colored the coffee insert with some brown Copics and then covered the steam die cut with Wow embossing ink in a dauber applicator and heat embossed the whole thing in that Shabby White powder... I love how it came out! And my tweezers came in quite handy for that one!  Then I assembled all of my pieces and to have enough room for my sentiment, I positioned the cup and saucer over the edge of the card and then cut the overhanging part off.


Finally I stamped, trimmed, and distressed my sentiment with the same ink as I applied to the cup for that aged look.  Don't you just love that sentiment??  A few sequins and I was done!


Well... that was a lot of words and thanks for sticking with me!  I had so much fun with these new sets and already have lots of ideas for them!  I hope you are having fun and playing along with the Coffee Lovers Blog Hop and good luck!  Come back again soon!


Follow A Jillian Vance Design on:


Saturday, September 14, 2019

Miss Ink Release Day! - Jitters and Just Be-Caws!


Woo Hoo!  It's finally Release Day over at Miss Ink Stamps and you can get all of the awesome new stamps and stencils today!   We're all sharing some more inspiration with the new sets over in Instagram and here's what I have for you today:


I used the fantastic Jitters background for my middle layer and what a cool edging it makes for my panel stamped with the ravens from Just Be-Caws!  (I'm only wishing I had cut the middle out before I added it to my card so I could use it on another!!!...lol!  So unlike me to not!)


The ravens and rose make the perfect background without any coloring.  I used my Misti to stamp the birds so I knew I could get them where I wanted them.  And another of those awesome punny sentiments...lol!  Love it.  The roses make a great embellishment and add a pop of color.

And then in the middle of the night I thought of this:


I think this Jitters background is my new favorite!  I had fun and used my Misti with the stamp... first inking up the yellow at the bottom.  Then I cleaned off the stamp and inked up some orange and then again with yellow.  Before removing the stamp, I cleaned it again and added versamark to the whole thing and embossed with some Wow Clear Embossing Powder.


I love the shine the embossing powder gives!  And these images included with the Jitters background!!  So fun!  They're floating on clouds... because this is how it feels when I take that first sip...lol!


And I made my syrup Pumpkin Spice again... 'cause right now... there is no other!  Love the sentiments included in the Jitters set also!

Here's another quick look at both:


Don't feel like coloring but love this Just Be-Cause set?  It's so cool in black and white!

I'm playing along with the Monday Challenge over at Simon Says Stamp which is Stamp It!  I certainly have!


And this one just makes me smile.... and with this one I'm playing along over at Simon Says Stamp's Bling It On Wednesday Challenge!  You should too!

So thanks very much for stopping by!  I'm so excited to be guesting with Miss Ink through October so I'll be bringing you more fun with new sets and prior release sets as well!  I can't wait!

Be sure to head on over to the Miss Ink IG account and see what everyone has cooked up!

Come again soon!


Monday, March 11, 2019

Casual Fridays Stamps-A Pastel Rainbow!


I'm up on the Cas-ual Fridays Blog today and I'm sharing with you an alcohol Ink pastel rainbow background made using Copic marker refills!!  I knew I wanted a little softer look for this background and I turned to my copic refills because I knew I had some really light colors I could use.  For the details on how I created it, you can hop on over there!


I used lots of CAS-ual Fridays goodies on this one... I cut the heart from the Heart Board Fri-Dies from some purple glitter paper; the beautiful Big Hope Fri Die from some purple foiled paper; the Bubble Box Fri Die from white cardstock (embossed this with a folder);  and I used the same yellow from my background to color the little bit of Yupo scrap that was left from cutting my background panel and then used the 4 Petals Fri Dies for my flowers.


I layered it all together and added some purple gems to the centers of my sweet yellow flowers.  And it was fun to alternate thicknesses of foam tape to every other heart cut out to accentuate each individual piece.


I absolutely love this Big Hope die... I cut it a couple more times from plain old cardstock so I could stack them.  I love the dimension it gives to your word die cuts.  And then I completed my sentiment using the small "hang in there" from the Somebunny Stamp Set... a cute little pick me up for a friend that's having a rough time.  I love to mix and match my sentiments from various stamp sets... you never know what will make a great combo!

And there you have it.. a pastel alcohol ink rainbow!  Don't forget that March over at Three Amigos is all about rainbows!!  Hope you'll join us there! And I'm playing along with the Simon Says Stamp Monday Challenge which has a theme of Feminine/Girly!  Check it out!

Thanks so much for stopping and hope you've enjoyed your stay!

And if you find there is something you must have from the shop I've got this for you:


Tuesday, February 26, 2019

Cas-ual Fridays and A Copic Marker Background


I'm up on the Cas-ual Fridays Blog today I'm sharing with you a fun way to create a background using your Copic markers (or any other alcohol markers) and some blending solution (or alcohol).  These are the cards I created using two backgrounds I made this way.


I started with a white panel... I made two of these... one with regular white cardstock and one with 100 Lb paper that I use when I stamp and color with my Copics.  Both worked just as well.  I basically chose the colors I wanted that I thought might be interesting together and laid them out in the pattern I wanted.  My first strokes down the paper were with the wide flat end of the marker (you know ... the one that is usually only there for filling...lol!).  I quickly moved down the paper and swiped across.  Then I started at the top again and went through it all again.  I probably went over it about 4 times, and the last couple I switched to the brush end and made smaller swipes and filled in blank areas... I also made sure to put some unexpected strokes... a little purple in the blue.. a little blue in the green and finally ended up with this:


Next I poured a little bit of Copic Blending Solution into the cap... 80% alcohol works great for this technique, but I couldn't find my large bottle of alcohol so I decided to use the Blending Solution.  I dipped a paint brush (no water please) into the solution and then splattered it onto the panel that I colored.  If you want big blobs then add more alcohol... smaller splatters use less.  This is even less controllable than splattering water over distress oxides so be willing to let the liquid do what it does .. which is push the color away and you end up with something like this:


Pretty right?  I made two because I didn't think I was happy with the first and wanted to try it with the different paper, but once I was done, I decided I loved both panels and made two cards instead of one!


I started with this one... I used the full panel in the way back... it was the center of the panel that I was not happy with so this was the perfect use for this one.  I used the Bubble Box Fri-Dies and cut the larger one in plain white cardstock and the next size I cut from the second panel.


Before I layered everything, I stamped that pretty border design from the Bold Wishes Stamp Set onto the smaller Bubble Box using Versamark and heat embossed them in gold.  Then I stamped the Wish Big sentiment from the same set in a purple ink, fussy cut it and popped it up onto the inked panel.


I used the balloon dies from the Bunny Fri-Dies to cut out three balloons from some Copic friendly paper and then used some of the same markers that I used for the background to color them in.  I love that these colors don't completely blend.. I think it makes for a fun contrast... I attached some twine with popup tape and added the balloons to the card.


Finally I just added a couple sequins in similar colors to the rest of the card and done!  I thought I was done... but then I was looking at the piece that was left from cutting out the small inked Bubble Box layer and decided it would make a cool shaker frame:


So I made one!


First, I laid the window piece over the white layer so I could line up and stamp my sentiment from the Dream Then Do Stamp Set in the center.  Next I adhered a piece of clear cardstock to the inside of the window panel and then added popup tape around the outside edges.  I added some sequins ... enough to create a pretty sequin filled shaker, but not so much that the sentiment would be covered up.  I saved a few for the outside.


I decided this one called for some pretty flowers... so I used the 4 Petals Fri-Dies to cut some flowers and the Garden Fri-Dies to cut some leaves from white Copic friendly paper and then colored them in with the same markers I used for the background.  I layered the flowers together along with some leaves and then added a few sequins to the center.


I added a few more sequins to the outside of the shaker and this one was done!  I'm playing along with the Doodles Paper Playground #ShowMeYourShaker Contest on Instagram!  You can find info regarding the contest on the blog here!  I'm also playing along over at Mod Squad Challenges to use a Brand Name Clear or Rubber Stamp-No Digis... I've used all CAS-ual Fridays stamps here!  

I hope you enjoyed your visit today and hope I've shown you a fun new way to use your Copic markers!  Or if not new, maybe just a reminder that you can use them for more than just coloring images.

Should you decide to shop, I have this for you:


For more Cas-ual Fridays Inspiration, check out these places:


Sunday, October 14, 2018

Paper Sweeties October 2018 Release Party!


It's Release Day over at Paper Sweeties!  The new sets are available today in the shop!  I used a cute sentiment from the new Happy Fall Y'all stamp set as well as the pumpkin along with some cute leaves from the Stand Add On 2 set.

I started by random stamping the pumpkin and leaves onto some watercolor paper in Versamark and heat embossed with white embossing powder.  Then I smooshed some watercolors around.


When I was dry, I splattered some more colors around.  While waiting for that to dry, I cut the scalloped rectangle out of some plaid and some cocoa cardstock and heat embossed my sentiment onto the cocoa rectangle.  I wrapped a thin band of cardstock around the whole card and popped up my sentiment over it.


I just added a few flowers and sequins to finish it off!

Thanks for stopping by!  Come back tomorrow for the release rewind!  And in the meantime, head on over to these places and see what my teamies have in store for you: