Showing posts with label Ink Blending. Show all posts

Monday, June 1, 2020

Crafty Fuel - A Jillian Vance Design


I'm up on the blog over at A Jillian Vance Design and sharing how I created this one!  If you'd like more pics and details, join me over there!

Thanks so much for stopping!  Come again soon!

Thursday, May 28, 2020

Coffee Lovers Blog Hop - Day 7 1/2 Funky Fossil


Hello!  Welcome to the Coffee Lovers Blog Hop!  It's Day 7 I have a couple posts today and here I'm sharing with you some Funky Fossil Designs Inspiration!  Funky Fossil Designs is one of the many sponsors offering up awesome prizes for linking up to the hop!  

To play along, you just need to create something with a coffee, tea, or cocoa theme and link it up for your chance(s) to win!  (Yup! You can link up multiple new creations for multiple chances!).  For all of the rules and to check out who the sponsors are, link up or just start hopping, check out the main hop post here up on the Coffee Loving Cardmakers Blog!  And for even more fun, if you're not already a member, join us over in the Coffee Loving Papercrafters Group on Facebook here where we share caffeinated inspiration all year long!  (Be sure to answer all of the questions to get added right away!

Here's how I was inspired:


I am in love with the pups on the Pugs and Hugs stamp set!!  And I love love that one of them is a pup in a cup!


With all of the wonderful details these little guys are so easy to color up!


And for my background I blended some Distress Oxides on and then used the Words of Friendship stencil I got for free in April to apply some beautiful Iridescent Gina K Glitz Glitter Gel!  (I got mine in the Butterfly Reflections Ink shop!)  I think it made the perfect soft backdrop for a card to send to just about anyone!  Look at that wonderful sparkle!!


I just added a few sequins and I was done!

Thanks so much for stopping by again today!  Come back again tomorrow because I'll have some more coffee goodness for you before the end of the hop (you have until tomorrow night, Friday, May 29th, to link up!)


Friday, May 22, 2020

Coffee Lovers Blog Hop - CASual Fridays Stamps


Hello!  Welcome to the Coffee Lovers Blog Hop!  I have a few posts today and here I'm sharing with you some CAS-ual Fridays Stamps Inspiration!  CAS-ual Fridays is one of the many sponsors offering up awesome prizes for linking up to the hop!  

You just need to create something with a coffee, tea, or cocoa theme and link it up for your chance(s) to win!  (Yup! You can link up multiple new creations for multiple chances!).  For all of the rules and to check out who the sponsors are, link up or just start hopping, check out the main hop post here up on the Coffee Loving Cardmakers Blog!  And for even more fun, if you're not already a member, join us over in the Coffee Loving Papercrafters Group on Facebook here where we share caffeinated inspiration all year long!  (Be sure to answer all of the questions to get added right away!

Here's how I was inspired:


At CAS-ual Fridays we're sharing projects using the newly released Coffee Chips Chipboard!  I had lots of fun with mine today and did some foiling on them!


I started this one by blending inks in a rainbow pattern onto my panel.  Then I laid the By The Beans stencil over it and applied some Translucent Embossing Paste through it.  I sprinkled some glitter over the top.   I wasn't trying to cover the entire embossed area with glitter... whatever stuck was fine and when it was dry I just tapped it off and then ran a wide brush across it to remove the excess... it leaves such a pretty sparkly surface without a ton of glitter... not that there's anything wrong with that!


I took a small paintbrush and applied some transfer gel onto the chipboard pieces.  I was fairly generous but not too heavy handed and made sure to cover the entire surface of them.  I set those aside to dry completely.  Then I cut some white cardstock using the Bubble Box Fri-Dies and secured it in the Misti to stamp the sentiment from the Stay Strong stamp set onto it leaving room for my coffee cups when they were ready.  Once the gel was dry (the jar says an hour... I'll be honest, I left it overnight because I'm impatient and went on to something else...lol!) I placed some Rainbow Deco Foil over the three pieces and ran them through my Minc on the 4 setting.  So pretty aren't they??  And I love that the Coffee word chipboard piece fit perfectly over the Coffee word in this sentiment stamp so I didn't even have to piece the sentiment together!  


I just added a few of my favorite sequins and I was done!

Thank you so much for stopping by today!  Be sure you check out what my teamies have created for you today!

And should you decide to shop, Coffee themed products are 25% off for the hop!  And in addition you can use one of the DT codes for an additional 15% off any products!  Here's mine:


Now get making and link up for your chance to win!  CAS-ual Fridays is sponsoring a $25 gift code and three flash prizes of the Coffee Chips Chipboard packs!!  What are you waiting for?


Sunday, April 19, 2020

CAS-ual Fridays Stamps Release - Rainbow Bridge


Today is Day 1 of the new CAS-ual Fridays Stamps release!  And today we're sharing creations using the new Rainbow Bridge Stamp Set, Pawesome Stencil, and Pawprints Chipboard!

I love the stencil because it has four different sections and I used the trailing paw prints section and some Distress Oxides to add a rainbow trail of paw prints diagonally across my white panel.


Then I stamped the rainbow from Rainbow Bridge onto white cardstock with Versamark and heat embossed with Wow white embossing powder.  I used a nested circle die from my stash to cut out the curved part of the rainbow because I didn't trust myself to cut it smoothly by hand.  Then I cut the flat part with my paper trimmer and fussy cut the inside arch.  Then I used the same colors I used for my paw print trail to add the rainbow colors to it.   Finally, I took a dry cloth and rubbed the extra ink off of the embossed parts, used a black marker around the edges to give it some definition, and popped the rainbow up onto my background.


I stamped this sentiment from Rainbow Bridge with Versamark onto black cardstock and heat embossed it in white.  Then I applied some clear glue to one of the chipboard hearts and added some Wow EcoSparkles glitter and added them both to the card along with a few sequins.


Don't you just love these sweet new products??

Be sure to head on over to the CAS-ual Fridays Blog where you'll find links to everyone's projects!

And should you decide you need something, I have this for you:


Thank you so much for stopping and hope you enjoyed your visit!  Come again tomorrow for more release inspiration!


Thursday, March 26, 2020

Sending Some Comfort - Rubbernecker Stamps


Hello all!  Lisa here!  I'm sharing a sympathy card today using one of the beautiful florals from the shop and one of my favorite sentiments for sending love at one of the most difficult times we face.


This gorgeous Flower Bouquet is one of my faves to color up... it's beautiful in any colors you choose!  I find it very hard to make a sympathy card at the time that I need it.  So I find it best to have a few on hand to choose from.


And this sentiment.  It says so much yet not too much.  Just a simple wish of comfort.


Sending peace and comfort to all of you out there!  As always, we will be bringing you as much inspiration to you as we can over the next few weeks to keep your eyes happy and your minds and hopefully your hands busy!

Here's how I made this one:

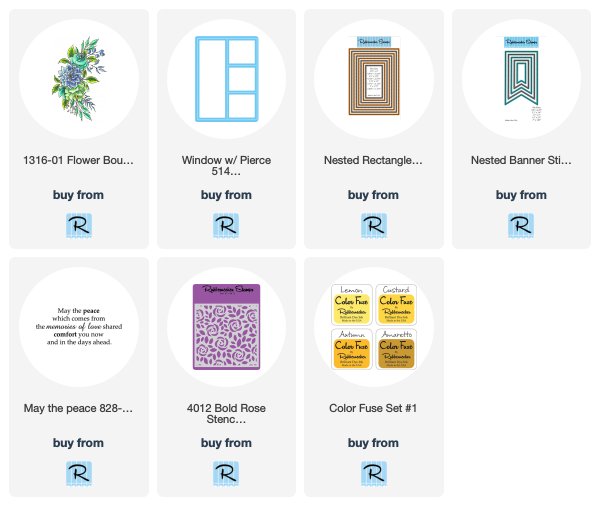
  1. I cut a panel of white cardstock using the largest of the Nested Rectangle Small Stitch Dies.
  2. I used some distress inks in  yellow to first blend some yellow onto my background and then applied some of the orange through the Bold Rose Stencil.  (I did this before I received my beautiful new Color Fuse inks from Rubbernecker and I can tell you since I got them I have used them in the same way and they worked beautifully!)
  3. Next I cut the Window w/ Pierce from a yellow that coordinated with my background.
  4. I stamped the Flower Bouquet and cut it using the Scan N Cut and then colored it in with my Copics.  I went for a soft look this time with some peaches and yellows for the florals leaving some white space even (it's ok to not color every part of your florals!)  When I leave white, I like to use my blending marker to soften up the edges between the color and the white space.
  5. Next I cut a banner from white cardstock and stamped the sentiment in the center using my Misti.
  6. Finally I assembled all of my pieces and adhered them with various thicknesses of foam tape.  Added a few sequins and done!

Thanks so much for stopping today!  I hope you enjoyed it and you'll come back again for more Rubbernecker Inspiration!


I have provided links below to the Rubbernecker products I used today.  Should you purchase using these links I will receive a small compensation at no additional cost to you.  And thank you!

Friday, February 21, 2020

Dazzling Butterflies - Miss Ink Stamps


Don't you just love shaker cards??  I do and once you've made one you realize how easy they are (as long as you remember to put the acetate behind your window BEFORE you put the popup tape on (I may or may not have done this several times).

I knew I wanted a natural palette for this one so I started with a kraft base.  For my next layer I diecut the rectangle pattern; ink blended with Peeled Paint distress ink and then used Mowed Lawn through the Leafy Green stencil.  I wanted the stenciling and background to vary in depth and color so I was lighter in some areas than others.


Next I die cut my smaller rectangle panel, lining it up with the heart die inside and taping it so they would stay in place and my window would be where I wanted it.  The acetate was attached behind my window and I added popup tape to the entire panel but specifically around the heart to keep my bits and pieces contained to just the window.


I cut a smaller panel from the kraft and stamped the Have Heart image onto it with Versamark and embossed using Altenew Rose Gold for the wood slice lines.  I attached that piece to the stenciled layer, arranged my Dazzling Butterflies, some clear sequins and some beads in the center the stamped heart and then popped my window panel over the top.

Next I added my images from Springtime Banners and moved them around until I was happy with the layout.  Then I attached them with varying thicknesses of foam tape.


I stamped a simple sentiment from the Everyday Sentiments set (LOVE the wide variety of sentiments on this set!) onto a kraft piece of paper in Versamark and heat embossed with white embossing powder.  I just popped it up at the bottom and added a few sequins and I was done!

(Check out that color shift in those Dazzling Butterflies!)


And there you have it!  It's been extra warm here in the Desert Southwest and I've been feeling Springy lately... can you tell?

Thanks so much for stopping and hope you'll come back again soon!


Tuesday, August 13, 2019

Miss Ink Stamps-Mugs and Kisses


I can't seem to put these new stencils from Miss Ink Stamps away so I didn't!  I created the background for this one using the new Waves stencil and some Distress Inks.  I popped my frame up over the stenciled panel.


I wanted to ink up the Gardenia set... so easy to color up and SO beautiful!


Well, of course I added these from the Brewtiful set!  Why wouldn't I?


Did I mention how all of these new stencils gradually become thinner... such a cool look!


Thanks for stopping!  Did you comment over on IG on the giveaway post at Miss Ink Stamp's Account?  Be sure to check back there to see if you are the winner!

And don't forget, Miss Ink Stamps is the sponsor for this month's Caffeine Fueled Paper Play Challenge!  Link up a new project using any Sponsor (past or present) coffee, tea or cocoa product!  All of the details are in the challenge post here!


AND I'm playing along over at Simon Says Stamp's Wednesday Challenge to Add A Die Cut!  You should too!

Come back soon!!

Wednesday, May 22, 2019

CAS-ual Fridays Full On Floral Eclipse


I'm up on the CAS-ual Fridays Blog today and sharing a card using an Eclipse technique.  If you're not familiar, the Hello in my card is what we're talking about.  It's a raised area that could be a Word like in today's card or a shape or anything really that almost seems to raise out of the background... visible, but you can sometimes almost miss it... almost ghost-like.

Here's how I made mine:


I started by stamping the Full On Floral background stamp onto some mixed media paper in Versamark and heat embossed it in gold.


Next I used Picked Raspberry and Spiced Marmalade Distress Oxides and blended them over the embossed image.  When I was done blending the inks, I wiped over the top of the image with a dry paper towel to remove the ink from the top of the gold to let the shine through again.


 I splattered some water and Gold Color Shine over the top and when it was dry, I die cut the Hello die from the Sweet Friend Dies from the center of the embossed panel (you would want to cut this from whatever area you wanted to add your eclipse to because the negative space will be where you place it.  (Note: Be sure to save those little pieces from the middle of your O's, E's, L's.. you get the idea... because you'll need to place those inside their negative spaces so you don't have white showing through your eclipsed word or shape).


I added all of the layers to my card including the embossed panel with the Hello cut out of the center.  Next I die cut three more of the Hello words from white cardstock.  I glued and stacked all of my Hello words together with the embossed piece on top.  Sometimes I like to offset the top piece just a bit so that there is a tiny bit of the color from the bottom layers that shows around the outside in some places to help the word stand out just a bit.  Then I glued the stacked word into the negative space and added the little center bits that I saved (center of the O, etc).  I also added a thin layer of Glossy Accents to the top of the word... again so that it would stand out just a little bit more.


I included a simple sentiment from the Bushy Tailed stamp set and a few sequins to finish it off.


And there you have it!  A simple Eclipse design with a big impact!  I think it's cool anyway!

I hope you enjoyed your stop!  If I've inspired you and there is something you need to have, you can head on over to the shop here and use this code for a discount on your order!


Monday, May 20, 2019

Rubbernecker Stamps - Happy Wishes!


Sharing with you a project today that I made using some great Rubbernecker Stamps products!

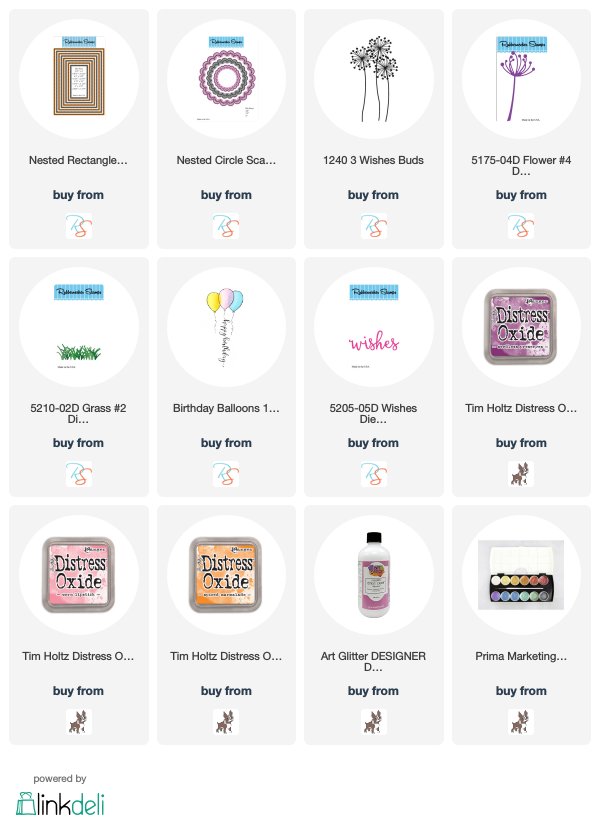
I started by die-cutting my 2nd layer using the largest of the Nested Rectangle Small Stitch dies (one of my most used) along with the 2nd largest of the Nested Circle Scallop dies.  I used washi tape to hold them in place and ran them both through at the same time so I only needed to make one pass with my die cutting machine.  The scalloped circle created my window and I saved the inside piece for another project!


I cut a circle slightly larger than my window and blended a couple different colors of Distress Oxides onto it.  Next I stamped the sweet flowers from the Wishes Buds stamp set onto the ink blended circle and splattered it with Prima Metallic Watercolors.  While that was drying,  I cut two of the Flower #4 Die in black cardstock along with the Grass #2 Die.  Once the splatters were dry, I placed the flowers where I wanted them, using my window as a frame before I attached it permanently.  Then I made it all permanent and popped the window layer up over the stamped and die cut flowers.  I glued the tops of the flowers down very loosely for dimension, letting the beautiful tendrils pop up out of the window.  Then to finish, I used the little grass pieces to add some additional "foliage" just peeking up over the window.


I ink blended another piece of cardstock in the same colors as my background and die cut the Wishes word from it and again twice more from black cardstock.  I stacked and glued them together for dimension.  Then I stamped the "happy" from the Birthday Balloons stamp set in Versamark onto black cardstock and heat embossed with WOW Bright White Opaque embossing powder. I fussy cut it out and then added them both for my sentiment.  I rarely keep track of my "dots" so I like to use a gem or Nuvo drops to dot my I's.  A few sequins and it was done!


And there you have it!

I'm playing along at Simon Says Stamp's Wednesday Challenge which is Stitches this week!  You have until tomorrow (Tuesday) to play along!  I'm also playing along at Die Cuttin' Divas Flowers and/or Mother's Day Challenge!


Thanks so much for the visit!  I hope you enjoyed it and that I'll see you again soon!


For your convenience, I've included links below to the products I've used on today's make!  The Rubbernecker links are affiliate links and if used, I will receive a small compensation at no additional cost to you.  The others just link to some of my favorite places to shop!