Showing posts with label Distress Embossing Glaze. Show all posts

Friday, September 10, 2021

Haunted Hellos-Miss Ink and A Gel Press Background


Welcome back!  I've got some more Miss Ink Stamps Halloween!  I used a Gel Press background I made previously and stamped the House from the Roll With It stamp set with Versamark and embossed with some Tim Holtz Embossing Glaze.  


I colored up some cutie pie critters from the Boo Crew set as well as the Angel from the Little Angel set.  She dressed up as a dark angel for Halloween and took her furry friends out for some safe Halloween fun!


I hope you enjoyed your visit!  Thank you for stopping!  Hope to see you again soon!


Saturday, September 26, 2020

I Like Big Mugs - Miss Ink Stamps Release Day!


Welcome back!  It's Release Day over at Miss Ink Stamps and all of the new sets are available in the shop today!  I've used another coffee gnome set, Big Mugs!


I used a couple stencils for this background; Leafy Green and the new Floral Wave... I was going for the feeling of lots of autumn leaves flying and the sun rays kind of peaking through and I used a little bit of Distress Embossing Glaze too!  I do miss the so colorful foliage of a New York autumn....


And those mushrooms from the new Pumpkin Spice Gnomes are SO fun and perfect with or without a gnome!  This guy just makes me giggle... how his beard is dipped in his mug... personally I'd have to shave it off...lol!

Don't forget you still have time to comment over on Instagram on each day's Release Graphic post for your chance to win one of the new sets!  And check our the new Miss Ink Stamps YouTube Channel for even more inspiration!

Thanks so much for stopping and I hope you enjoyed it!  Come again soon!


Friday, September 18, 2020

Dodon't Be A Stranger - Miss Ink Stamps!


Welcome back!  I've been continuing my play with Tim Holtz Distress Embossing Glazes this week and decided to get my bright on!  I decided this one would be a little lighter and brighter and without a plan I just started playing.


I started by blending on some Distress Oxide Inks in a rainbow pattern on a panel of Mixed Media Paper... starting with Lucky Clover, Squeezed Lemonade, Spiced Marmalade, Picked Raspberry and Tumbled Glass (I didn't need any purple since the pink and blue made me a nice shade of it!)  When I was done blending, I stamped the images from Smokin' Caterpillars onto the panel using Ranger Archival Ink. 


I sprayed my Paint Stroke Floral Stencil with iCraft Pixie Spray and after waiting a minute for it to dry to tacky, I laid it over my panel and applied some translucent Embossing Paste through it.  While it was wet, I sprinkled on some Broken China Distress Embossing Glaze over the top left corner and a little over halfway down, tapped off the excess and heated it to a pretty gloss.  Then I sprinkled Cracked Pistachio Embossing Glaze on the bottom left corner and heated that up.  I love how these glazes let the images below show through!


I stamped the Dodo and an additional mushroom onto mixed media paper as well with Ranger Archival Ink and watercolored them using the same colors of Distress Oxides that I used on my background.  When the Dodo was dry, I used a paint brush to apply some embossing pad re-inker to parts of the Dodo and sprinkled on some of the Broken China powder and heated that.  I fussy cut my images and popped them up onto the background.  


I stamped the sentiment and hand drew lines around it and cut it out.  I let it be a little wonky.  I had cut part of the mushroom image off and decided to add some of the Cracked Pistachio glaze on it and added it with the sentiment.  A few sequins and done!

That's me for today!  I hope you have enjoyed it and hope you'll give these powders a try!  They are the perfect compliment to the Distress Oxides and I can't wait to add more colors to my collection.
 

Friday, September 11, 2020

If Something Made Sense-Miss Ink Stamps!


Welcome back!  Today I've got some more Miss Ink Stamps and Ranger Distress Embossing Glazes!

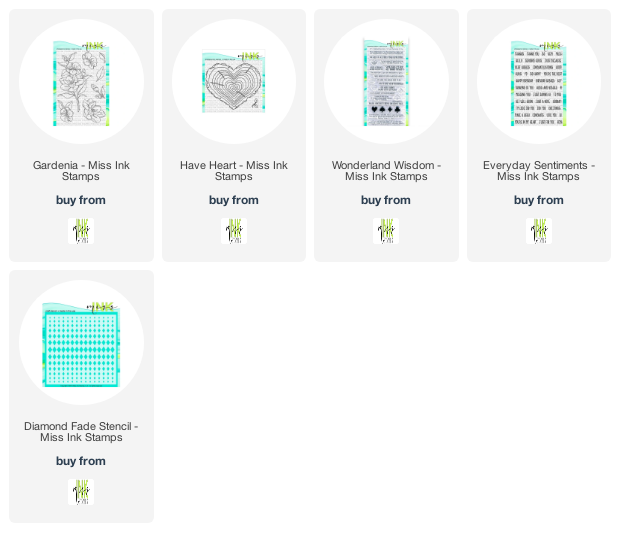
I started this one ink blending some Fossilized amber and a little Vintage Photo onto a die cut panel.  I stamped the Gardenia images onto the paper using some Espresso Distress Oxide Ink.  I had meant to use the Archival Ink, because I knew I'd be watercoloring the floral images, and the ink did run a little when I did that, but it all just added to the vintage distressed look I was going for.  I used Vintage Photo to color in the petals, Fossilized Amber to color in the flower center, and Bundled Sage for the leaves.  I just took a scrap piece of plastic like from packaging and smoosh some ink from the pad onto it and then use a water brush to pick up the ink.


Next I added some more of the inks through the Diamond Fade Stencil using a blending brush and over that added some texture paste.  I did clean off the stencil in between the ink and texture paste to keep from getting ink in my texture paste jar as I applied it and it was easy to line it back up. Then while the paste was wet, I used my fingers to sprinkle on some Embossing Glaze in Fossilized Amber and Peeled Paint.  I heated that up and once it cooled, I used a paint brush to brush on some more embossing ink in each corner swiping upwards.  (I just put a few drops onto the plastic from my refill bottle and applied it with a paint brush.)  Then I sprinkled on more Embossing Glaze in Vintage Photo.  When I heated that up it was a little darker than I wanted so I took a Ranger Embossing Dauber and dabbed on some more ink lightly everywhere and then very lightly sprinkled on some Gold Embossing Powder to add a little light and sparkle.  Whew!!  It took some work but I finally got it where I wanted it.


I decided with the darker colors that the Have Heart wood slice image would be perfect to add my sentiment.  I stamped it with Memento Ink, cut it out and then colored it with some brown Copics.  I decided to tone it down by blending on some Distress Ink in Antique Linen over the entire piece and then Vintage Photo around the edges.  Then using my Misti I stamped the sentiment from the Alice Collection Wonderland Wisdom stamp set in Versamark ink and heat embossed it in gold.  Just a subtle sentiment that is probably going through a lot of our heads right now "It would be nice if something made sense for a change".  I added the main sentiment heat embossed in white and popped it up underneath.   Finaly, a few paper flowers from my stash from Prima and some sequins and I was done!


That's me for today!  Thank you so much for stopping by and hope you'll visit again soon!


Thursday, September 10, 2020

Made You This Cawed - Miss Ink Stamps!


I'm up on the blog over at Miss Ink Stamps with this one!  I had lots of fun playing with Ranger Distress Embossing Glazes and a bunch of other stuff!


If you'd like links and more details, then hop on over there and join me!

Thanks so much for stopping and hope you'll come again soon!


Friday, September 4, 2020

Birthday Hugs & Kisses - Miss Ink Stamps


Welcome back!  It's a new month and for September I'll be focusing on using Ranger Distress Embossing Glazes in various ways!

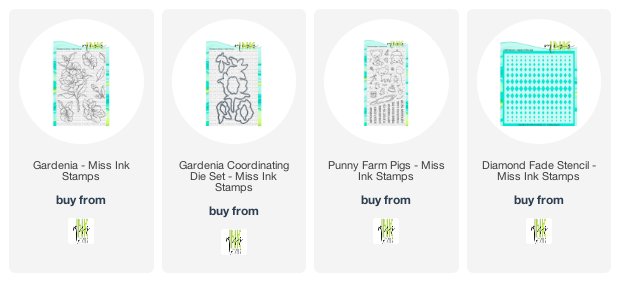
For today I used them along with the Gardenia, Everyday Sentiments, and Punny Farm Pigs stamp sets and one of the awesome Diamond Fade Stencils.

If you're like me, you're wondering how these are different from any other embossing powder.  What I can tell you so far is they are made to be translucent (yes, there are others that are but this line is all translucent) which is very cool because you can use the glaze over images like I did here and it will show through.  Also, the colors are in your favorite Distress Ink colors which is awesome, but if you apply them over other colors you'll get many different looks.  All of this is important to know before you use them to be sure you get the look you want!  If you like videos (and even if you don't) I'd recommend you watch this one here of Tim's demo at Creativation.  I'm not a video watcher, but it was great to see the different ways he uses them.  I'll be playing all month and share with you what I discover! 


For this one I started by using Speckled Egg and Broken China Distress Oxide Ink to blend the background panel cut from Strathmore Mixed Media Paper.  (When I remember to, I like to start with this paper if I'm going to be using a bunch of different medium to avoid too much curling.)  


Then I stamped the florals from Gardenia using my Misti in the corners using Ranger Archival Ink.  Next, I used a water brush to lift some of the color from the flowers and leaves and then used the same brush along with some Distress Oxide Inks in Milled Lavender and Bundled Sage along with a tiny bit of Fossilized Amber to lightly and loosely watercolor the floral images.


After the florals were dry, I applied some Broken China and Milled Lavender first and then clear embossing paste over that through the Diamond Fade Stencil and then used my fingers to sprinkle on some Broken China and just a little Weathered Wood (why not!?) Embossing Glazes and heated them up.  These do dry shiny and you can dull them if you prefer with Steel Wool (Tim suggests this in the video rather than sandpaper because it will just lightly buff off the shine).  I decided to add a little Wilted Violet over the top which did dull it a little which I'm sure I could have wiped off, but decided I liked it just the way it was!  See how the floral image lines and colors show through underneath the embossed areas?  I did leave some areas with little or no powder because I wanted to leave some areas embossed but really clear... and that's how I roll!


My initial plan was just to add a simple sentiment over the top, but I decided to instead add a few of the smaller birthday images from the Punny Farms Pig set!  I colored them with Copics in colors Complimentary to the inks I used.. some Vs and some BGs and then built my sentiment from the Everyday Sentiments stamp set!

Just a few sequins (of course!) and I was done!

I'm playing along over at Double Trouble Challenge's Something, Anything and Everything Challenge that goes through Sunday the 6th!  Check it out!  There are prizes!!

I had a lot of fun playing with this one and I can't wait to play again!  Thanks for stopping and be sure to come again soon!


Friday, August 28, 2020

Woodland Wonder - Miss Ink Stamps


Welcome back!!  I've got a little bit of a Miss Ink woodland wonder for you today!  I'm in love with the Smokin' Caterpillars stamp set that these mushroom images come on.  It's cool that you can use them along with the other Alice Collection images OR they are beautiful on their own and mixed with some of the other sets from Miss Ink!


I started by ink blending a white panel of cardstock using Cracked Pistachio Distress Oxide Ink.  I didn't worry about full coverage and left lots of variation.  Then I sprayed my Leafy Greens stencil with some Pixie Spray (let it sit for a few minutes while I gather my supplies) and then place it over the panel sticky side down.  This stuff has saved my crafty life recently.  I had no clue.  (Thanks Heidi!)  Then I applied some Deco Foil Metallix Gel in Champagne Mist.  I did add some Distress Embossing Glaze powders to this and heat it, but since the colors weren't really much of a contrast it didn't have a huge impact.  I will be playing with these next month so stay tuned!


Finally I cut all of my pieces and assembled them... adding in a couple flowers, the bee, some greenery and a butterfly ... and of course that beautiful banner... from the Springtime Banners stamp set and gold embossed a cute sentiment from the Decaf Background stamp set... perfect for that banner.

That's me for today!  Thanks so much for stopping and I hope you enjoyed it!  Come again soon!