Showing posts with label Happy Birthday. Show all posts

Saturday, August 2, 2025

Thursday, April 10, 2025

Brass & Bliss Craft Co - Spring Release Part 2


Hello!  Brass & Bliss is celebrating Part 2 of the Spring release!


There are some gorgeous floral dies in this release and I've used them here today along with the fun sentiment dies in the shop!


There are tons of dies releasing today and you can go check them out here!


So pretty, right!?  And in my usual fashion, I've cut them from some foiled gel prints.


And check out the fun flower wrap!

Thanks for stopping!  Be sure to had over to Instagram for lots of inspiration from my teamies.


Saturday, January 4, 2025

Happy Birthday Golf-Brass and Bliss Craft Co


I'm up on the blog over at Therm O Web with this birthday card!


Join me there for the details!


Thanks for stopping!  Come again soon!
 

Saturday, November 23, 2024

Happy Birthday Rose - Brass and Bliss Craft Co


I have this one up on the blog over at Brass & Bliss Craft Co!


I hope you'll join me over there for links and details! 


Monday, March 11, 2024

Happy Birthday Daisies


I'm up on the blog over at A Jillian Vance Design with this shaker card.


I hope you'll join me there for links and details!


Saturday, November 26, 2022

Sweet Happy Birthday! - My Paper Insider


I decided it was time to get some of my papers out from the Your Paper Insider Quarterly Box I received this month!  I've been spending some time with that Wavy Masking Stencil this month and thought it was perfect to mix a couple patterns to play along over at Double Trouble Challenge Blog's GORP challenge!


I used the Perfectly Plaid and Medium Polka Dot Stencils for my mixed patterns.  You can also add some paper piecing and use the sketch from their partner Try Stamping on Tuesday for more chances to win!  I didn't play along with these extra twists but you can!


Head over to the Double Trouble Challenge blog for all of the details and to link up!


All of my papers were from the My Paper Insider Box including that beautiful white sparkly iridescent paper I die cut the Lawn Fawn Happy Birthday sentiment from.  I also cut one in the pink I used as a mat ... I cut the piece down to 4 1/8 x 5 3/8 and then die cut the Happy Birthday from the center before adding it to the card.  I added one of the Coffee Bunny images from Studio Light that I got from the Topflight Stamps shop and decided an ice cream cone would be perfect for this one along with a "sweet" sentiment from an MFT set.


Check out that sparkle!!


That's me for today!  Thank you so much for stopping!  Hope you'll come again soon!

Be sure to check you the Your Paper Insider Subscription!


Friday, October 28, 2022

Happy BIRTHday! - Miss Ink Stamps


I decided it was about time I used the Flower Shower Layering Stencil!  And I added some images from the So Charming stamp set.


I added some transfer gel duo and clear Magical Shattered Glass Deco Foil to the flowers for a really pretty sparkle!


Over on Instagram I'll include a short video so you can see the sparkle!

Thanks so much for stopping!  Come again soon!


Thursday, October 14, 2021

CAS-ual Fridays Stamps - It's Time to Paaarrrrtayyy!


We're celebrating a birthday over at CAS-ual Fridays Stamps!  I created a fun Birthday Card for the party!


Hope you'll hop on over there and join me for links and details for this one!

Thanks so much for stopping and hope you'll come again soon!


Monday, January 11, 2021

Foil Fun With CAS-ual Fridays!


I'm up on the blog over at CAS-ual Fridays and this is one of two cards I have for you today!  I'm playing with Deco Foil and if you'd like more details and links, join me over there!

Thanks so much for stopping and come again soon!


Saturday, June 13, 2020

A Multi Medium Birthday Card - CASual Fridays Stamps


Welcome back!  If you like to play with different mediums this is the card for you! I I came across the Bubble Box layer with green and gold Alcohol Inks on it in my stash.  I had made it for a different project, but it wasn't right for that one.  Turns out it was perfect for this one and it set the tone for the rest of the card!


I used the Jacks stencil to blended some greens through it onto a white cardstock layer and then because my alcohol ink layer had gold in it I decided to add some Inka Gold randomly before removing the stencil.  Mine was dried up so when I use it I just add a little water to it and apply it with a sponge.  After that dried, I layered that onto my white base, then a vellum Bubble Box and then popped up the Alcohol Ink layer.


Finally I stamped the Happy Birthday in the same greens I used on the background and then without moving the stamped image in my Misti, I dabbed on some Ranger embossing ink that comes in a bottle with a dauber tip to the stamp set, stamped it over the ink stamped image and then used clear embossing powder over the top.  I got a kind of textured embossed look which I decided I liked because it kind of makes the  sentiment sparkle!  And then I cut it out and popped it up over the top.  I just added a few sequins and I was done!

That's me for today!  I hope you enjoyed your visit and you'll come back again soon for some more CAS-ual Fridays Stamps inspiration!


Monday, June 8, 2020

Happy Birthday Jillian! - Make A Wish! - AJVD


I'm up on the blog over at A Jillian Vance Design sharing a birthday card!  Jillian's Birthday is coming up so there is a sale and a Rafflecopter Drawing!  Hope you'll hop on over there and give us a visit for your chance to win, links, and sale info!

Thursday, May 21, 2020

Feliz Cumpleanos - Rubbernecker Stamps!


Welcome back!  Today I'm back with some more stripey goodness!  This time I used it for this birthday card using the Dog With Big Eyes stamp along with Birthday Balloons!


I created the background just like my last, but this time using the Color Fuse #8 blues...


I love using a frame to highlight the main card images!  But I also love letting the images push the limits of the frame... I mean all of this fun can't be contained!


And again I used the Frases En Espanol #1 stamp set for this Happy Birthday wish!


I added a little sparkle with some clear sequins and I was done!

Here's how I created this one:

  1. I started with the background panel!  Just like my last one,  I cut a piece of white cardstock approximately 6x6.  Usually I'll die cut my panel first, however it was easiest to stamp the stripey background using a larger piece because I was able to place the cardstock in the corner and still use the magnets to hold it into place leaving room for the stamp and so I could stamp more than once to get a nice solid stripe.
  2. To give a sort of Ombre effect, all four of the blues in Color Fuse Set #8 were used.  I started with the lightest and inked up the first three skinny stripes or so and stamped... I didn't worry about overlapping so that the varying colors would have a bit of a transition and blend.  I cleaned off the stamp and repeated the process with next few wider stripes using the next darkest ink in the set and then twice more with the two darkest colors.  I did go over in the same fashion a second time again to blend the colors better.
  3. Once my striped background was complete, I used the largest of the Rectangle Small Stitch Dies and taped it into place with some washi tape placed on the outside of the die to be sure my stripes would be straight and ran it through the Gemini to cut the panel.  (I like to place the tape on the outside when I can in case the washi decides to stick so I don't tear my panel at all).
  4. I stamped, die cut and colored my pup!  I used E34, E35 and E37 to color him in and E77 and E79 for his nose.
  5. I stamped, die cut and colored two of the Birthday Balloons images.  I used R24, R27, and R29 for the red balloons; Y08, Y11, and Y15 for the yellow; and B21 B24, and B26 for the blue.  I trimmed the "Happy Birthday" sentiment from the center balloon of each knowing I was going to use a different sentiment.
  6. I attached my stripey background to a white card base that I cut 5 1/2 x 4 1/4".
  7. I grabbed one of the rectangle frames that I had on hand... when I cut these frames I put any leftovers into a clear baggy for later use so it's easy to grab one when I need it!  I added some thin foam popup tape to the back of the frame for dimension and popped it onto the background at an angle.
  8. I added my images inside the frame letting parts of them fall over the edge using varying thickness of foam tape.  I was careful to cover up the area of the balloon strings where I cut off the sentiment with my placement.
  9. I stamped and fussy cut the sentiment I wanted and then added foam tape to the ends so I could pop it over the edge of the frame.
  10. I added a few sequins for sparkle and fun!
That's me for today!  I hope you enjoyed your visit and be sure to come back tomorrow!  We've got lots of fun going on here because it's the start of the Coffee Lovers Blog Hop and Rubbernecker Stamps is a Sponsor!  It's a week long celebration of all things Coffee, Tea and Cocoa and there will be chances to win lots of prizes if you link up and play along!  Be there or be square (like this graphic... although it is pretty cute... but be there anyway just to be safe!)


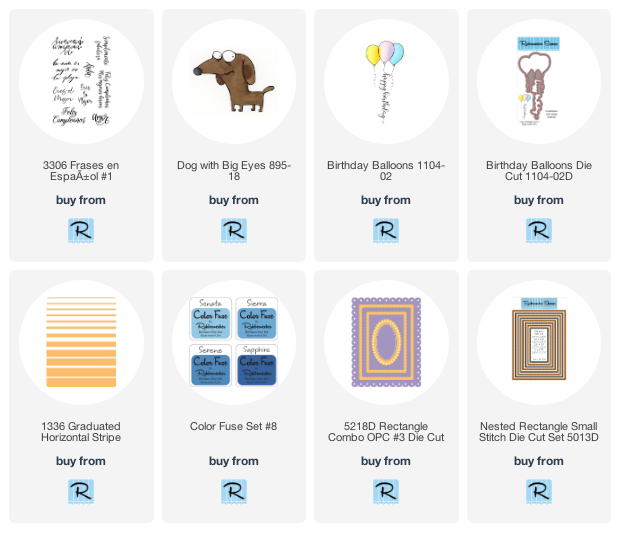
Below are links to all of the Rubbernecker products I've used today!  If you choose to purchase using these links I will receive a small compensation and thank you!
Tuesday, March 31, 2020

CAS-ual Fridays Release-Happy Birthday!


It's Day 3 of the CAS-ual Fridays Release and today we're sharing the new Happy Birthday Stamp Set!  All of the new products are available in the shop now!

I started this one by using some Distress Oxides and the Curtis Stencil for the background.  I stamped the Happy Birthday from the set and fussy cut it out and then stamped one of the sassy sentiments onto a strip of black and popped that up beneath it.


A few Jumping Jacks cut from Glitter Paper and sequins and I was done!

Don't you just love the font on all of these cool new stamp sets??  

Be sure to head on over to the CAS-ual Fridays Stamps blog to see what everyone has made!  And should you decide you need something from the shop, I have this for you:


We've got one more day of Release inspiration for you so be sure to come back tomorrow!