Showing posts with label Everyday Sentiments. Show all posts

Friday, April 26, 2024

Here for You - On The Floor - With The Cat


Happy Friday!  I've got some fun Miss Ink Stamps today!  I've used the Under the Stairs dies and Letters stamps and dies to create this fun card.


I used the Everyday Sentiments stamp set for the "I'm Here For You" and when I thought of this sentiment I just couldn't let it go... so I printed the rest and added it to the card.


Fun right??  But seriously, if you bring me to a party and you can't find me... I'm probably on the floor with the dogs/cats/any other fluffy animal.

Thanks so much for stopping!  Hope you'll come again soon! 

Friday, March 12, 2021

Miss Ink Stamps-New Stencil Release-Sending Hugs


Happy Friday!  Today I'm showing off another one of the new stencils over in the Miss Ink shop and I've created some Glitter Paste using the Pink Flamingo Dazzle Dust available in the shop mixed with Glossy Accents!


This is the new Heirloom Blooms stencil and don't you love how that Dazzle Dust changes colors... here you can see the difference where the light is shining brighter it's a soft opalescent pink and as you angle it it becomes a deeper flamingo pink!


It's perfect along with some images from Springtime Banners and the Alice Background and a simple sentiment from Everyday Sentiments.

Thanks so much for stopping!  I hope you enjoyed it and you'll come again soon!


Friday, September 11, 2020

If Something Made Sense-Miss Ink Stamps!


Welcome back!  Today I've got some more Miss Ink Stamps and Ranger Distress Embossing Glazes!

I started this one ink blending some Fossilized amber and a little Vintage Photo onto a die cut panel.  I stamped the Gardenia images onto the paper using some Espresso Distress Oxide Ink.  I had meant to use the Archival Ink, because I knew I'd be watercoloring the floral images, and the ink did run a little when I did that, but it all just added to the vintage distressed look I was going for.  I used Vintage Photo to color in the petals, Fossilized Amber to color in the flower center, and Bundled Sage for the leaves.  I just took a scrap piece of plastic like from packaging and smoosh some ink from the pad onto it and then use a water brush to pick up the ink.


Next I added some more of the inks through the Diamond Fade Stencil using a blending brush and over that added some texture paste.  I did clean off the stencil in between the ink and texture paste to keep from getting ink in my texture paste jar as I applied it and it was easy to line it back up. Then while the paste was wet, I used my fingers to sprinkle on some Embossing Glaze in Fossilized Amber and Peeled Paint.  I heated that up and once it cooled, I used a paint brush to brush on some more embossing ink in each corner swiping upwards.  (I just put a few drops onto the plastic from my refill bottle and applied it with a paint brush.)  Then I sprinkled on more Embossing Glaze in Vintage Photo.  When I heated that up it was a little darker than I wanted so I took a Ranger Embossing Dauber and dabbed on some more ink lightly everywhere and then very lightly sprinkled on some Gold Embossing Powder to add a little light and sparkle.  Whew!!  It took some work but I finally got it where I wanted it.


I decided with the darker colors that the Have Heart wood slice image would be perfect to add my sentiment.  I stamped it with Memento Ink, cut it out and then colored it with some brown Copics.  I decided to tone it down by blending on some Distress Ink in Antique Linen over the entire piece and then Vintage Photo around the edges.  Then using my Misti I stamped the sentiment from the Alice Collection Wonderland Wisdom stamp set in Versamark ink and heat embossed it in gold.  Just a subtle sentiment that is probably going through a lot of our heads right now "It would be nice if something made sense for a change".  I added the main sentiment heat embossed in white and popped it up underneath.   Finaly, a few paper flowers from my stash from Prima and some sequins and I was done!


That's me for today!  Thank you so much for stopping by and hope you'll visit again soon!


Friday, September 4, 2020

Birthday Hugs & Kisses - Miss Ink Stamps


Welcome back!  It's a new month and for September I'll be focusing on using Ranger Distress Embossing Glazes in various ways!

For today I used them along with the Gardenia, Everyday Sentiments, and Punny Farm Pigs stamp sets and one of the awesome Diamond Fade Stencils.

If you're like me, you're wondering how these are different from any other embossing powder.  What I can tell you so far is they are made to be translucent (yes, there are others that are but this line is all translucent) which is very cool because you can use the glaze over images like I did here and it will show through.  Also, the colors are in your favorite Distress Ink colors which is awesome, but if you apply them over other colors you'll get many different looks.  All of this is important to know before you use them to be sure you get the look you want!  If you like videos (and even if you don't) I'd recommend you watch this one here of Tim's demo at Creativation.  I'm not a video watcher, but it was great to see the different ways he uses them.  I'll be playing all month and share with you what I discover! 


For this one I started by using Speckled Egg and Broken China Distress Oxide Ink to blend the background panel cut from Strathmore Mixed Media Paper.  (When I remember to, I like to start with this paper if I'm going to be using a bunch of different medium to avoid too much curling.)  


Then I stamped the florals from Gardenia using my Misti in the corners using Ranger Archival Ink.  Next, I used a water brush to lift some of the color from the flowers and leaves and then used the same brush along with some Distress Oxide Inks in Milled Lavender and Bundled Sage along with a tiny bit of Fossilized Amber to lightly and loosely watercolor the floral images.


After the florals were dry, I applied some Broken China and Milled Lavender first and then clear embossing paste over that through the Diamond Fade Stencil and then used my fingers to sprinkle on some Broken China and just a little Weathered Wood (why not!?) Embossing Glazes and heated them up.  These do dry shiny and you can dull them if you prefer with Steel Wool (Tim suggests this in the video rather than sandpaper because it will just lightly buff off the shine).  I decided to add a little Wilted Violet over the top which did dull it a little which I'm sure I could have wiped off, but decided I liked it just the way it was!  See how the floral image lines and colors show through underneath the embossed areas?  I did leave some areas with little or no powder because I wanted to leave some areas embossed but really clear... and that's how I roll!


My initial plan was just to add a simple sentiment over the top, but I decided to instead add a few of the smaller birthday images from the Punny Farms Pig set!  I colored them with Copics in colors Complimentary to the inks I used.. some Vs and some BGs and then built my sentiment from the Everyday Sentiments stamp set!

Just a few sequins (of course!) and I was done!

I'm playing along over at Double Trouble Challenge's Something, Anything and Everything Challenge that goes through Sunday the 6th!  Check it out!  There are prizes!!

I had a lot of fun playing with this one and I can't wait to play again!  Thanks for stopping and be sure to come again soon!


Friday, June 12, 2020

Sending Hugs - Miss Ink Stamps


Welcome back!  I've been playing with bleach again and learning some things!

I had a hard time finding paper to use for one!  Most of my paper is from Close To My Heart from many years of being a consultant and guess what!  It's no good for the bleach technique...lol!  I believe there is a coating on it that doesn't allow the bleach to do it's thing believe it or not!  It barely made a whisper of a mark.  After searching high and low I finally found a pad of Core'dinations Color Core Cardstock and tested a corner and was happy with the result so I cut a panel of it to use.


I used my Misti and stamped flowers and leaves from the Alice Background stamp set.  I did some masking so I had to work methodically.  I stamped in Black Memento Ink in the Misti and then without moving the paper again in Versamark and then embossed the lines with clear embossing powder.  Then I masked and did it all over again with the next flower or leaf.  It surprisingly didn't take very long... and you know how I feel about masking (hate it!), however, it wasn't too bad and I'm happy with how it came out. 


Once I was done stamping, I took a paintbrush and a small bowl of bleach and painted inside the embossed lines.  You don't have to be careful and can go right over the lines because they're embossed in clear... you don't have to worry about them getting bleached out!  After I was done coloring, I splattered some bleach over the entire piece.   I loved the look of the added colored pencil last week so I decided I was going to do that again.  There may come a day when I just leave it plain... but today is not that day!  I stenciled some Broken China Distress Oxide onto the upper right corner of the panel... just cause I wanted to!


Next I added a couple flowers and leaves in the upper right so I could have a cluster around the sentiment.  I wasn't happy with the way I layered them, so I stamped one of the flowers onto a scrap piece of the same paper in the same fashion, bleach painted it, colored it, cut it out and popped it up over my goof and I LOVE it... so I'll be doing that again.  Then I stamped my sentiment from Everyday Sentiments onto a little die cut piece in Versamark and embossed it in white.  This sentiment is all one line, but I stamped the words separately over each other so they'd fit on my die cut piece.  Finally I popped it up over my cluster of flowers and leaves.


I added some Peacock Jewels around because the colors were perfect and I was done!

That's me for today!  I hope you're enjoying my play with the bleach!  If you've never tried it before I highly recommend!  I love the vintage feel that I've been getting!

Thanks for coming and hope you'll come back soon!


Friday, June 5, 2020

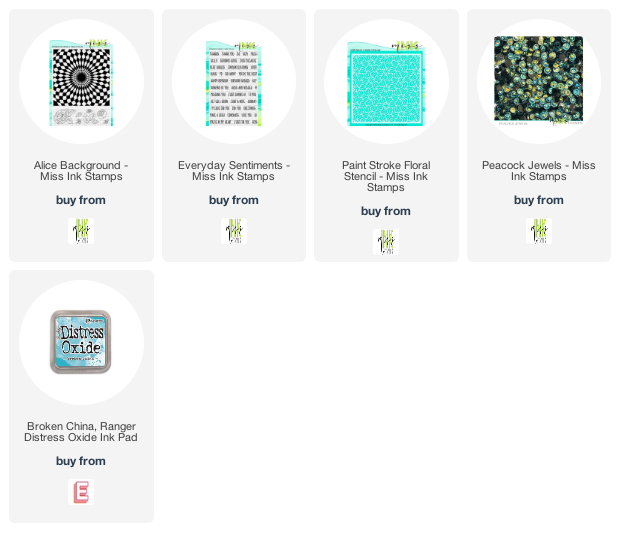
I'm Here For You - Miss Ink Stamps


Welcome back!  Today I'm sharing a card I made inspired by a crafty friend that I crop with virtually almost every Sunday.  We have a group of ladies that used to get together physically once a month and about halfway through the Pandemic so far we decided to start cropping virtually (thanks Mom!).  So last week, my friend Mare was playing with an old technique of painting with bleach!  I had never heard of it, but I don't watch a lot of videos... I just don't have the time.  She had been watching a Gina K Facebook Live on this technique... which I will admit I didn't watch... but I decided to play with the technique with the little bit I know.


Oh I had so much fun!  Basically I stamped the images from the Smokin' Caterpillars stamp set with Memento Espresso Truffle Ink in my Misti and then stamped over it with Versamark and embossed with clear embossing powder.  You may notice some extra sparkle... I think my clear powder ended up with some glitter in it...lol.. which I'm good with.. and not surprised.  I think the embossing is important so that the bleach doesn't make the outline fade and maybe the embossing kind of contains the bleach?... although that might make a fun no line type of thing so I might play with that a little.  (I'm guessing if you watch the video these things will be addressed...lol).  I decided to try it on kraft paper for a really neutral color pallet.
 

After my images were embossed, I took a brush and some straight chlorine bleach and painted the images... I had to be careful with this one as there is a lot going on and I didn't want to bleach any of the open spaces... and I did.. but it worked out okay because I just decided there was something behind there and treated it as such.  At first it seems like not much is happening, but as time goes on the bleach really takes hold.  You don't need a lot.  It was very cool.  After, I splattered on some bleach for good measure and then used a Diamond Fade stencil and some Brushed Corduroy Distress Oxide Ink to add a little extra... I masked the image on the right and let the diamonds go over on the image on the left... just 'cause... it was intentional and not an accident.


I got a really cool result that looked great as it was, but you know I can't leave anything alone.  I tried.  I was a little afraid and was going to just leave it, but it got the better of me and I pulled out some neutral Prismacolor pencils and did some light coloring.  I did use greens and browns, but then also went over those with a putty to diffuse the color a bit.  I am so happy I did this and I love the dimension it adds!

So finally a sentiment from Everyday Sentiments and some sequins from Trinity and I was done!  I'm gonna be playing with variations of this technique all month and I'll be up on the Miss Ink Stamps blog towards the end of June with a few tips based on what I've learned and experienced.

Thank you SO much for stopping and I hope you'll come again soon!!  In the meantime, please stay safe and share as much virtual love as you can.. I think everybody needs it right now!

Friday, May 8, 2020

You're The Best - Miss Ink Stamps


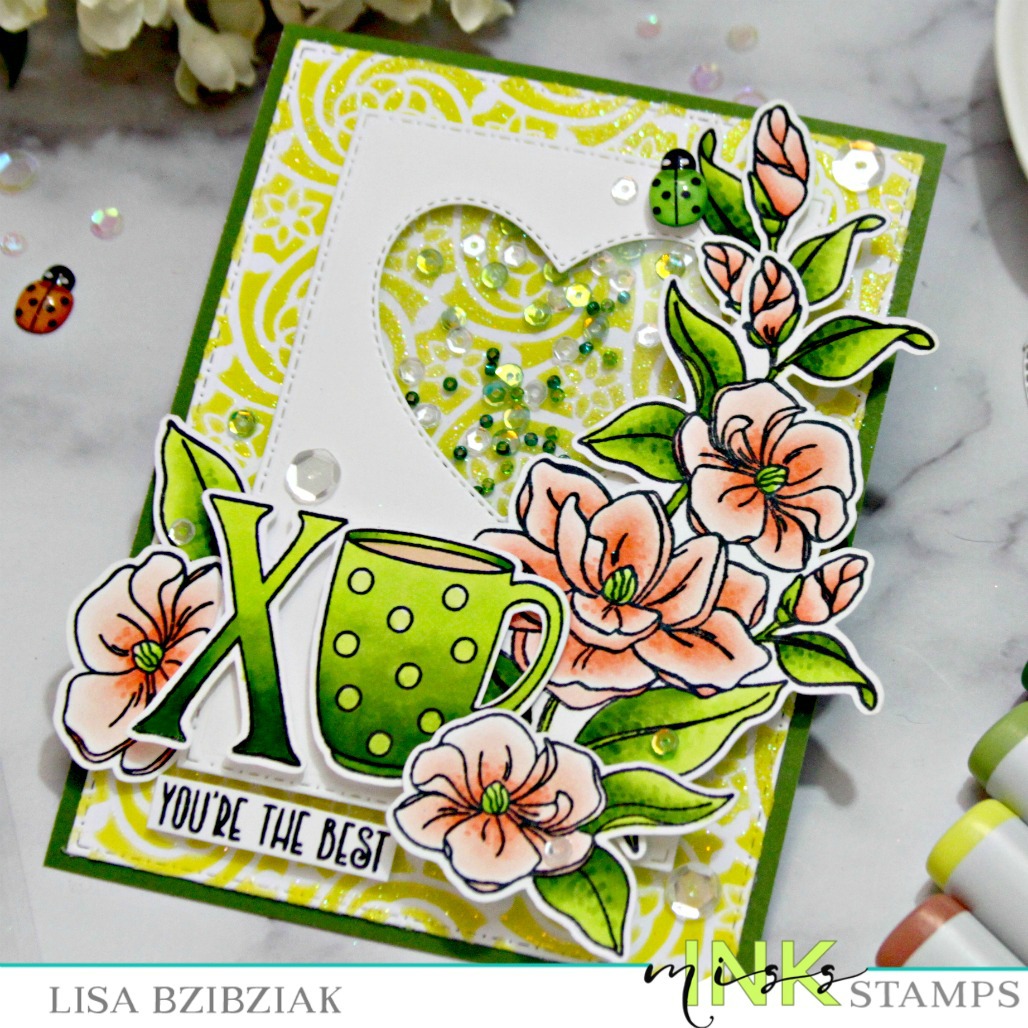
Welcome to some Miss Ink Stamps inspiration!  I am sharing a card for someone very special today!  Someone who is the best!

I started with the background.  I used the Mouse Flower Stencil to apply some Color Fuse Inks in a couple different greens.  I rinsed and dried the stencil before placing it back over the ink blended background and added some Ranger Gloss Translucent Texture Paste.  Then while it was wet I sprinkled just a little bit of glitter over it.. not evenly because I didn't want a totally glittered background but just some sparkle here and there and I figured whatever stuck... stuck!  I set it aside to dry.


I stamped, cut and colored all of my images from the Gardenia and Brewtiful stamp sets ahead of time and colored them... the flowers using some Copic in R000, R00, R01, and R02.   For the leaves I used YG01, YG03 and YG17.    

I cut a rectangle panel with a heart window by placing both dies in place at the same time and taping them in place with some washi.  That way I only had to run it through the Gemini once.  I added acetate to the inside of this panel and then foam tape around the heart and then as support to the rest of the panel.  I eyeballed where the panel would go and added some sequins to that area... just a few so that my stenciled part would still show through.


I colored the "XO" from the Brewtiful stamp set in an ombre style using the same colors as for the leaves of the flowers.  Then using varying thicknesses of foam tape, I added all of my pieces parts to the card and this sentiment from the Everyday Sentiments set!


I almost forgot about that sweet green ladybug up in the top right!  Isn't that so fun and cute!?  You can get those in the shop too right here and they come in a few different colors!

And that's me for today!  Well, no... I'm not going to tell you who it's for...lol!  But she's pretty special and I think she'll like it ok...lol!

Thanks for stopping and hope you'll come again soon!

Friday, March 13, 2020

A Magnolia Spotlight - Miss Ink Stamps


I'm up on the blog over at Miss Ink Stamps sharing a technique I've been playing with lately and the details of how I created this one!

Thanks for stopping here and if you'd like to visit me over there for more pics, links and tips, you can find my post here!

Friday, February 21, 2020

Dazzling Butterflies - Miss Ink Stamps


Don't you just love shaker cards??  I do and once you've made one you realize how easy they are (as long as you remember to put the acetate behind your window BEFORE you put the popup tape on (I may or may not have done this several times).

I knew I wanted a natural palette for this one so I started with a kraft base.  For my next layer I diecut the rectangle pattern; ink blended with Peeled Paint distress ink and then used Mowed Lawn through the Leafy Green stencil.  I wanted the stenciling and background to vary in depth and color so I was lighter in some areas than others.


Next I die cut my smaller rectangle panel, lining it up with the heart die inside and taping it so they would stay in place and my window would be where I wanted it.  The acetate was attached behind my window and I added popup tape to the entire panel but specifically around the heart to keep my bits and pieces contained to just the window.


I cut a smaller panel from the kraft and stamped the Have Heart image onto it with Versamark and embossed using Altenew Rose Gold for the wood slice lines.  I attached that piece to the stenciled layer, arranged my Dazzling Butterflies, some clear sequins and some beads in the center the stamped heart and then popped my window panel over the top.

Next I added my images from Springtime Banners and moved them around until I was happy with the layout.  Then I attached them with varying thicknesses of foam tape.


I stamped a simple sentiment from the Everyday Sentiments set (LOVE the wide variety of sentiments on this set!) onto a kraft piece of paper in Versamark and heat embossed with white embossing powder.  I just popped it up at the bottom and added a few sequins and I was done!

(Check out that color shift in those Dazzling Butterflies!)


And there you have it!  It's been extra warm here in the Desert Southwest and I've been feeling Springy lately... can you tell?

Thanks so much for stopping and hope you'll come back again soon!