Showing posts with label Embossing Paste. Show all posts

Friday, April 21, 2023

Hippo Birdie To You - Miss Ink stamps


Happy Friday!  I've got some Hippo Hooray from Miss Ink Stamps for you today!


I used the Ins and Outs Quatrefoil again along with Random Dots and Tiny Snowfall for the background.  I used embossing paste for the gold dots and embossed them in WOW Clear Gold Glitter and just added a few images from Hippo Hooray and a birthday sentiment.


Thank you so much for stopping!  Hope you'll come again soon and hoping to have some videos for you sometime soon.  Now that tax season is over I should have more time for that again... you can consider it something to look forward to or a warning...lol!

Come again soon!


Friday, October 8, 2021

Where The Bones Are Buried - Miss Ink Stamps


Well, you know I love the Slim's Whims stamp set from Miss Ink Stamps!!  I mean, my fur baby Slim was the inspiration!  I had so much fun creating this one using that one plus Oh Nuts and that AWESOME new Bone Chevron stencil available in the shop!


This was an easy one... just stamped, cut and colored the images and then used some Glossy Black Embossing Paste from Dreamweaver through the stencil.


Thanks so much for stopping!!  Hope you were inspired and you'll come again soon!


Friday, September 18, 2020

Dodon't Be A Stranger - Miss Ink Stamps!


Welcome back!  I've been continuing my play with Tim Holtz Distress Embossing Glazes this week and decided to get my bright on!  I decided this one would be a little lighter and brighter and without a plan I just started playing.


I started by blending on some Distress Oxide Inks in a rainbow pattern on a panel of Mixed Media Paper... starting with Lucky Clover, Squeezed Lemonade, Spiced Marmalade, Picked Raspberry and Tumbled Glass (I didn't need any purple since the pink and blue made me a nice shade of it!)  When I was done blending, I stamped the images from Smokin' Caterpillars onto the panel using Ranger Archival Ink. 


I sprayed my Paint Stroke Floral Stencil with iCraft Pixie Spray and after waiting a minute for it to dry to tacky, I laid it over my panel and applied some translucent Embossing Paste through it.  While it was wet, I sprinkled on some Broken China Distress Embossing Glaze over the top left corner and a little over halfway down, tapped off the excess and heated it to a pretty gloss.  Then I sprinkled Cracked Pistachio Embossing Glaze on the bottom left corner and heated that up.  I love how these glazes let the images below show through!


I stamped the Dodo and an additional mushroom onto mixed media paper as well with Ranger Archival Ink and watercolored them using the same colors of Distress Oxides that I used on my background.  When the Dodo was dry, I used a paint brush to apply some embossing pad re-inker to parts of the Dodo and sprinkled on some of the Broken China powder and heated that.  I fussy cut my images and popped them up onto the background.  


I stamped the sentiment and hand drew lines around it and cut it out.  I let it be a little wonky.  I had cut part of the mushroom image off and decided to add some of the Cracked Pistachio glaze on it and added it with the sentiment.  A few sequins and done!

That's me for today!  I hope you have enjoyed it and hope you'll give these powders a try!  They are the perfect compliment to the Distress Oxides and I can't wait to add more colors to my collection.
 

Friday, September 11, 2020

If Something Made Sense-Miss Ink Stamps!


Welcome back!  Today I've got some more Miss Ink Stamps and Ranger Distress Embossing Glazes!

I started this one ink blending some Fossilized amber and a little Vintage Photo onto a die cut panel.  I stamped the Gardenia images onto the paper using some Espresso Distress Oxide Ink.  I had meant to use the Archival Ink, because I knew I'd be watercoloring the floral images, and the ink did run a little when I did that, but it all just added to the vintage distressed look I was going for.  I used Vintage Photo to color in the petals, Fossilized Amber to color in the flower center, and Bundled Sage for the leaves.  I just took a scrap piece of plastic like from packaging and smoosh some ink from the pad onto it and then use a water brush to pick up the ink.


Next I added some more of the inks through the Diamond Fade Stencil using a blending brush and over that added some texture paste.  I did clean off the stencil in between the ink and texture paste to keep from getting ink in my texture paste jar as I applied it and it was easy to line it back up. Then while the paste was wet, I used my fingers to sprinkle on some Embossing Glaze in Fossilized Amber and Peeled Paint.  I heated that up and once it cooled, I used a paint brush to brush on some more embossing ink in each corner swiping upwards.  (I just put a few drops onto the plastic from my refill bottle and applied it with a paint brush.)  Then I sprinkled on more Embossing Glaze in Vintage Photo.  When I heated that up it was a little darker than I wanted so I took a Ranger Embossing Dauber and dabbed on some more ink lightly everywhere and then very lightly sprinkled on some Gold Embossing Powder to add a little light and sparkle.  Whew!!  It took some work but I finally got it where I wanted it.


I decided with the darker colors that the Have Heart wood slice image would be perfect to add my sentiment.  I stamped it with Memento Ink, cut it out and then colored it with some brown Copics.  I decided to tone it down by blending on some Distress Ink in Antique Linen over the entire piece and then Vintage Photo around the edges.  Then using my Misti I stamped the sentiment from the Alice Collection Wonderland Wisdom stamp set in Versamark ink and heat embossed it in gold.  Just a subtle sentiment that is probably going through a lot of our heads right now "It would be nice if something made sense for a change".  I added the main sentiment heat embossed in white and popped it up underneath.   Finaly, a few paper flowers from my stash from Prima and some sequins and I was done!


That's me for today!  Thank you so much for stopping by and hope you'll visit again soon!


Friday, September 4, 2020

Birthday Hugs & Kisses - Miss Ink Stamps


Welcome back!  It's a new month and for September I'll be focusing on using Ranger Distress Embossing Glazes in various ways!

For today I used them along with the Gardenia, Everyday Sentiments, and Punny Farm Pigs stamp sets and one of the awesome Diamond Fade Stencils.

If you're like me, you're wondering how these are different from any other embossing powder.  What I can tell you so far is they are made to be translucent (yes, there are others that are but this line is all translucent) which is very cool because you can use the glaze over images like I did here and it will show through.  Also, the colors are in your favorite Distress Ink colors which is awesome, but if you apply them over other colors you'll get many different looks.  All of this is important to know before you use them to be sure you get the look you want!  If you like videos (and even if you don't) I'd recommend you watch this one here of Tim's demo at Creativation.  I'm not a video watcher, but it was great to see the different ways he uses them.  I'll be playing all month and share with you what I discover! 


For this one I started by using Speckled Egg and Broken China Distress Oxide Ink to blend the background panel cut from Strathmore Mixed Media Paper.  (When I remember to, I like to start with this paper if I'm going to be using a bunch of different medium to avoid too much curling.)  


Then I stamped the florals from Gardenia using my Misti in the corners using Ranger Archival Ink.  Next, I used a water brush to lift some of the color from the flowers and leaves and then used the same brush along with some Distress Oxide Inks in Milled Lavender and Bundled Sage along with a tiny bit of Fossilized Amber to lightly and loosely watercolor the floral images.


After the florals were dry, I applied some Broken China and Milled Lavender first and then clear embossing paste over that through the Diamond Fade Stencil and then used my fingers to sprinkle on some Broken China and just a little Weathered Wood (why not!?) Embossing Glazes and heated them up.  These do dry shiny and you can dull them if you prefer with Steel Wool (Tim suggests this in the video rather than sandpaper because it will just lightly buff off the shine).  I decided to add a little Wilted Violet over the top which did dull it a little which I'm sure I could have wiped off, but decided I liked it just the way it was!  See how the floral image lines and colors show through underneath the embossed areas?  I did leave some areas with little or no powder because I wanted to leave some areas embossed but really clear... and that's how I roll!


My initial plan was just to add a simple sentiment over the top, but I decided to instead add a few of the smaller birthday images from the Punny Farms Pig set!  I colored them with Copics in colors Complimentary to the inks I used.. some Vs and some BGs and then built my sentiment from the Everyday Sentiments stamp set!

Just a few sequins (of course!) and I was done!

I'm playing along over at Double Trouble Challenge's Something, Anything and Everything Challenge that goes through Sunday the 6th!  Check it out!  There are prizes!!

I had a lot of fun playing with this one and I can't wait to play again!  Thanks for stopping and be sure to come again soon!


Tuesday, April 28, 2020

You're Owlsome! - Funky Fossil Designs!


Popping in quick to share this one using some new stuff I recently got over at Funky Fossil Designs!


Well, of course I had to get the Quirky Owls Stamp Set!  Did you ever doubt I would?  If you love artist Kimma Parish's designs, you should definitely check out the offerings over at Funky Fossil!  And of course this one with the glasses is my favorite...lol!


And while you're in the shop check out all of the awesome stencils!  And for the month of April (you still have a couple days left!) you can receive this Words of Friendship stencil free with any order!  I created this background using Kraft paper and some Wendy Vecchi Gold Embossing Paste while making all of my Christmas card backgrounds last week!  I used the cute frame die from A Jillian Vance Design to highlight the "You" word in the stencil.  (I love that the Instant Photo Frame set comes with a larger and this mini sized photo frame as well as a couple other dies including speech bubbles! And of course I scattered some of my favorite sequins from Trinity Stamps!


That's me for today!  Thanks so much for stopping by and do be sure to check out the Funky Fossil Shop!  This shop is in the UK and I am in the US... I ordered these items sometime after lockdowns started happening and waited patiently for this oh so Happy Mail to arrive in my mailbox.  It really didn't take that long and it was SO worth it.  If you've never ordered before you should give them a try!

And as always in these difficult times, please be patient with and support our friends that are running their small businesses through it all!

Come again soon!

Friday, January 3, 2020

On Your Wedding Day - CAS-ual Fridays Stamps


Happy New Year!  Today I'm up on the CAS-ual Fridays Blog and I'm sharing a card for a wedding and I've used lots of embossing powder on the background, sentiment and on the embellishments.  I used some gold mirror cardstock and was wondering how it would take the heat if I were to heat emboss it. 

I started by creating my background using the Starlequin stencil and applied some gold embossing paste through it.  Then while it was wet I sprinkled on some Vintage Peacock embossing powder and heated it up.:


Next I die cut one of the CASual Trees Fri-dies from gold mirror cardstock, smooshed the ends onto my embossing ink pad and then smooshed them into the powder.  I didn't worry about full coverage because I like things imperfect and wanted the gold to show through.


As you can see, the mirror cardstock took the heat ok, however, some of the embossing powder seemed to slide around a bit as I heated it.  After it cooled, I applied more embossing ink and more powder and heated it again... this time keeping the heat pointed straight down at it instead of coming from the side as I tend to do and that seemed to help more stay put.....


And this is what I ended up with... I LOVE it!   I used the same powder as in the background, Vintage Peacock, and I mixed in some plain gold die cuts for contrast in my "bouquet". I love imperfect things in my project, but if you don't, then you may want to use plain cardstock for this technique for more even coverage of the embossing powder and you can just keep adding more until you get the look that you like!
  

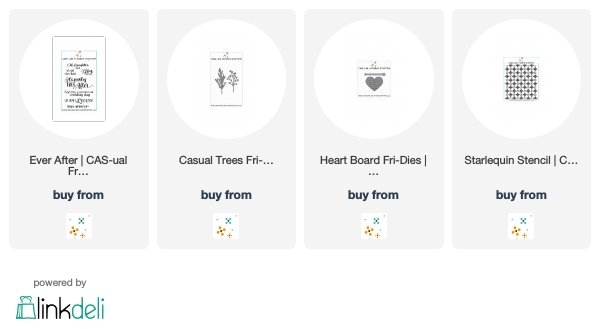
I love to cut apart the branches of this CASual Trees die cut so I can make a full "bouquet" and love how it coordinates perfectly with the background.  The heart from the Heart Board Fri-Dies is perfect as a vase.


I embossed the sentiment from the Ever After set in white onto some teal cardstock and added a matte of the gold behind it, tucking a few more of the branches from the CASual Trees die cuts in the corner.
  

I'm playing along with the Wow Embossing Powder January Challenge which is Love/Valentines Day/Wedding/Anniversary.  I've got that covered!

If you entered the giveaway for the Season's Giving Blog Hop, be sure to stop back tomorrow to see if you were a winner here at the CAS-ual Fridays Stamps Blog!  And if there are things that you need from the shop, I have this for you:


Thanks so much for stopping by!  Come back again soon for more inspiration!

Below are links to the CAS-ual Fridays Stamps Products I used today:


Thursday, November 28, 2019

A Special Freebie for a Happy Thanksgiving with CAS-ual Fridays Stamps!

Welcome back and Happy Happy Thanksgiving!  I hope you are having a chance to spend time with friends and family and to reflect on all the good that is in your lives right now.  I am very grateful today for so many things including that I get to be here sharing with you today!  We've got some really great things going on here starting now!

First... a sale!!!


Awesome sale, right??  And bonus!  If you spend $55 and will get the beautiful and adorable new stamp set Snow Angel for free!


Beautiful isn't she?  I've used this set today on a tag to play along with the 25 Days of Christmas Tags challenge!


I was inspired by Mindy Eggen's tag on Day 18!  That beautiful gold embossed sentiment background got me started!  I used my favorite Scallop Tag Fri-Dies as my base.


I'll be honest... It took me three times to get the tag right...lol!  I love imperfection as much as the next guy, but I learned some things along the way.  Patience for one...lol!  For me the easiest way to do this was to stamp each line separately with Versamark, powder, and emboss and then go on to the next.  Otherwise, these eyes could not keep track of where I was stamping.  And then I would just line the next set up so that the peace was lined up approximately the same distance on each line ... so for instance... I'd place the "P" of the 2nd line somewhere around the "C" and "E" on the one above it.  Don't check... I said approximately...lol!  AND!  Don't forget to swipe over the tag before you start with an antistatic pad... I only did it once the first time and that seemed to do the trick... although I never mind a little stray powder here and there.


I'm also playing along with the Wow Embossing Powder December Challenge on Facebook to use Gold!  I think I've done that here!  I used the Gold Metallic Embossing Powder.

I just love this sweet angel stamp and the oh so sweet sentiments included in it.  You can get her free with an order of $55 or you can buy her separately... or both during the sale!

AND even better there is a brand new Coffee sentiment set available!  Meet Stay Strong:


I used one of the sentiments on this card over this cool background I made using the Tin Roof Stencil, some embossing paste and some embossing powder!  Have you ever used embossing powder over embossing paste?  I love the extra dimension it gives to the embossed parts!  Here's how I do it:


When I use this technique, I like to start with Mixed Media paper because it's a little heavier and the combo of the paste with the heat embossing can really curl regular cardstock... plus sometimes I like to add other medium as well, so (if I remember) I usually start with this kind of paper.


I die cut my panel with a rectangle die from my stash.  Then I place it on a scrap paper because I tend to make quite the mess!  It's also easiest for me if I place some masking tape around the stencil to help keep it in place.  If I'm covering the entire panel, I keep the tape off the edge of where the paper is, but the tape still helps to hold it in place.  Then  I used my spatula to apply the embossing paste to the panel through the stencil.  And finally my new best friend when using any kind of paste with stencils is the Stencil Pal with it's long straight edge for smoothing out the past and it floats over the entire panel.


When you remove the stencil you're left with this...so pretty all by itself, right?  But while it's wet, you can if you wish sprinkle some embossing powder over it....


I used the Wow Vintage Peacock and it's sooooo pretty!  I thought it would be perfect for my Emotional Support Beverage sentiment.  My favorite part I couldn't capture, but when you heat this it's so fun to watch it change.  It bubbles just a bit as it sets and then you can watch the magic happen as more of your colors come out of that beautiful powder.


So not only do you have that cool sparkly embossing, but it's raised a bit too because of the paste.  I love it!!  To finish my card, I die cut my Coffee Cup and hearts from the Heart Board Fri-Dies out of Copic friendly paper and colored them using some colors that coordinated with the background.  I love the kind of tie-dyed look!


My coffee really does understand and love me.


So that's me for today!  I hope you enjoyed your stop and if you're inspired and ready to shop the sale I have something extra for you!


You can use my code or any of the Girl Fridays' codes for an extra 15% off these already fantastic sale prices!!  And don't forget if you spend $55 before shipping and tax you will receive Snow Angel for free!  That sweet angel needs to come to your house.

Happy Holidays and take whatever chance you have to relax and reflect (and maybe shop a little...lol... I know I will be)!  Come back again soon!