Friday, July 31, 2020

Miss Ink Stamps Release Sneak Peeks - Firetruck Duck!


It's Day 3 of Miss Ink Stamps Release Sneak Peeks!  Today we're sharing projects using the all fun Firetruck Duck!  Be sure to check out the

Dad joke anyone??...lol!  

I absolutely love this adorable set!  The first thing I thought of when I saw it was this two part joke and punchline design.


You may know I've been really loving this

Thanks so much for stopping by today!  I hope you enjoyed your visit and come back tomorrow for more Release Day and more inspiration!

Christmas In July - Rubbernecker Stamps!


Welcome back!  Today up on the Rubbernecker Blog we're celebrating Christmas In July!  We're sharing holiday projects that are not cards and you are gonna find some fantastic ideas!

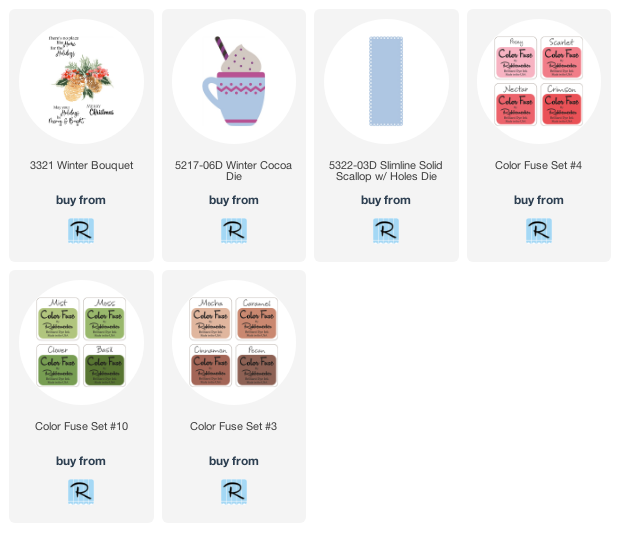
I've used one of the new Slimline dies and a few other things from the shop including that beautiful new Winter Bouquet layering stamp set to create a gift card holder that could hang on a tree!


  • I simply cut one of the scalloped slimline dies from white cardstock and scored it a little over halfway... when you fold it you can leave a little bit of a lip at the top like I did (or you don't have to).  I thought it might make it easier to have the gift card sit how I wanted. 
  •  Before attaching the two halves, I marked where the card would need to sit in order to stick up a bit and then used two sided tape at that point and down to where the score mark was so that when it was attached the gift card wouldn't slide down past that point making it easy for the recipient to take it out.  
  • Then I added glue to the scalloped edges and folded it in half and applied pressure to be sure it was attached.  (Again you want to be careful where you place your glue to leave room for the card to slide in... for this one I just added the glue to the scalloped edges).


  • I stamped the images from the Winter Bouquet set using my Misti and cut them out.
  •   Then I diecut my cup pieces (being sure to keep track of all the smaller pieces) all from white cardstock.  I stamped more winter bouquet images onto the edge of the cup... these weren't completely lined up which I thought gave it even more of a watercolored look for my pretty Christmas mug. 
  • Next I added some Antique Linen Distress Oxide Ink to the edges of the cup.
  • The stripe pieces were glued onto the candy cane... lining them up first and then adding glue to each piece.  Fine tweezers are perfect for this job.  
  • Then I colored the strips with my Copic marker.  
  • I stamped the sentiment using some Color Fuse ink and cut it out and then attached all of my decorations to the front of the gift card holder using varying thicknesses of foam tape.
  • Finally I added a gingham bow; some rope was tied through a scallop hole for hanging and scattered a few sequins!
Thanks so much for stopping!  If you'd love more holiday crafty inspiration head on over to the Rubbernecker Stamps Blog!

And through the end of today, July 31st there's a Christmas in July Sale!  You can save 15% on anything in the Christmas in July section!


Use code RUBBERNECKERJOLLY!

Come back again soon!


The links below are to all of the Rubbernecker Stamps products I used today!  If you choose purchase using these links I will receive a small compensation at no additional cost to you... and thank you!!:

Wednesday, July 29, 2020

Miss Ink Release Sneak Peeks - Hay Daze!


I am SO excited!  Today is the start of sneaks for the Miss Ink Stamps release and today we're sharing cards using the new Hay Daze background stamp!  All the new stamps will be available in the shop here on August 1st!


I absolutely LOVE this stamp!  It will fill up a slimline card design!


And you can use it for an A2 card!  And you can have so many different looks depending on the orientation and size of your panel!  I've cut a bunch of panels and I'll be using this one in August in a few different ways!


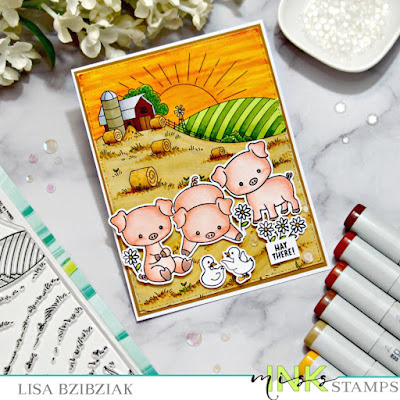
I colored my panels with my Copics and added the critters from Punny Farm Goats and Punny Farm Pigs... LOVE!!!

Follow Miss Ink on Instagram to be sure to see all of the New Release inspiration over the next few days and for your chance to win something from the new release!

Monday, July 27, 2020

Background With A Bang - CAS-ual Fridays Stamps


I'm up on the blog at CAS-ual Fridays Stamps with this one!  If you'd like more details and links, you can join me over there!

Thanks so much for stopping by!  Hope you enjoyed it you'll visit again soon!

Peace, Love & Rainbows - A Jillian Vance Design


I'm up on the blog over at A Jillian Vance Design sharing another one of the great new slimlines available in the shop!  If you'd like more details and links, you can join me over there!

Thanks so much for stopping and hope you'll come again soon!

Saturday, July 25, 2020

Build Your Stash Holiday Hop-Christmas In July 2020


I have some more Christmas for you today!  Today is the very first Build Your Stash Holiday Hop and start of a Linky Party!  Link up your holiday cards by August 1st for a chance to win some great prizes from some awesome sponsors!  All of the details are up on the Build Your Stash Holiday Hop Blog here!

Here's how I was inspired:


These awesome images are from a digital set by sponsor Angie Blom called Tropical Santa!  I hardly ever leave so much white, but I liked the contrast of these fun colors against that white background so I decided that was the way to go!  Aren't the lights in that palm tree cuuute!!  We have palm trees here and I don't know how people get lights up there.. a very tall ladder I'm sure... but people do at Christmas time!  

Thanks for stopping and I hope you are inspired to create some holiday cards!  In fact I have four more Christmas cards up on my blog today because every 25th of the month I share Christmas cards I've made that month.  Some crafty friends and I make Christmas cards all year long!   So check that one out and don't forget to also check out the BYS Blog and find out all of the details for today's hop and the linky party!

Also, if you love to make holiday cards all year long or just want some inspiration, be sure to join us in the new Build Your Stash Holiday Cardmakers Facebook Group! Hope to see you there!


Crafty Elves Countdown to the Holidays - July 2020 Edition!


Welcome back!  It's the 25th of the month and time for me and my crafty friends to share the Christmas cards we made this month!  Please be sure to visit them too once you get done here!


For me, this month's theme is Hoggy Holidays!  Here's how I was inspired:


Apparently I'm partial to swine!  Who knew!?  But I realized I had a couple adorable Christmas pig sets that I hadn't used yet, so I decided this was the month!

This one is from The Rabbit Hole Designs called Hoggy Holidays and I just love it!  There are two pigs in the set and I used both!  And for this one I used the sentiment strip from MFT Stamps and the little frame is from the same Impression Obsession die as the one below! (AND it's half off right now!  You can find it here!) The snowflakes on this one are from Lawn Fawn.  I'm a bit of a connoisseur of snowflake dies and this is one of my faves!


Along with that pretty and punny sentiment from the set!  It was perfect!  I used the larger frame from that Impression Obsession die and snowflakes from Reverse Confetti on this one.


And then there's this adorable Hogs & Kisses set from Sunny Studio!  It's an adorable little mini set with three holiday pigs and that speech bubble and all the words are separate so easy to build a sentiment!  I used the photo frame from Trinity, the bells from Your Next Stamp, the Mistletoe is an old Craftin Desert Divas die set and the landscape and tiny tree and house are from Trinity!


These guys are also from the Sunny Studio set and the Holiday Cheer paper I used on all four cards is from Sunny Studio as well! The frame is from Trinity and the snowflakes are from Reverse Confetti (no longer available).

I'm playing along over at Double Trouble's Christmas In July Challenge!  And they are partnering with the Heart2Heart Challenge to use your favorite tool (they are waving the requirement to use at least one CTMH product for this partnership, but you do get an extra chance to win at Double Trouble if you do!)  My favorite tools... and they are probably equal... are my Gemini die cutting machine and my Copics!  Check them out!

That's me for today! I hope you enjoyed your visit!

Now it's time for the winner of some happy mail from comments left on last month's post!

Kim!  Send me your snail mail so I can get your Happy Mail out to you!

We're doing it again this month!  I'm extra slow at getting stuff in the mail right now since I can't or won't go to the post office at this time, but I'm figuring it all out from home...lol!

Now be sure to hop on over to my fellow crafty elves' blogs (list above) and see what they have for you today!  Thanks for stopping and be sure to see my other post today which has one more Christmas card in it!


Friday, July 24, 2020

How Do You Make A Mouse Smile? - Miss Ink Stamps


Hello!  Welcome back!  I have been having so much fun this month playing with the Say Cheese stamp set and painting with glitter!  I think I saved the best for last.. well, at least my favorite!


With a sentiment like this, you just NEED to have a photo with friends!  I used all of the critters from Say Cheese along with the present, balloons and birthday hats from Punny Farm Pigs!


I painted the balloons with chunky glitter mixed in Glossy Accents in each color of the balloons!


And you may be able to tell that right now I'm quite partial to the Halftone Diamond stencil!  It is SO much fun and I love the white space it leaves along with all of that color!

We've got some cool stuff coming up from Miss Ink starting next week so be sure to check back!  SO excited!

Thanks for stopping and hope you'll come again soon!


Thursday, July 23, 2020

Make A Wish and the New Slimline Collection-Rubbernecker Stamps


Hi all!  Lisa here and today I'm sharing some more of those adorable foxes from the Fox clear stamp set along with a couple more of the new slimline collection available over in the Rubbernecker shop!  I just love the separate solid and inside dies for the slimlines so you can choose your combination of outside edge cut and shape and size of windows in the center!

Here's how I was inspired:


I am just in love with these adorable foxes!!  And the brand new Balloons die was perfect to go along with them for this one!

Here's how I made it:

Shaker Element:

  • I started with an orange base from The Paper Cut Slimline Cards Festive Variety.  These are 8 1/4" x 3 1/4"
  • Then the plaid layer was cut to 8 1/8" x 3 1/8" and adhered to the base.
  • Next, I cut the shaker window layer using two of the new slimline collection dies.


  • I cut a piece of blue cardstock that coordinated with my plaid to around 8 1/4 x 3 1/2.. big enough to fit the Slimline Solid Postage die.
  • The Postage die was placed onto the cardstock and fastened using some washi tape to keep it in place.
  • Next, I centered the Slimline Inside Rounded Square die inside the Postage die leaving an equal amount of space around each side and then fastened it in place both to the cardstock and to the outside die.
  • I ran this through my Gemini die cutting machine to cut my window layer.


  • Next, I cut a 7 1/4" x 2 1/4" piece of acetate to fit over the windows in the shaker layer and adhered it to the back of the window layer.
  • Then I added foam tape around all of the edges and in between the windows so that I could have three separate shaker areas.  The edges are nice and wide with this combination so 1/4" foam tape fit nicely.
  • I piled a mix of sequins onto the plaid paper estimating where the center of each of the three windows would be and removed the paper from the foam tape and placed the window layer over the sequins.  Once the layer is firmly on you can shake the base around to mix up the sequins.  If you don't care for the "eyeball" method...lol... next time around I'll share with you another way to add your shaker fillings that might be easier if you're just starting out creating shakers.


Card Layout:
  • I stamped, die cut and colored the foxes from the Fox stamps set.  Copic Markers YR23, YR27 and YR31 were used to color the foxes and R02 for a little bit of color on their cheeks and ears.
  • Balloons were cut once from a polka dot paper that coordinated with the plaid and twice more from white.


  • The white balloons were colored using a blending brush and Color Fuse inks in Crimson, Apricot and Autumn.
  • The white strings were attached to the back of the balloons with a small dot of glue.


  • Next the sentiment from Kittie Says Phrases #1 was stamped onto the sign from the Fox stamp set.  (Love that the separate sign has attached foxy hands so it can be added or not and it looks like the fox is holding the sign... adorable right??)  This sentiment is one thin line, but I made it fit in the sign by inking up only the "Make A" first and stamping it at the top of the sign and cleaning it off and doing the same with the "Wish" part of the sentiment and centering it underneath the first.
  • Finally all of the images and balloon die cuts were added to the front of the shaker with varying thicknesses of foam tape with balloon strings tucked behind the images and a few sequins scattered on the front of the card.


  • And there you have it!  That is me for today!  I always tend to use these adorable foxes on more feminine cards and it was fun to change it up a bit and using them to create this card that could be for anyone!

    Thanks so much for stopping and hope you enjoyed it!  Come again soon for more Rubbernecker inspiration!


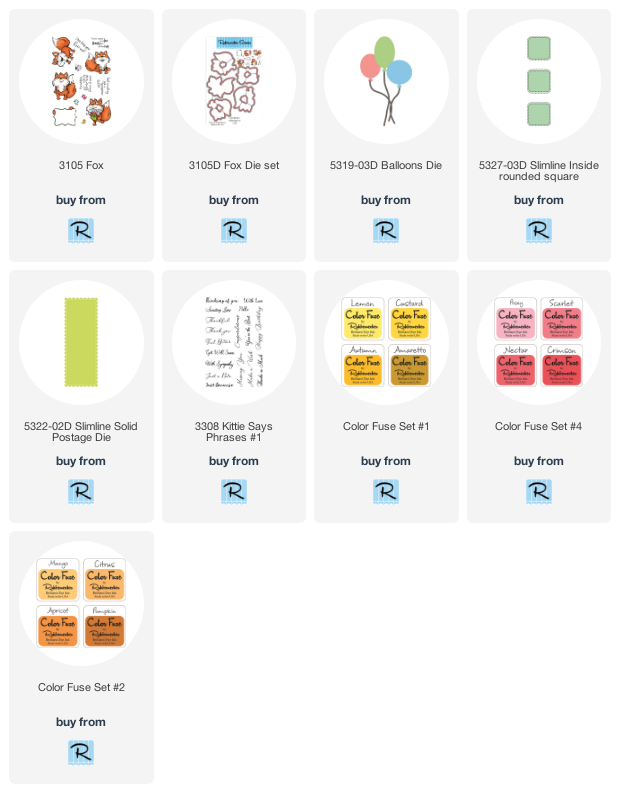
    Below are links to all of the Rubbernecker products I've used today.  Should you decide to purchase using these links I will receive a small compensation at no additional cost to you.  And thank you!

    Wednesday, July 22, 2020

    Caffeine Fueled Paper Play - Javalicious!


    I'm up on the blog over at the Coffee Loving Cardmakers Blog and playing with some Amuse Studio stamps along with lots of other Super Sponsor products!  Hope you'll hop on over there for links and details!  Here's a sneak peek!


    Thanks for stopping and hope you'll come again soon!
    Monday, July 20, 2020

    Eat Cake - A Jillian Vance Design!


    I'm up on the blog over at A Jillian Vance Design and I'm using the new plaid slimline die!  If you'd like more links and details join me over there!

    Thanks so much for stopping and hope you'll come again soon!

    Friday, July 17, 2020

    I Will Sit With You - Miss Ink Stamps


    I'm back again today with some more Miss Ink Stamps!  I'm taking a break from using the Say Cheese stamp set just for a moment (big plans for that one for next week!) to bring you some pretty Gardenia florals along with the In The Dark sentiment... and of course I'm painting with glitter again!


    I painted my stenciled background again but this time I painted over some black texture paste that I applied through the Circular Harlequin stencil.  After I added the paste, I added a mixture of white and chunky black glitter over it.  I threw a few of those Dazzle Stars in also while it was wet.


    I painted some of the white glitter onto the flower petals too after coloring them lightly with Copics and then added the frame, florals and heat embossed sentiment to the card.


    And that's me for today!  Thanks so much for stopping and hope you'll come again soon!

    Thursday, July 16, 2020

    Have An Ice Day - Miss Ink Stamps


    I'm up on the blog over at Miss Ink Stamps and painting with Glitter!  If you'd like links and details on this one, please do join me over there!

    Thanks so much for stopping and come again soon!

    Monday, July 13, 2020

    What's Up Friend - CAS-ual Fridays Stamps


    Welcome back!  Today I'm sharing another card using the Bold Flower stencil along with the Somebunny stamp set and a few other things!  I'm painting with Glitter again on this one because I'm playing with this technique this month and I love it!


    I started by using Distress Oxides and the Bold Flowers stencil to add the two largest flowers to my slimline sized card.  I knew I wanted to use a few colors on the petals so I stuck with the largest flower on the stencil and added one off the left edge at the top and off of the right edge at the bottom.  Then I took a paint tray and added a little bit of anemone colored Eco Sparkles glitter from Wow and some Glossy Accents and mixed them together.  You don't need a lot and you can always add just a little water to the mix if you need to thin it out a bit while you paint.


    After I got done "painting" the glitter onto the purple areas, I rinsed out my paint tray and grabbed pink, orange and yellow glitters from my stash and repeated the process with each.... rinsing out in between so that cleanup would be easy... and it was!  Before I set that aside to dry I sprayed some Distress Oxide Spray in purple over the panel and then set it aside.


    I cut the Friend word die from the Sweet Friends word die set once from purple card stock and twice more from white and stacked and glued them together.  Then I decided it would be fun to paint the sentiment with glitter too, so I did!  I wanted even more dimension for this part of my sentiment so I decided to add additional Glossy Accents over the top of it and set it aside to dry.


    I colored in my bunny and balloon and then decided the balloon could use a little sparkle too...lol!  So I broke out the chunky orange glitter and liquid glass and proceeded to paint that too... I can't get enough!


    I absolutely love the shimmer of the glitter and glossy accents painted on!  It's much lighter than just adding glitter to your project.  The Glossy Accents is light enough that it doesn't buckle your paper, and there is no glitter to fall off of your project either at your house or your recipients!  It's all securely in place with the Glossy Accents... smooth and sparkly!

    I used one of the short sentiment pieces from Somebunny along with the Friend word die to build my sentiment.


    I just added some jewels and sequins and I was done!

    So thanks for joining me today!  I hope you enjoyed it!  Should you see something that you must have today, I have this for you:


    And you just might find some really great deals in the sale section too!

    Come again soon for more CAS-ual Fridays Inspiration!