Showing posts with label Authentique. Show all posts

Monday, July 6, 2020

Thanks For Owl You Do - A Jillian Vance Design


I'm up on the blog over at A Jillian Vance Design with some more Hootie The Owl!  This time around he's looking quite distinguished!  If you'd like links and details you can hop on over there and join me!

Thanks so much for stopping and hope you'll come back soon!

Friday, September 6, 2019

Cutting Cafe Inspiration - Anything Goes!


Welcome to some Cutting Cafe Inspiration!  This time around it's Anything Goes so I had some fun playing around with one of my fave files, the T Shirt Shaped Card File.  I love this file because it's so fun to create any T Shirt you wish you had!  A great canvas for any design!  I decided it's finally time to get my Halloween on!


For this one I used some Halloween themed papers from my stash from Authentique and My Mind's Eye.  Of course one of them had to be plaid and I love that skeleton with a top hat that I cut from one of the papers!  And I had the perfect chipboard sticker for the sentiment!


And of course there is coffee!  Probably my very favorite file is the Coffee Cup Shaped Card 2.  I used the layering pieces and made them small enough to fit on my T Shirt card (the best part about SVG files vs dies... like digital stamps you can re-size them!) and another perfect sentiment from those chipboard stickers!


And that's me for today!  #IdbuythoseTshirts!

Thanks so much for stopping!  Be sure to hop on over to the Cutting Cafe Blog and comment there for your chance to win three files of your choice and then see what everyone else has created for you today!

Monday, June 17, 2019

You're The Best-Rubbernecker Stamps


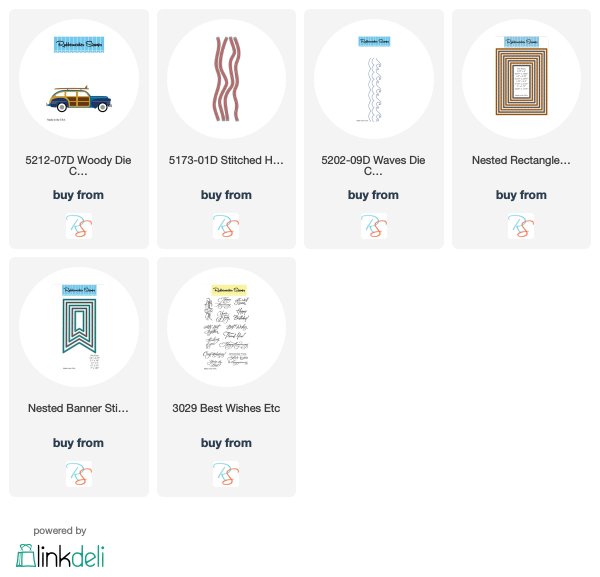
It's time for some Rubbernecker Stamps Inspiration!  I have a difficult time when it comes to making masculine cards usually, but when I saw this fantastic Woody Die I got SO excited... the possibilities are endless!

I started with my fave first layer, the Nested Rectangle Small Stitch Dies.  I chose some great masculine papers from Authentique.  Then I layered on a couple of banners from the Nested Banner Stitched dies.


I created my "background scene" by cutting one of the smaller stitched rectangles from some kraft paper and another pattern from the Authentique pad.  Then I cut a couple layers using the Stitched Hills and Waves.  I layered them together adding a little thin foam tape between the two wave pieces so there would be a bit more contrast... I LOVE these waves dies!!


And then I cut and assembled my Woody car.  Those lines are small, but boy is it worth keeping track of them!  I didn't add the included surfboard for this one, but I love that it's in the set.  These die blades are all attached on one metal plate.  I just cut one set out of white and one out of the woodgrain.  It was great to have a set of both colors so I could play around with which pieces I wanted where.  For the wheels and the little metal pieces on the bumpers and hitch, I just used a small cardstock piece of the colors I wanted on that section of the plate.. and it's on one end so I didn't have to run the whole plate through... easy peasy!  I put a little foam tape under the front and rear fenders (um?  I think that's the right term...lol!).  I absolutely love this die!!  


And that's me for today!

I can't wait to use this die again and the color combinations are endless.. I've got lots of ideas running through my head!

I'm playing along with the Transport It Challenge over at Simon Says Stamp's Monday Challenge!  I'm also playing along at Double Trouble's Embossing Challenge (my sentiment is embossed) and at Pile It On's Transportation/Vacation challenge!  You should check them out!

Come back again soon!  Thanks for stopping!

Thursday, February 21, 2019

Cutting Cafe Inspiration - Shadow Box Cards!


Welcome to this edition of Cutting Cafe Inspiration!  Today we're playing with the Shadow Card File and I've used that and lots more today!  Lots of photos because it's almost two cards in one...lol!  I decided to go with a bit of a St. Patrick's Day theme...and Regina has a bunch of files in the shop that are good for this... you can find some of them here and a bunch more here!!


And for the Shadow Card itself, the wow is on the inside!  This card is so cool because it lays flat when it's closed but then you get this great pop up shadow box when you open it!  I used papers from the Authentique Charmed paper pad that I purchased last year... you may still be able to find one... if you do, pick it up because it's fantastic!


I started with the Lucky To Know You Overlay... I resized it so that it would fit inside my scalloped die cut background.  I got super lucky that it fit inside the stitched frame as well!  It gave me plenty of room to add some wider popup tape to create a shaker!


I used a few dies from my stash as well to decorate using "lucky" as the theme... and lots of sequins from my stash from all kinds of places!


Another cool thing about this Shadow Card File is the window pieces also come in a Circle shape (which has cool circle shaped sentiment frames!) and a heart shape.  So many possibilities!  Perfect to add a shaker on the inside if you wanted!  There is a fantastic video that you should watch before you start... so helpful and made this quite easy to put together.  You can find that at the bottom of the page where you'll find this file... right here!


I used a sweet sentiment from the Authentique paper pad... perfect wish to send to a friend that you are Lucky To Know.


And a view so you can see the depth this adds!  I can't wait to see what you create using this file!


I'm playing along over at Simon Says Stamp's Work it Wednesday... it's all about Green and Gold!  I've got that covered!  And I'm also linking up to the Simon Says Stamp Wednesday Challenge which is No Stamps Allowed... I didn't use any... not one!  I'm also playing along with the Doodles Paper Playground #showmeyourshaker contest on Instagram!  You can find info about the contest on their blog here!

That's me for today!  Be sure to head on over to the Cutting Cafe Blog to see what my teamies have created for you today and comment there for your chance to win one of three files of your choice!  And please be sure to tag me should you use this file so I can see how you use it!

Thanks so much for visiting today and I hope to see you again soon!


Sunday, October 7, 2018

The Cutting Cafe Inspiration - Pillow Boxes


Welcome to some Cutting Cafe Inspiration!  This time around we're playing with Pillow Boxes of the Halloween sort!  We were also lucky to get to play with some Digital Papers from Tabitha Skagg's CuteNCraftyMommy Shop on Etsy!  Tabitha is one of our new teamies and a big welcome to her, K M Meena Herale, Kim Hodgson, Justine Dandrea, and returning to our crafty family, Donna Espiritu!  Lots of new places to visit!

Edited to ad this (Woo hoo)!


These Pillow Box files are just about the easiest!  The box itself cuts in all one piece and scores where you need to fold.   With the scores the Cricut took a while to get it cut and once I pulled it off the machine I had it together in no time.   Although instead of leaving the window clear, I decided to make shakers out of them!  And the ends are not adhered so they are easy to open, get out the goodies and save! (make sure you tell the kids that though so they don't just rip it open...lol!)


So usually when you put these together, you'd pull them off of your cutting machine, place a piece of acetate over the window on the inside of the box, and then fold it up and glue it together!  All I did differently was add some foam tape around the hat and spider, a few sequins on top of the window, and then attached a piece of design paper to that, choosing which side I wanted to have show through the window (well, of course I chose the plaid... this yummy paper is from Authentique and I got mine in the Cutting Cafe Shop here... thinking I might need to get another 6x6 pad!

Speaking of design paper... don't you just love the paper that I cut the boxes from?  This was made using the digital paper set from CuteNCrafty Mommy!  I just opened the paper I wanted, printed in an 8 1/2 x 11 format, and placed it on my Cricut Mat for cutting!  The sizes indicated just fit on the printed 8 1/2 x 11 sheet but you could adjust the size of the box and make it smaller... just make sure you size the box and the included outline at the same time if you're going to use the outline... which I did on my next one:


I felt like this one needed an outline so that his many many legs would stand out... love the way it looks.  This shaker doesn't shake as much because the wide window is a bit more curved than the hat so it makes it tighter... but it shakes!  And you may have noticed I used the inside cut from the spider outline as an embellishment on my witch hat pillow box!  This beautiful distressed orange paper is also from the digital set and was just what I needed!  I wanted something not too busy, but still with a little bit of interest.  And there is an October challenge over on the Cute N Crafty Challenges Group and I'm adding this one to that Challenge!

For most of my embellishments I just pulled out my box of crafty Halloween goodies and went to town!

I'm linking up to the current Double Trouble and Crafter's Cafe Challenges... they are partnering this time around and both are Black/White and one Additional Color!

So thanks for stopping!  Be Sure to head on over to the Cutting Cafe Blog... comment there for a chance to win three files of your choice and then see what everyone else has created for you today!  And be sure to leave some extra love for our new teamies!

Be sure to come back on Tuesday for something special!


Saturday, June 9, 2018

Papertrey Ink Make It Monday #324: Lots O' Dots


Popping in with a "quick" card I made for the Make It Monday challenge over at Papertrey Ink which is Lots O' Dots this week!  I had to make a birthday card for a co-worker's husband.  He's turning 70 this year and he is always baking for us at work!  Yes... he bakes.. and he's quite awesome at it!

So, I knew I wanted to use my new Shape Shifters Circle 1 Die and I knew it had to be manly and figured I'd use my Kat Scrappiness Condensed Number dies for a 70 and that's about it.  And when I saw the pretty butterfly in the inspiration video for this challenge, which I just happen to have (also new) it made me sad I couldn't use it..lol!  And I didn't really have any man stamps that would lend themselves to polka dots... in fact, I really don't have much in the way of man stamps at all... what can I say?  I loves me some girly papercrafting stuff.  I scrapbooked boy pages for almost a decade before I discovered cardmaking.

So, I pulled out my Authentique "Rugged" man paper and just started cutting things!


Isn't that Shape Shifter die pretty cool?  I placed a solid blue piece behind it in a dark blue so that the design still showed up, but wasn't too distracting.  I also had a blue diecut behind it and offset my top piece just a bit and popped up the top piece.

I cut the numbers once from the design paper and then three more times from cardstock and stacked them.  I just love the way it adds so much dimension.  Then I took the flames from some candle dies and added them to the top to make them number candles.


Then I cut my sentiment using the Boho Rounds Sentiments but didn't die cut the entire sentiment... all I needed was the word Enjoy.  I added it to the card and added some liquid glass to it.  I decided my dots would just be scattered dots on the paper.  I am not happy with the performance of these gold Nuvo Drops.  They didn't keep their shape and some ended up more flat than I wanted.  Note to future card making self.  But for these purposes, it'll work.  I also added some to the top left corner to balance out the card a bit.

There.  Done.  I need two other man cards this week and thank goodness I already have them made because this one took a lot out of me....lol!  I really do need to get better at this.  Maybe I'll try another soon.

Thanks for stopping and please do come back soon!

Wednesday, March 21, 2018

Cutting Cafe Inspiration - Custom Word Shaped Cards


Welcome to some Cutting Cafe Inspiration!  This time around we're playing with some custom Word Shaped Cards... and well, of course you know what word I requested!  For my first one I used these pretty Authentique papers....along with some pretty flowers and sequins.


We chose our word and then two sentiments to go along with it... I chose to incorporate the word from the card into the sentiments... 


Here I cut out a COFFEE pot and a COFFEE cup from the paper to use as embellishments... (they are NOT teacups...lol!)


For my second I used this cool paper from a Multi Craft Coffee Time packet that I got at my LSS.  And I had these adorable stickers from Doodlebug to embellish... this sentiment is "If you bring me COFFEE" ... 


I did print the other part of the sentiment but then these Doodlebug stickers had this one on it, so I opted to use it instead... cute, right??

So thanks for stopping!  If you could have any word made into a shaped card, what would it be???  Check out what everyone else created over at the Cutting Cafe Blog and comment there for a chance to win!


Thursday, March 15, 2018

Paper Sweeties March 2018 Blast From The Past-Day 2


Welcome to Day 2 of Paper Sweeties March 2018 Blast From The Past!  We're sharing projects made with previously released Paper Sweeties goodness!  Today I decided to use my favorite cup to color some Easter eggs!

I started with a Scallop Circle frame cut from vellum so as not to cover up my background paper, but still bring my images all together.


I diecut the cup using the Keep Calm and Drink Coffee Sweet Cuts!  Then I stamped the drippy paint on using an image from the You Add Color To My Life stamp set.  Then I used the stamped image to apply some Nuvo Drops to the cup to look like drippy paint.  Mine is a little bumpy and I kept trying to smooth it by adding more drops, but this is what I got.  Not quite my vision, but I suppose messy paint is messy paint.  The paint brush is also from the same set and those pretty polka dot eggs are from the Hippity Hoppity Easter set.  I enhanced the dots also with some Nuvo drops.


The sweet sentiment is also from Hippity Hoppity Easter and I cut a banner using the Sweet Borders Sweet Cuts and heat embossed it on to add another shot of that bright green I used on the green egg.


I'm playing along the bottom row here with Flowers, Any Shade of Pink, and Polka Dots!  You should check it out and play along!

Now, check out what everyone has created for you today!


Wednesday, March 14, 2018

Paper Sweeties Blast From The Past March 2018


Happy St. Patrick's Day and welcome to the March 2018 edition of Paper Sweeties-Blast From The Past!  We're sharing projects made with previously released Paper Sweeties products this month and for today I wanted to create something green to celebrate the day!  I used the beautiful Authentique papers that I've been using for all of my St. Patrick's Day cards including one of the sentiments included in the 6x6 paper pad.


I created these fun four leaf clovers using the heart dies from the Be Happy Sweet Cuts set.  There are two sizes of hearts and I cut 8 of the small and 4 of the large and then glued them together to make a clover.  Love how they turned out!


I cut a frame using the Square Scallop Frames Sweet Cuts from the Design Papers and flipped the inside square around for just a little contrast.  I chose my sentiment from the papers and then since it was so dark, I matted it with a very light piece from the papers.


I especially love these smaller clovers and these white paper flowers from my stash were perfect to lighten up the card and were just right as clover blooms.  A few of my favorite Gold Sequins scattered around and I was done!

Thanks for stopping by today!  Don't forget to check out what everyone is sharing for today!  Come back tomorrow for more fun!