Showing posts with label Alcohol Ink. Show all posts

Monday, March 4, 2024

Green and Gold - Dancing Daisies


I'm up on the blog over at A Jillian Vance Design with some Dancing Daisies!


Double Trouble Challenge Blog has a fun challenge going on and green is the goal!


Use Green and add some gold for the twist!  And get even more chances to win by playing along over at Festive Friday:


Thanks so much for stopping!  Come again soon!


Thursday, April 6, 2023

Sending You A Rainbow


Hey friend!  So glad you're back!  I've got some alcohol ink on EVO paper for you today!  I had a girls' weekend a while ago with a friend and made a bunch of alcohol ink backgrounds and I thought it was time to put them to use!


I decided I'd cut those great butterflies from Waffle Flower Stamps out of one of them.  I mounted it on that fab grooved paper from my last Your Paper Insider quarterly box!  I cut the rainbow word die from that awesome sequin glitter paper also from the box and added one of the sentiments from the Waffle Flower Rainbow Stamp and Die combo.  I used my circle punch to cut out circles from the scraps and used them as gems... I adhered them with glue and added Glossy Accents over the top!  


I'm playing along over at Double Trouble Challenge Blog with my rainbow of butterflies!  I didn't use the sketch for the twist, but you can for more chances to win and to link up with their partner!


That's it!  Easy peasy!  Thanks so much for stopping!  Hope you'll come again soon!


Sunday, January 29, 2023

Hello Butterflies - Thermoweb


Welcome back!  I've got some pretty butterflies for you today with some alcohol inked EVO panels, Deco Foil and Adhesive Transfers!


I actually created this one a while ago and started this post and forgot about it!  I'm not sure how because Iove this one, but I did.

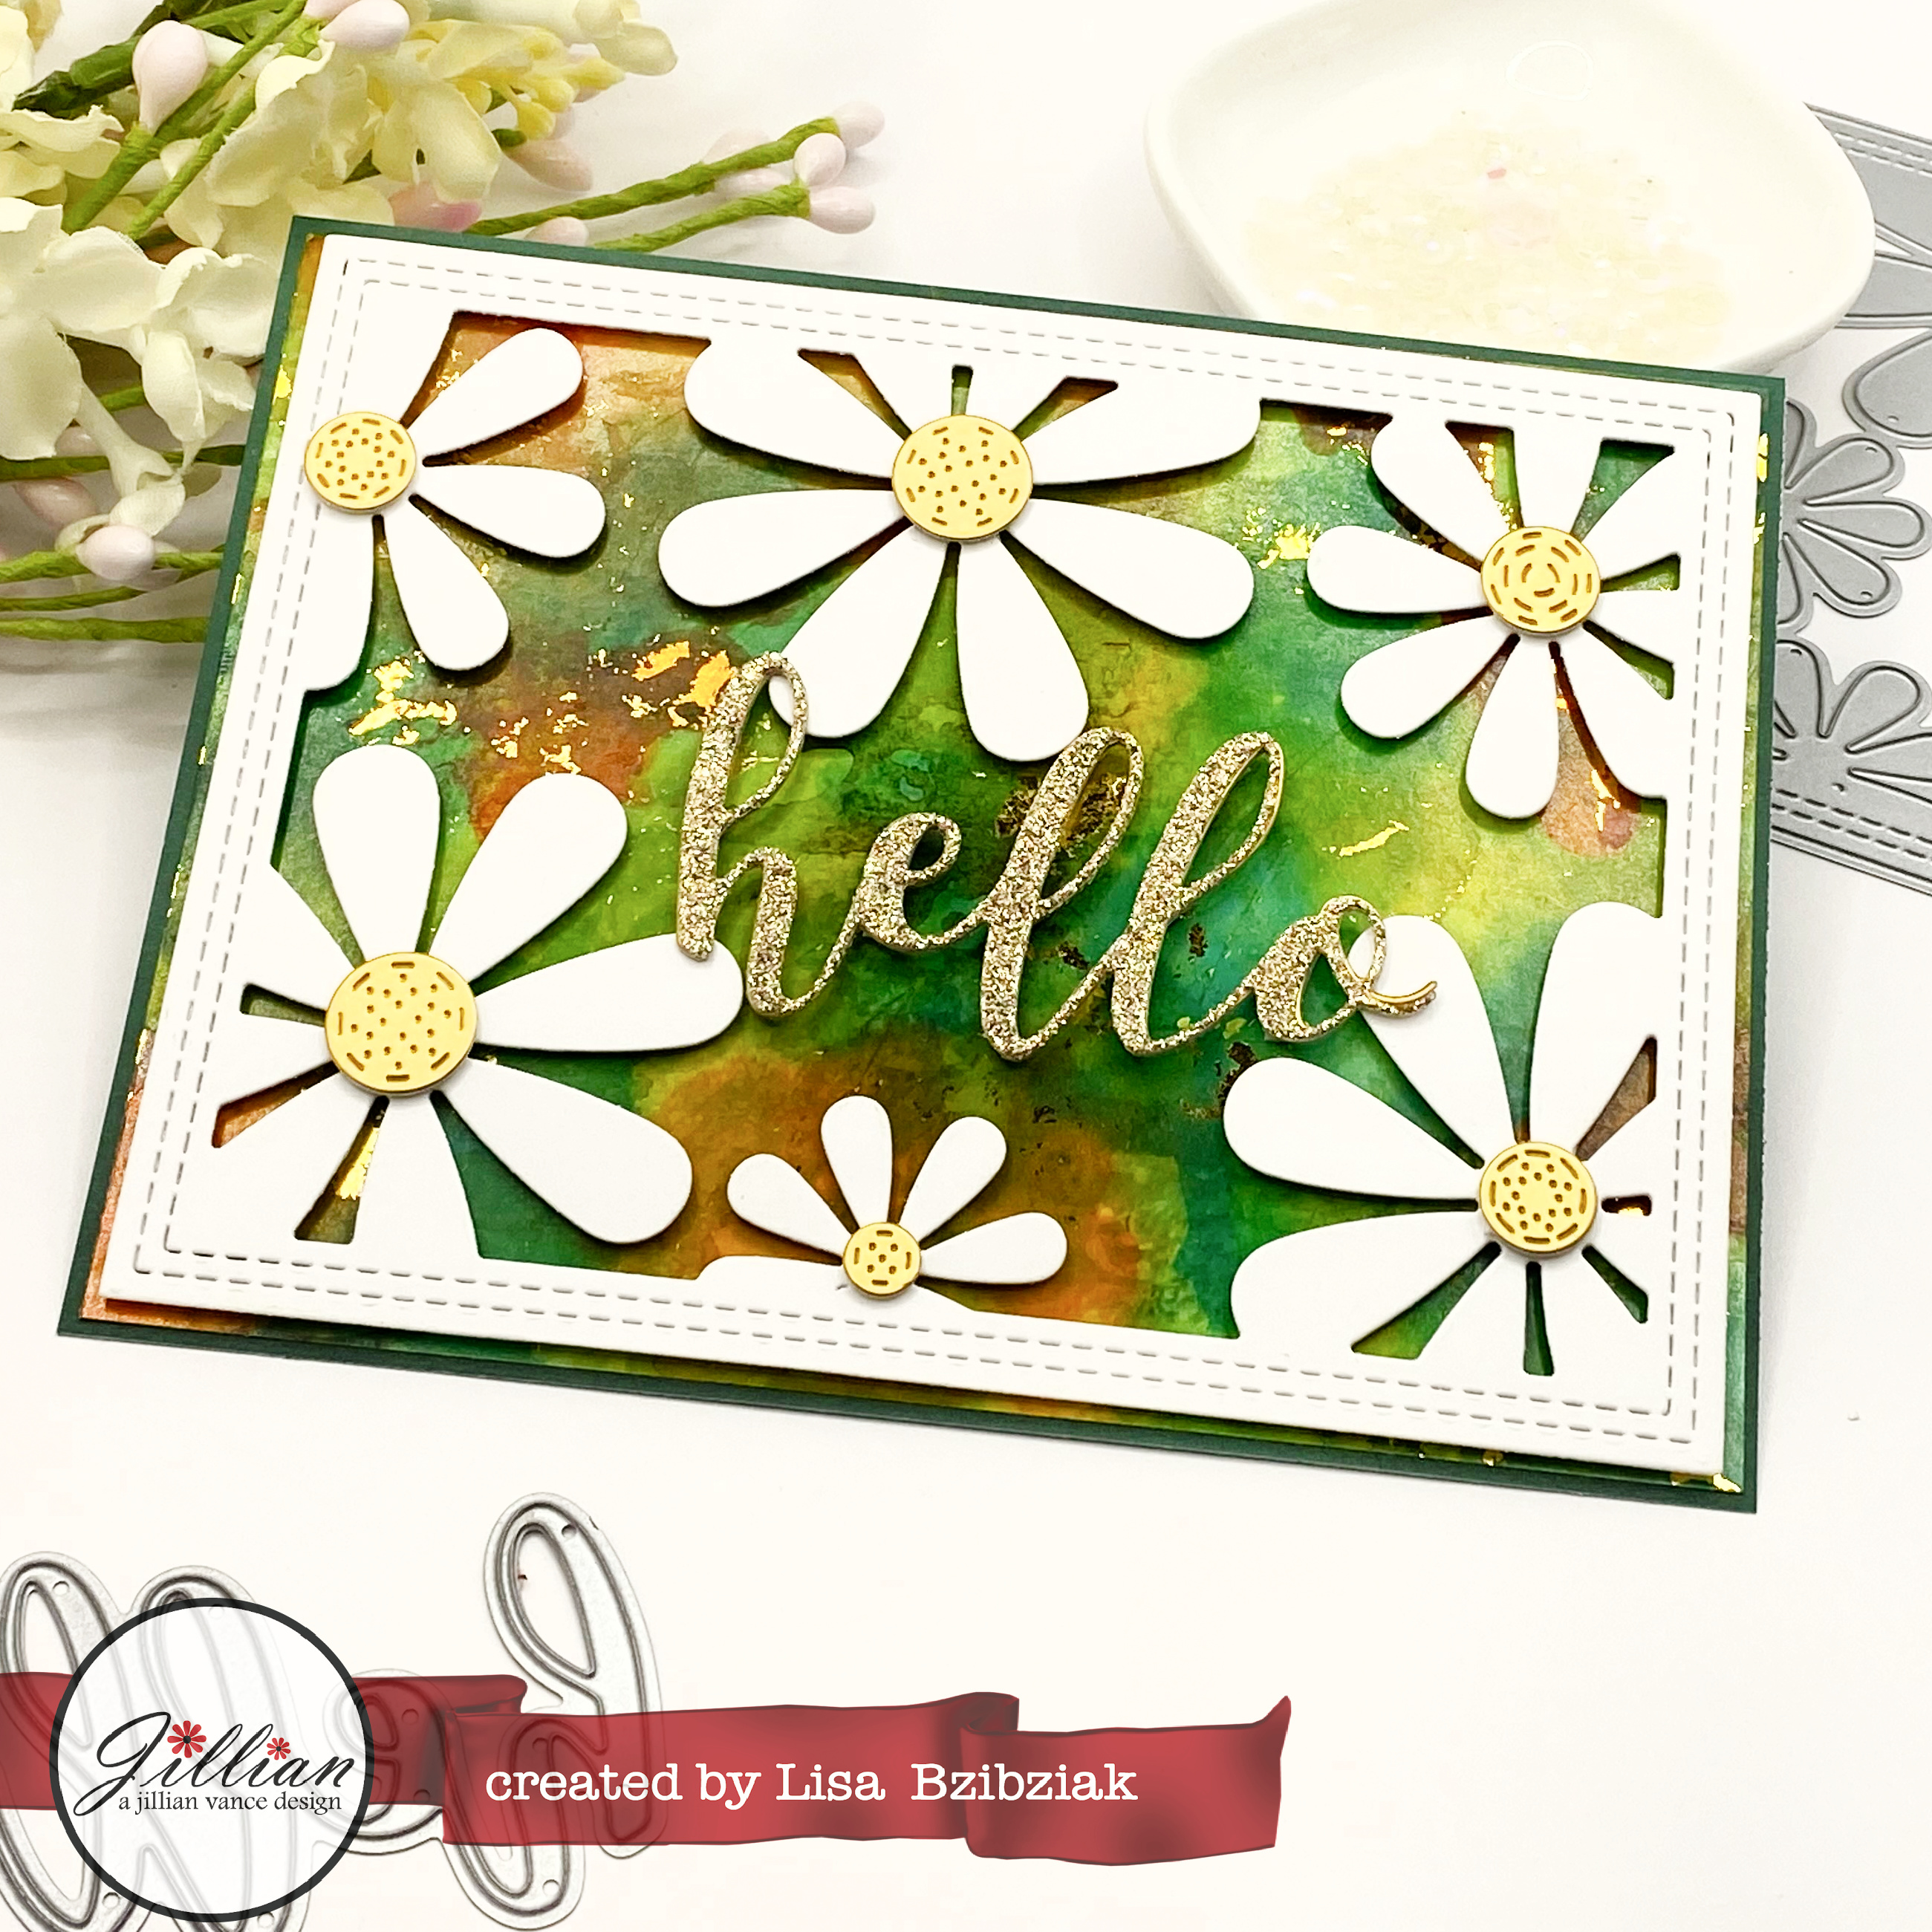
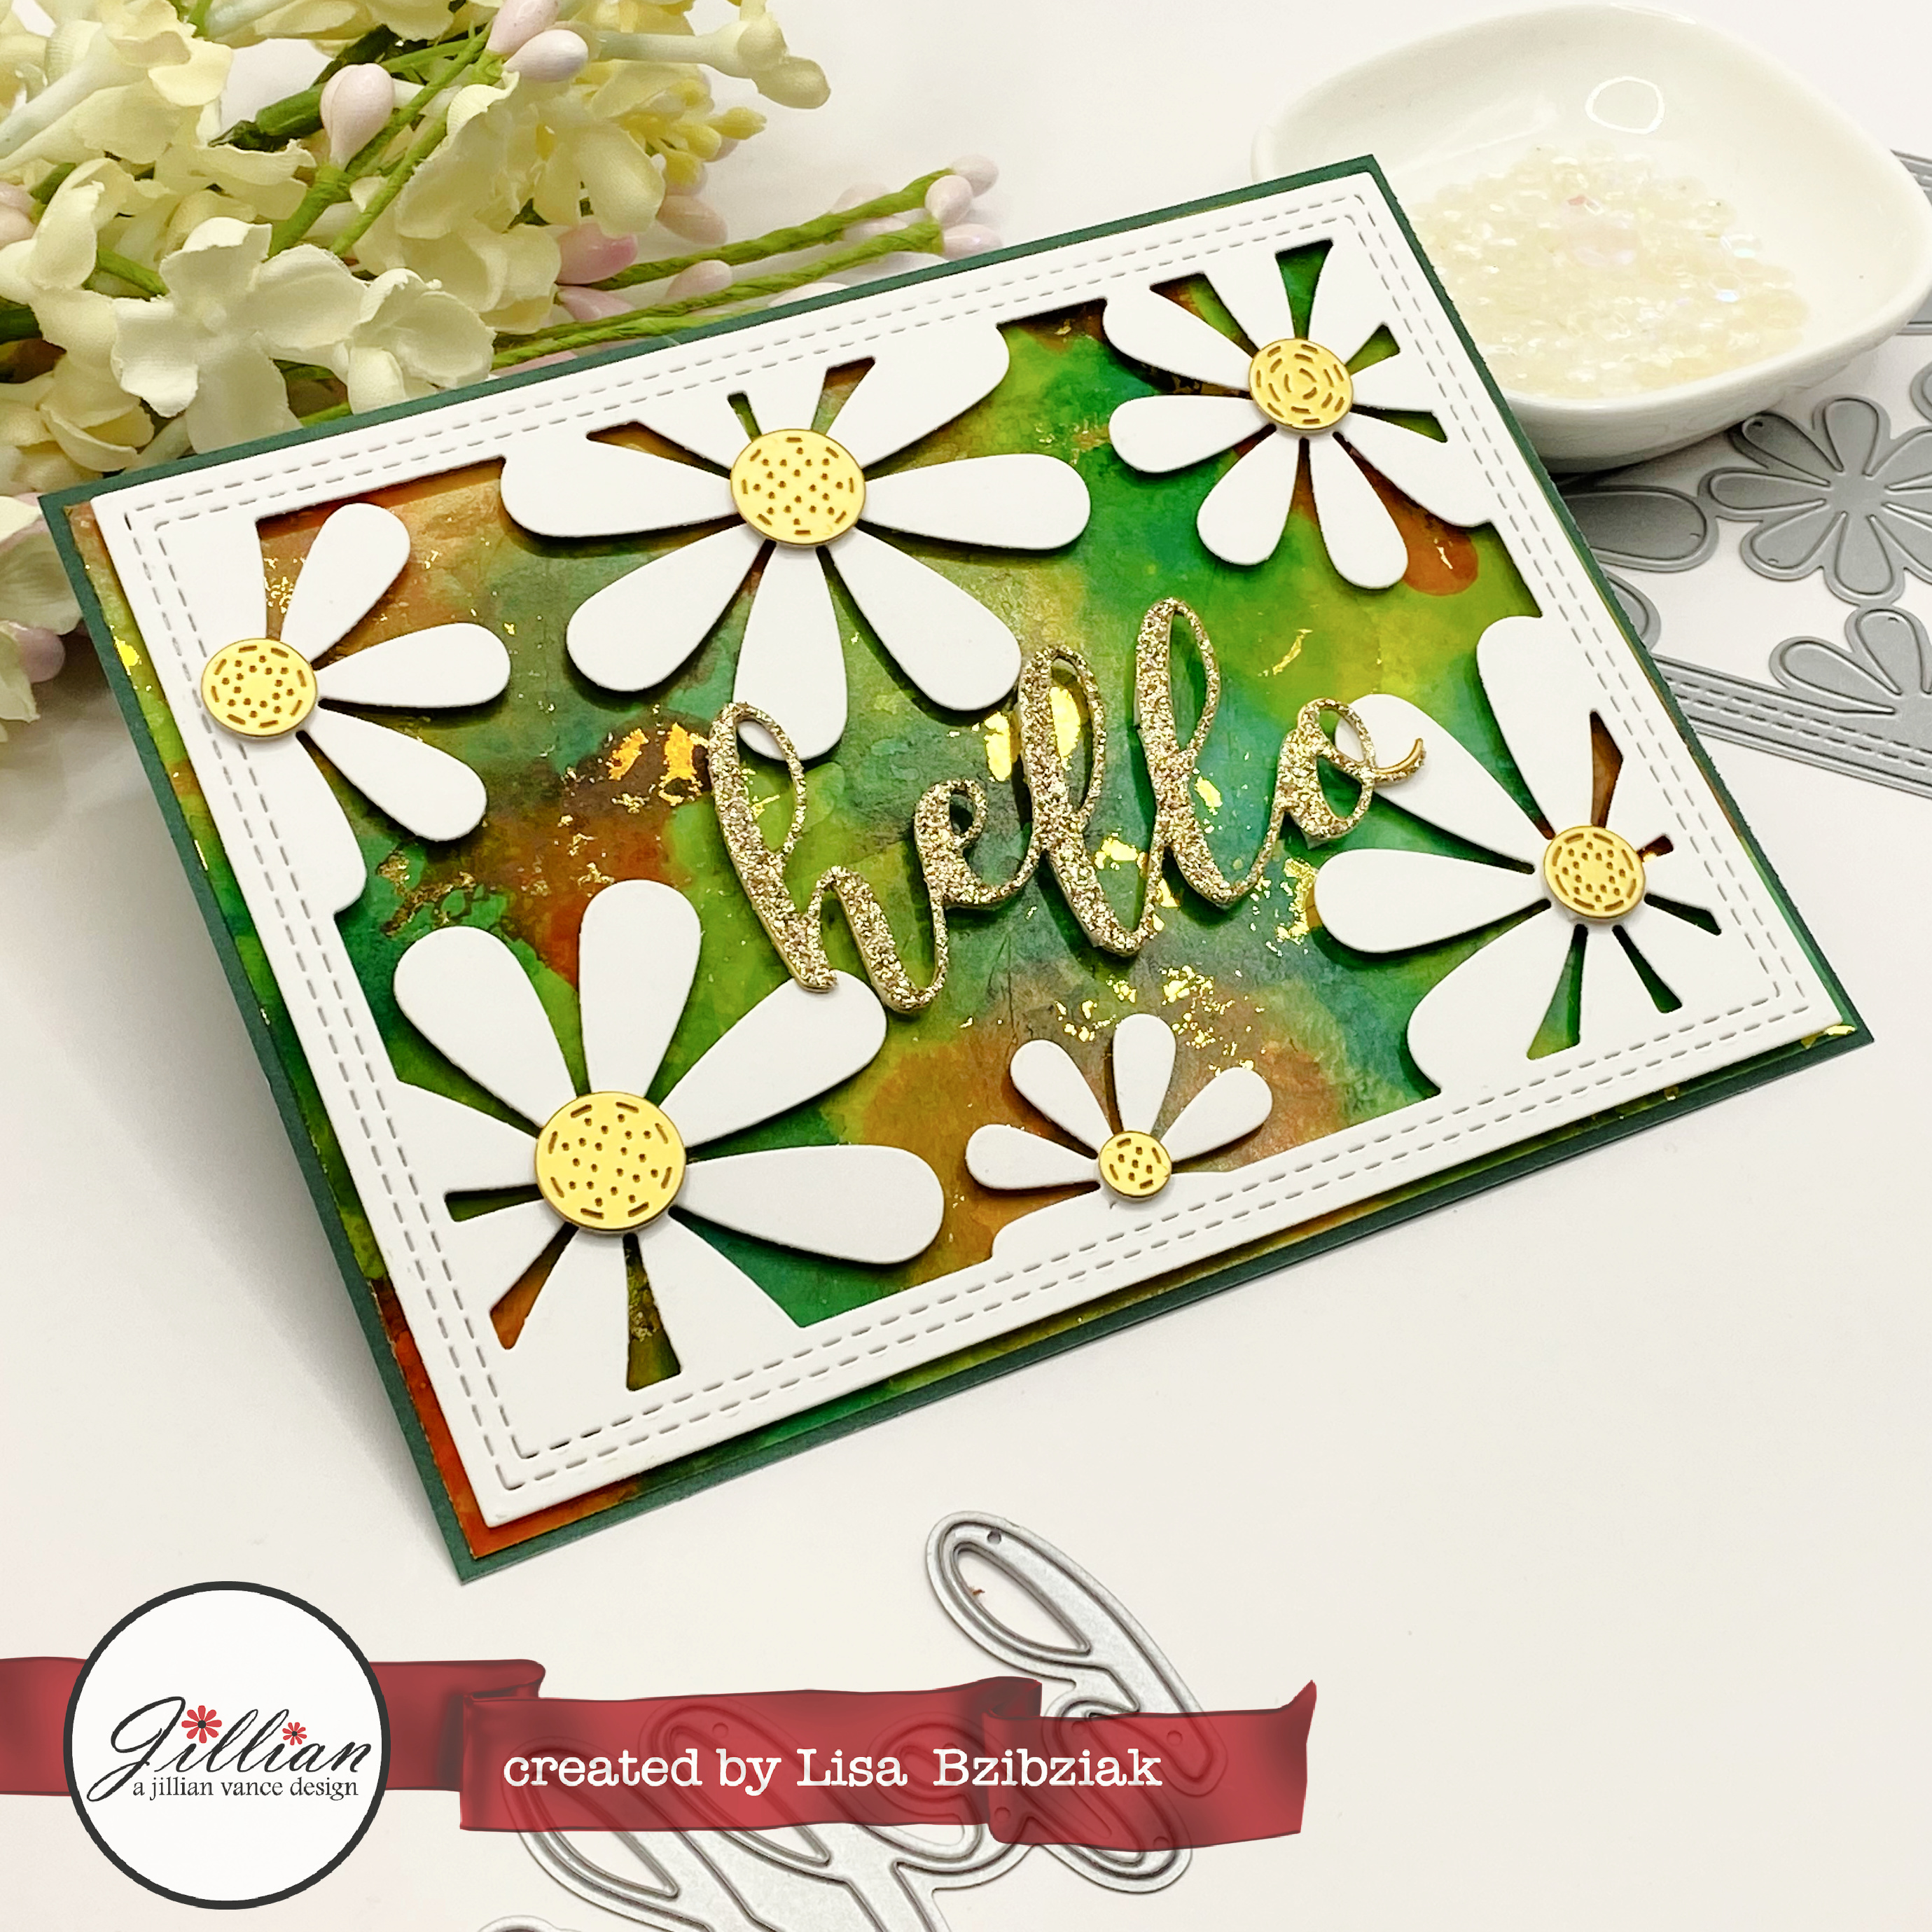
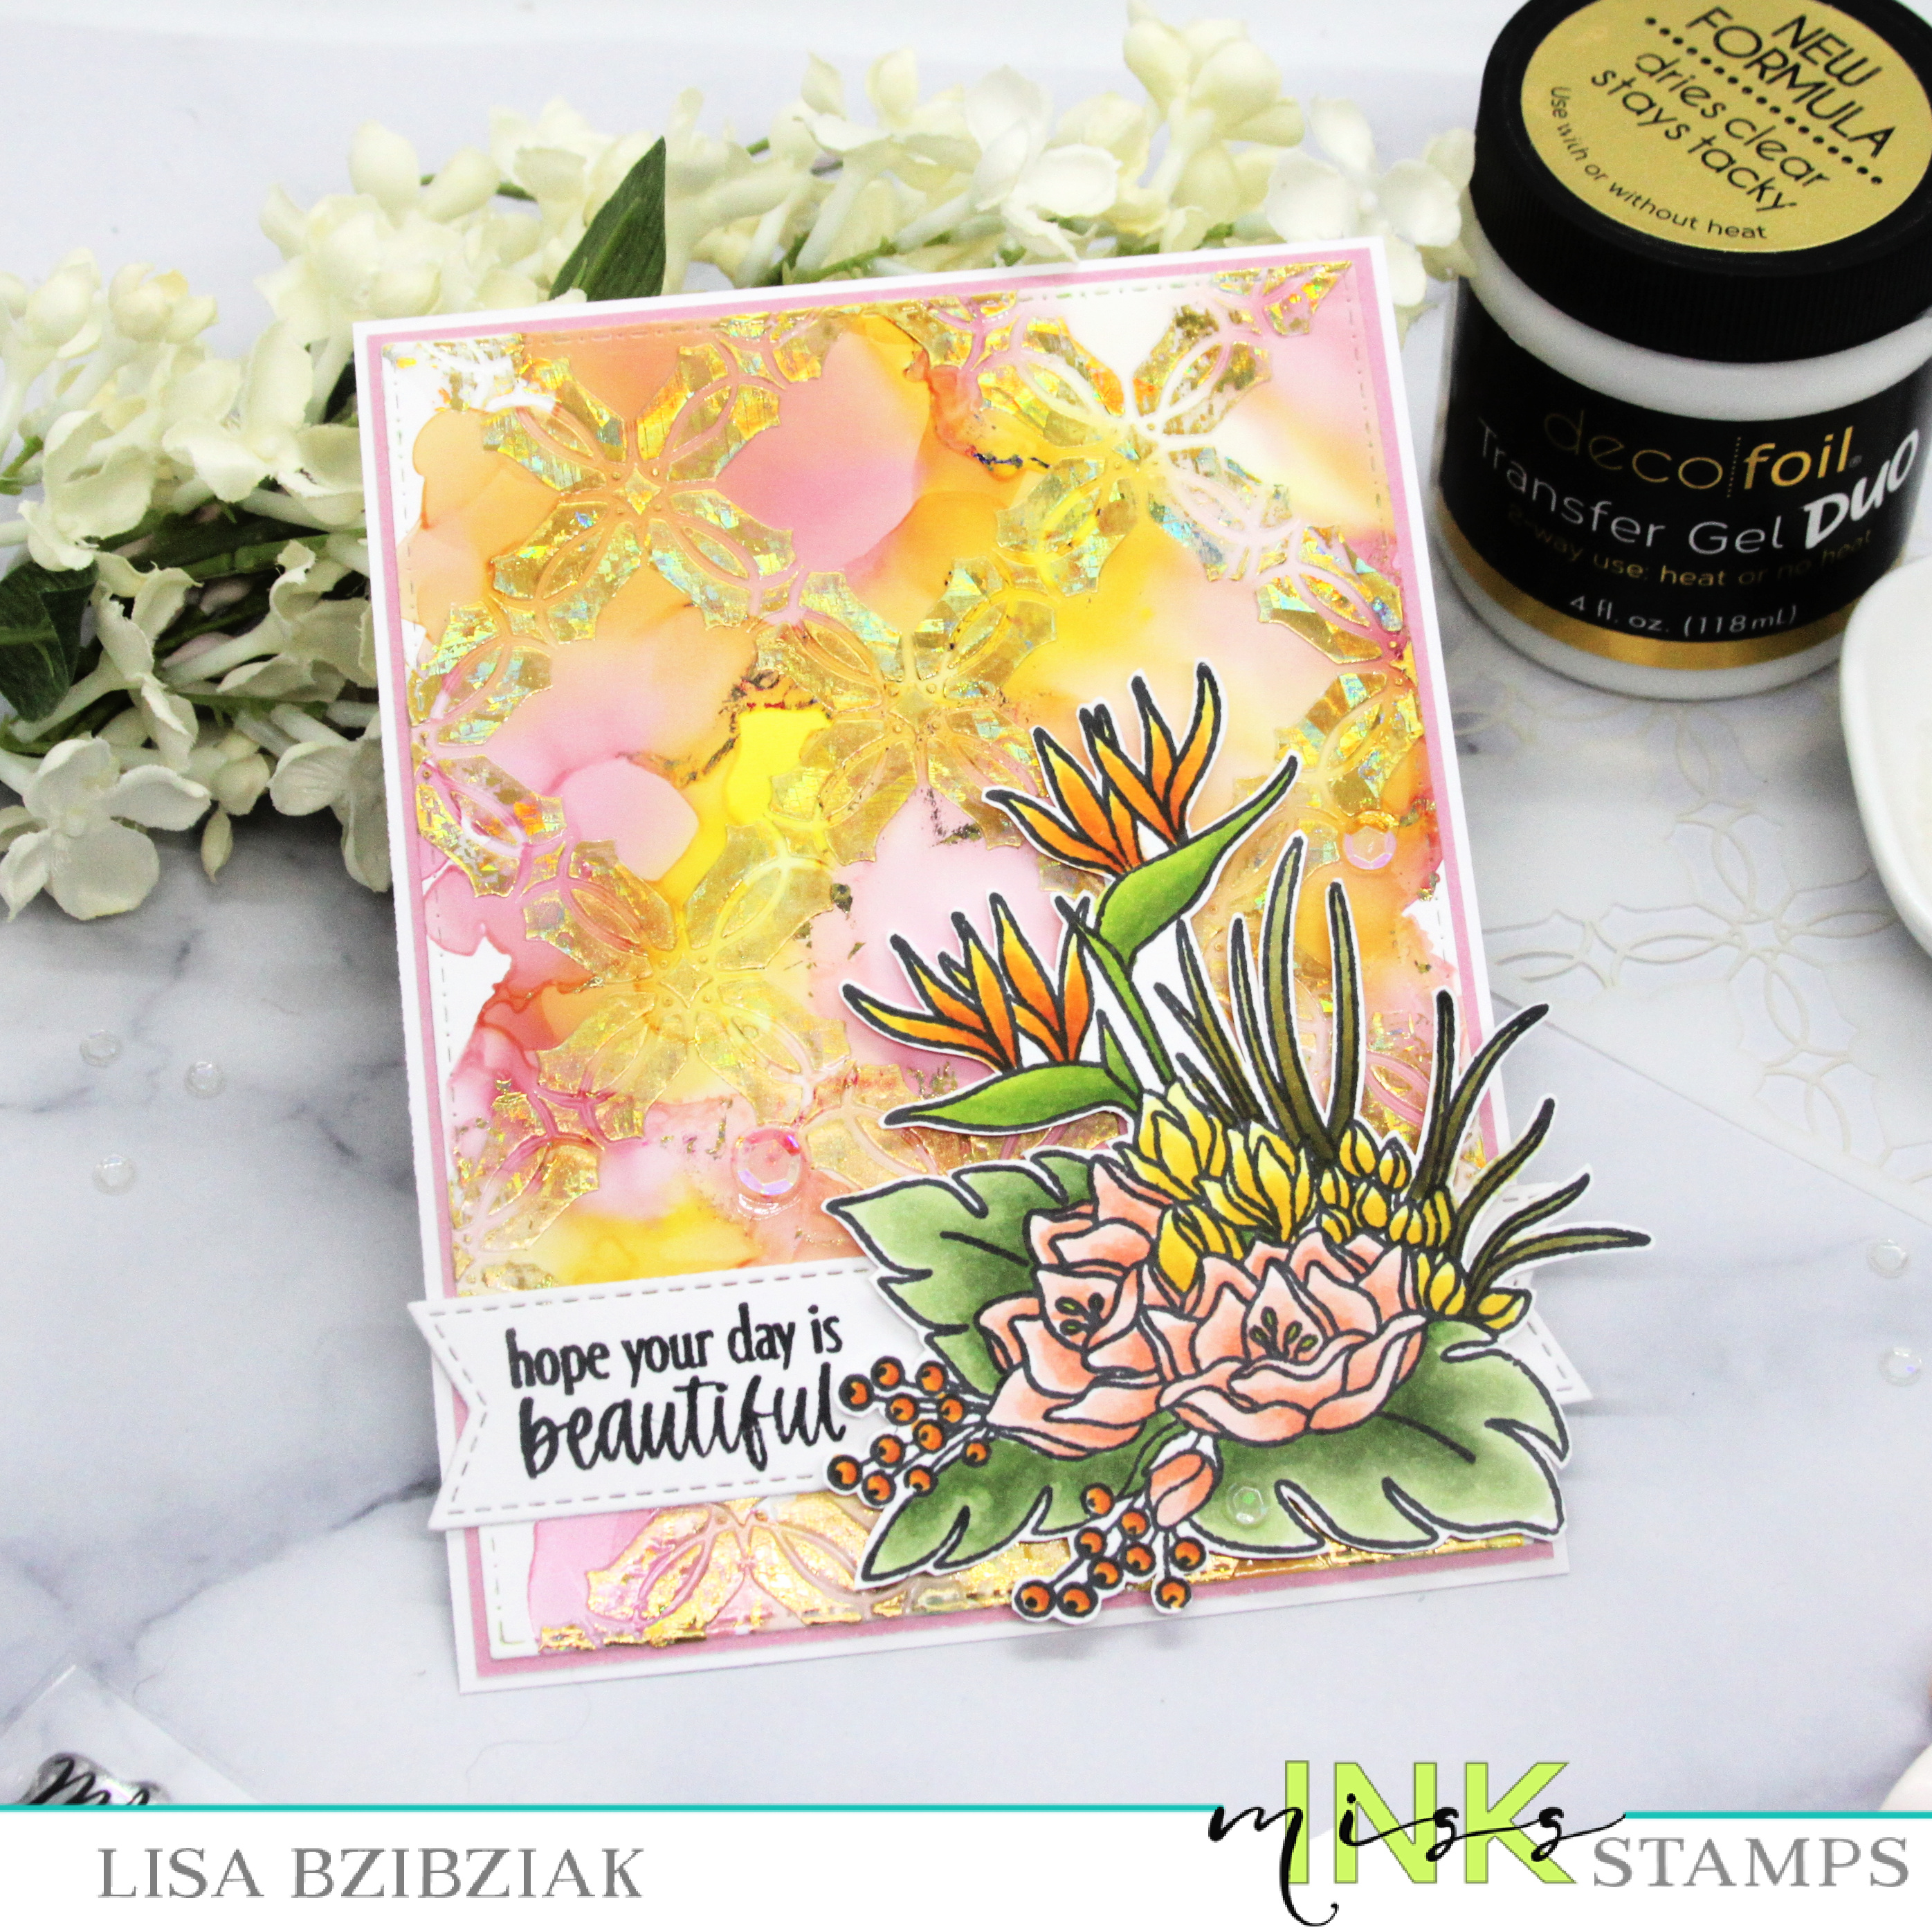
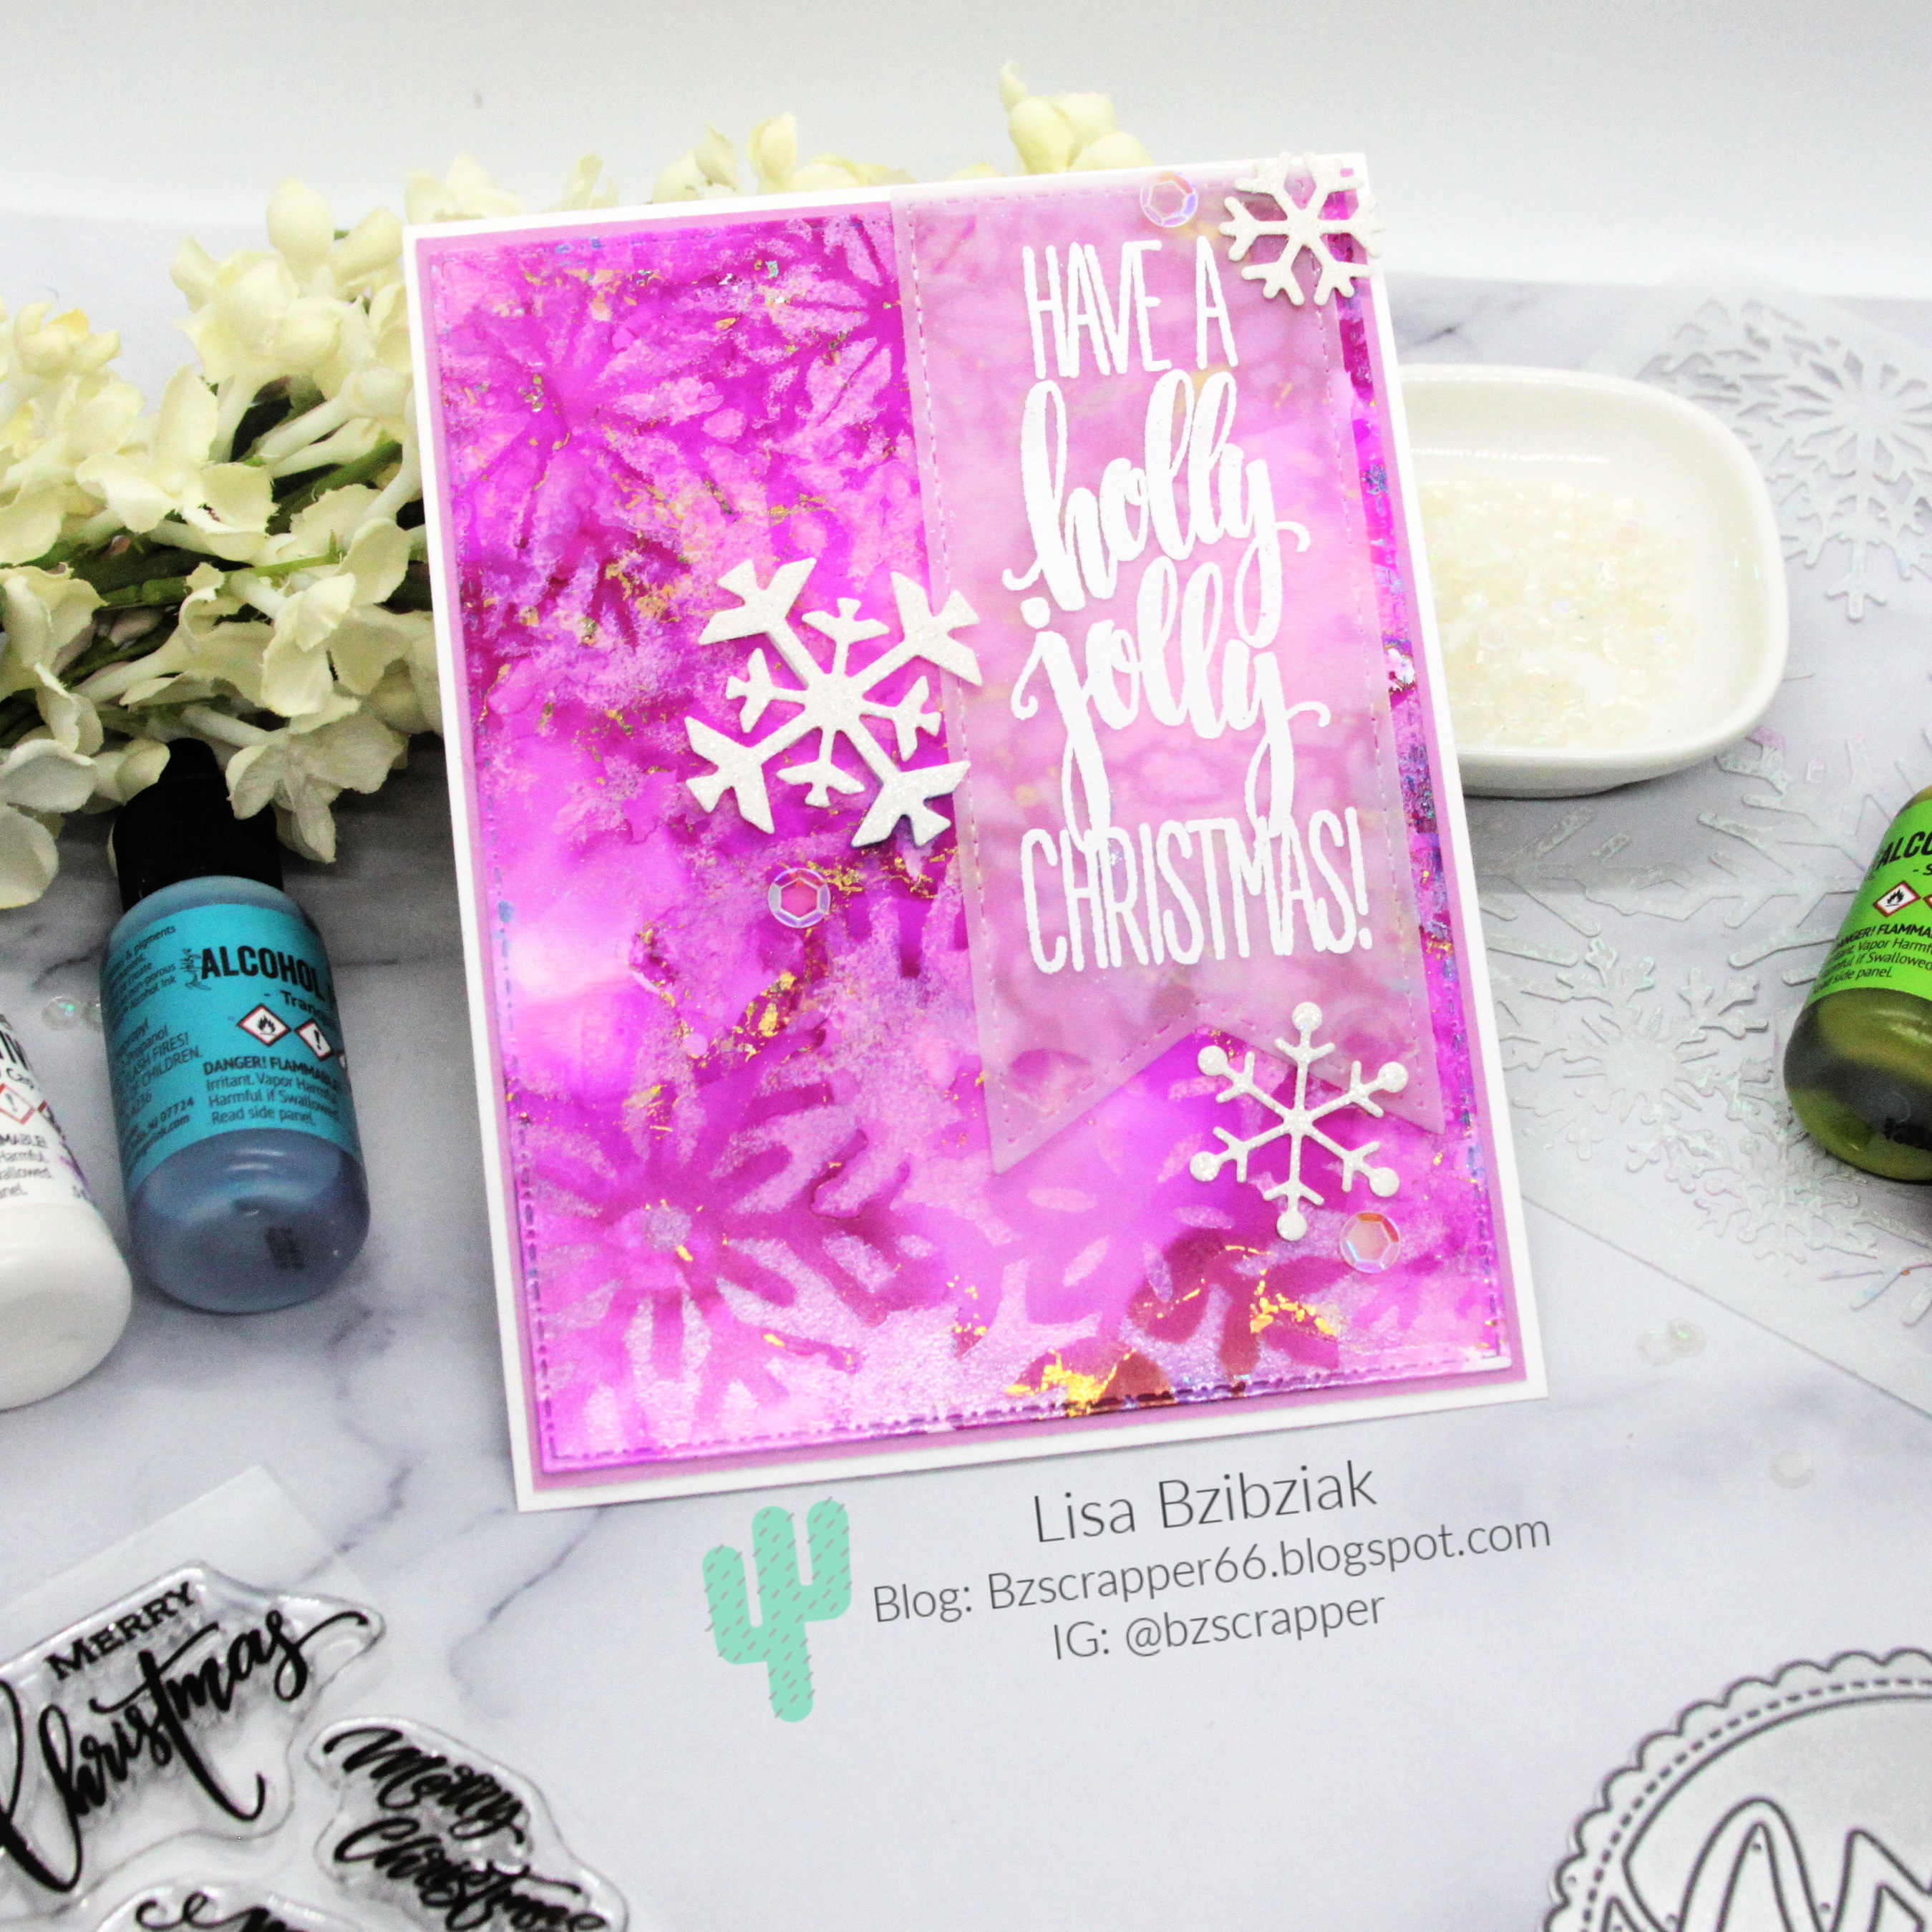
I alcohol inked a couple panels of EVO paper and while the ink was still tacky, I added some foil to it using some of my used sheets.  I sprayed Glitter Dust over the yellow panel. In fact, I haven't done this in a while and think it's time I got my alcohol inks out again and played a bit!

I used the Oh Hello Adhesive Transfers from Therm O Web for the sentiment directly onto the alcohol inked panel.  I love that you can apply the adhesive transfers with or without heat!


Then I die cut the Flying Butterflies from the yellow panel and glued the frame to the blue panel and then added the butterflies, popping up their wings using varying thicknesses of foam tape.

That's me for today!  I hope you enjoyed it and you'll come again soon!


Monday, September 26, 2022

Therm O Web - Trick Or Treat Week


I'm up on the blog over at Therm O Web with this one!  I hope you'll join me up there for links and details and a short video!


Thanks so much for stopping!  Hope you'll come again soon!


Friday, September 23, 2022

Miss Ink Stamps Release Sneak Peeks - Magical


Big fun and excitement this week as we're celebrating a New Release over at Miss Ink Stamps!  We've got the first set of Magical Collection stamps and DIES!!  That's right!  We have dies available for these stamps and I'm loving it!  New Release items will be available in the shop tomorrow!


I've used the fabulous new Staircase Background stamp along with the Magical Graduation set!  I heat embossed the background onto an alcohol inked panel on EVO paper!  EVO paper is sensitive to heat so be careful and it will curl a bit but I just placed it underneath something heavy for a few hours and then made sure my adhesive when attaching it to the layer underneath went right to the edges.  I love the look!


Here's a quick video showing how I created the background!


Lots of giveaways over at the Miss Ink Stamps Instagram account!  Don't miss your chances to win some of the new release!  Just head over there and look for the Release Graphics posts!

Thanks for stopping!  Come again soon!


Monday, August 29, 2022

A Jillian Vance Design-Hootie Halloween and New Stencils!


I'm up on the blog over at A Jillian Vance Design with some Hootie the owl and an alcohol ink background with some Glitz Gitter Gel stars using one of the three new stencils coming soon to the AJVD shop!


Hop on over there for links and details and a quick video showing how I created the background!

Thanks so much for stopping!  Hope you'll come again soon!


Friday, July 8, 2022

Deco Foiled Leafy Green Background


Hello!  I have a fun one for you today using some of the Alice Collection from Miss Ink Stamps!

I started with an alcohol ink background that I added some Deco Foil Transfer Gel Duo using the Leafy Green Stencil, let dry for a day and then added some Deco Foil to it by covering it with a used sheet and applying pressure with the Stencil Pal.  I'll add a quick video below!


Finally I die cut a circle scalloped frame from Paper Smooches and arranged my stamped, colored and fussy cut images from the Smokin' Caterpillar stamp set around inside and outside of it.  I stamped a sentiment from the Wonderland wisdom set onto a diecut strip and added the smoke rings and a few sequins around it.


Totally feeling that sentiment... It would be nice, wouldn't it?


I used lots of markers for this one!

Thanks so much for stopping!  I hope you'll come again soon!


Wednesday, July 6, 2022

Iced Tea and Happy Vibes - Caffeine Fueled Paper Play


I'm up on the blog over at Coffee Loving Cardmakers with an Infinity Shaker Card!


I used some Graciellie Design, Ellen Hutson, Alcohol Ink and more!


I hope you'll join me over there for links and details!


Thanks for coming!  Come again soon!


Monday, June 20, 2022

A Foiled Birthday Card


I'm up on the blog over at CAS-ual Fridays Stamps with some Copic coloring, Deco Foiled Sentiment and a Alcohol Ink and foiled background!


I hope you'll hop on over there and join me for links and details!

Thanks so much for stopping and hope you'll come again soon!
 

Monday, June 13, 2022

A Jillian Vance Design-My Hero


I'm up on the blog over at A Jillian Vance Design with some alcohol ink and Deco Foil!  I’m playing along with the current Masculine challenge over at Double Trouble Challenge Blog!  I didn’t use the twists to use the sketch and add stripes or plaid but you can for more chances to win!


Hope you'll join me over there at A Jillian Vance Design Blog for links and details!

Thanks so much for stopping!  Come again soon!


Friday, June 3, 2022

Hope Your Day Is Beautiful - Miss Ink Stamps


Welcome back!  I've got some more mixed media fun for you today!

I created another alcohol Ink panel using Copic Refills and EVO Paper; let it dry and then applied Deco Foil Transfer Gel Duo using the Lovely Lattice Stencil and let it dry for a few hours.. I left it for a little less time this time around-maybe about 4 hours.


While it was dry-ish but still sticky, I laid some Gold Shattered Glass Deco Foil over it and then used the Stencil Pal and firmly pressed the foil against the gel to transfer the foil to the stenciled pattern.


Just a bit of extra sparkle and design over the beautiful alcohol ink... I just love it!

I have a quick video for you:


I absolutely love this look as well as the soft ink colors using the Copic Refills... you can bet you'll see more of this here in the future!


Thanks so much for stopping!  I hope you'll come again soon!


Friday, May 27, 2022

Not A Daisy Goes By - Miss Ink Stamps


Happy Friday!  I'm back with some more alcohol ink, Transfer Gel and Deco Foil all on a crisp white panel of EVO paper!


I created the alcohol inked panel and while it was still sticky added a little bit of foil sparkle.  Then I used the Bluet Burst Stencil from Miss Ink to apply Deco Foil Transfer Gel Duo.  Cool thing about this is it's clear and you can let it dry a little or a lot and then either apply foil while it's a little sticky or run it through your Minc or laminator!  I let it dry a long time and then added foil without the Minc because I didn't want a solid transfer and I LOVE how it turned out!


I just needed enough foil to bring out the pattern from the stencil, but still wanted the alcohol inked panel to show through... so cool!

Here's a quick video to show you how I did it:


I added some images and a sentiment from the Blooming Brushes stamp set and done!

That's me for today!  Gonna be using this technique a bunch more I think!


Hope you all have a great weekend!  Thanks for stopping!


Wednesday, May 25, 2022

Crafty Elves Countdown to Christmas - May 2022 Edition


It's the 25th of the month and we're back!  It's time for the Crafty Elves to share the Christmas cards we made this month!  Be sure after you leave here you visit my fellow Crafty Elves, Debra and Michael to see what they've created for you too!


This month I'm playing with alcohol ink and of course I am for these as well!  I created four different panels with various color schemes and added some foil to the sticky parts before they dried completely.  Then I used a Rubbernecker Snowflake Stencil and some Snow Cap to add some snowflakes to the backgrounds.


For two of my cards I used the adorable Beary Christmas stamp set from Pawsome Stamps.  I also used the Cheers and Sentiment strip dies from MFT-both are retired and I got lucky because they were sitting in my pile of unused items that weren't quite right for previous projects but they were perfect for this one!


I just love that cute bear wearing antlers!!


For this one I used the square frame from my stash and the chunky snowflake is an old Paper Smooches die.  The sentiment came from another set from Pawsome Stamps, Just Sentiments Christmas.


Almost all of the die cuts were extras sitting around waiting to for these cards!


Couldn't you just boop that nose?


I decided I loved the blue and pink backgrounds too much to cover it up so I kept them simple.


The Joy die cut is from Pretty Pink Posh and the three snowflakes are from (top to bottom) Lawn Fawn, Reverse Confetti and A Jillian Vance Design.


Don't you love how that little bit of foil adds that beautiful extra shine!?


And the snowflakes turned out best on this one.  Using the snow cap worked well, but it does get sticky after a while.  Next time I'll try just using acrylic paint which should work well as long as the alcohol inked panel is dry.... 


And I used a fantastic sentiment set from Rubbernecker for that great embossed sentiment.  I embossed it on a banner from AJVD cut from vellum from Brutus Monroe.  And then added snowflakes from Reverse Confetti and Lawn Fawn.

And that's me for today!  Thanks so much for stopping!  Don't forget to visit Michael and Debra but before you go, let's pick a winner from last month's post:


Sharon G!  Email me at bzscrapper66 at gmail dot com with your snail mail so I can get some happy mail out to you!

Thanks so much to everyone who stopped and left me some love!  We're playing again this month so let me know you were here and you may be a winner next month.