Showing posts with label Little Huggables. Show all posts

Sunday, May 10, 2020

A Pawesome Shaker - CAS-ual Fridays Stamps


Hi all!  Lisa here and today I'm sharing a quick shaker I made using the new Pawesome StencilPawprints Chipboard, and a sentiment from the Little Huggables Stamp Set!


I started with the stencil and first blended some pawprints using the stencil onto it in pink, yellow and green Distress Oxides.  Then I added additional ink to the background over the stenciled area in the same colors to soften it.

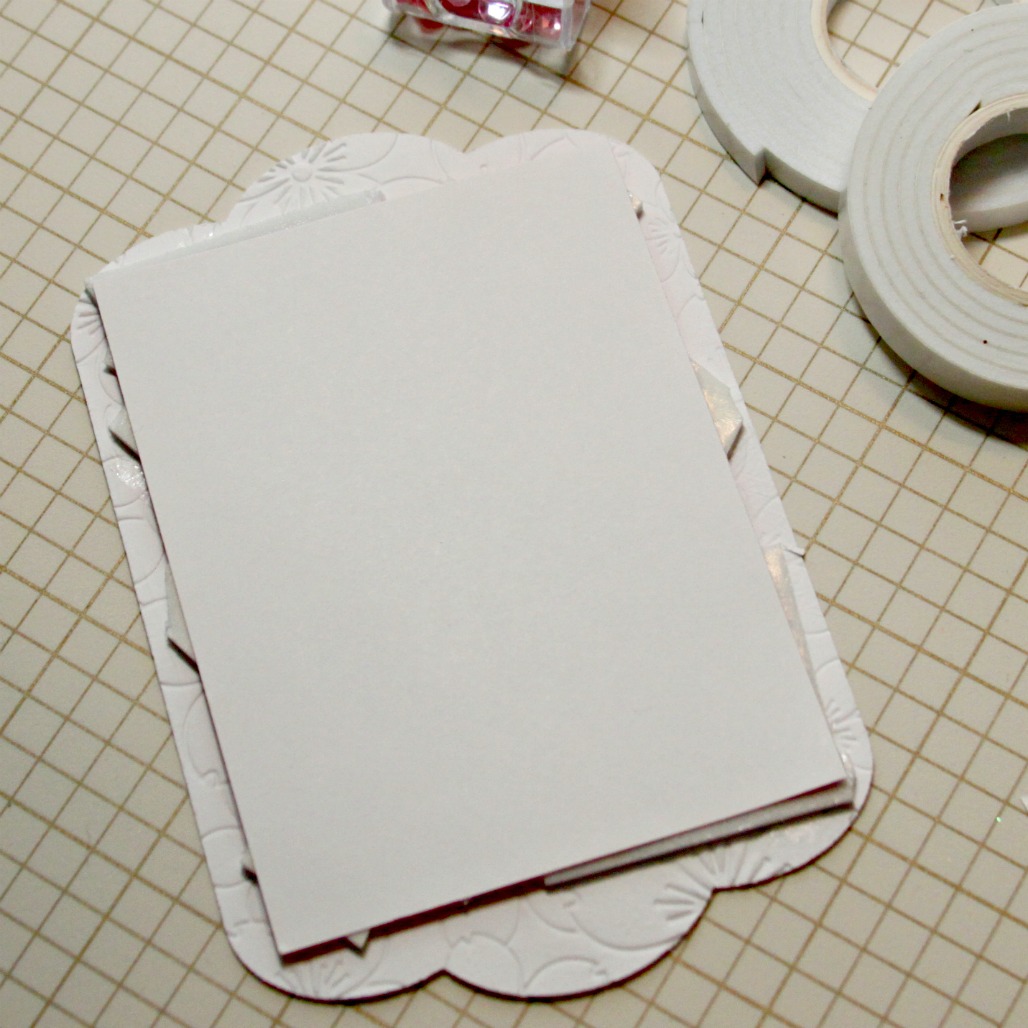
The frame was leftover ... I had cut a smaller window from a rectangular piece of white paper for a different project and ended up with the perfect window for a shaker!  I decided I needed to use it right away and this one would be perfect.  I just trimmed it down a bit to leave a boarder.  Then I added acetate to the backside of the window and then pop up foam tape around the entire frame.  I added sequins to my base and then popped the frame over the top!


Next I dabbed some Versamark ink onto the largest Pawprint Chip Board heart and embossed it in Wow Opaque White Embossing Powder.  After it cooled I dabbed on additional ink and some Wow Taffeta Embossing Powder.  Then I added more foam tape to pop it up on my shaker window... I love that it's a window that shows the window behind it...lol!


And that's me for today!  Thanks for stopping and hope you enjoyed your visit!  Come again soon for more CASual Fridays inspiration!


Thursday, March 26, 2020

Hi There Hop Stuff - CAS-ual Fridays Stamps!


Hi there!  Lisa here and I'm sharing another shaker similar to one I made for the Crafting of Hue Sponsorship Weekend so I could show you how I made this shaker using the paw die from the Huggable Critters die set!


I started by cutting the Bubble Box layer using the 2nd largest die in the set.  I taped it in place and then took the paw die from the Huggable Critters set and taped it in the bottom left corner so I could run them through together and avoid an extra run through the Gemini.  Then I took that piece and taped the paw die in place again and ran it through.  Then one more time so the paws were hopping across the bubblebox.  Once all three paws were cut out, I ran the entire thing through with a floral embossing folder.


Next I adhered acetate over the back of the die cut paws and added foam tape to create a well around the area I wanted to place my sequins and then additional tape to provide support for the Bubble Box layer.  I filled the well with sequins... using my fine tweezers to flip them over so when the shaker was right side up, most of the sequins would be too!


And finally I placed the design paper that I wanted to show through the shaker windows over the back.  I added adhesive to that and flipped the whole shaker element over onto my card front.


To finish it off, I used this cutie pie bunny from the Little Huggables set that I colored with my Copics.


And I added this cute sentiment also from the Little Huggables set... love all of the punny sentiments on this set!


A few sequins and done!

Thanks so much for stopping today!  Hope you enjoyed your visit and that you'll come back for more inspiration soon!  And should you need anything from the shop, I have this for you:


Saturday, March 21, 2020

You're Pawesome-CASual Fridays and Crafting of Hue!


It's a fun day!  CAS-ual Fridays Stamps is sponsoring over at the Crafting of Hue Facebook Group again!  And today the theme is Critters!  We all have created something for you today using some of the adorable critter products in the shop!


I colored up two of the critters from the Little Huggables stamp set!  Dogs and Cats can get a long!  These two are best of friends!


And I created a shaker by using one of the paw dies from the Huggable Critters set!  First I cut the 2nd largest Bubble Box die in white cardstock.  At the same time I positioned the paw in the bottom left corner of the bubble box and taped it in place and put them both through the Gemini together.  Then I placed the next paw where I wanted it on the die cut and ran it through again and then one more time!  After embossing the bubble box layer with a plaid embossing folder, I placed some acetate on the backside of this die cut; added some foam tape around the line of paws and while it was still upside down, I filled that with lots of sequins.  I took the time to flip them over so most would be facing the right way.  Next I took the backing off of the foam tape and placed a black piece of cardstock over the opening.  Then I added more adhesive and flipped the entire shaker element over onto my background.


Finally I just added the critters, sentiment and a few sequins and done!

AND to make it even better, I have this for you:


Cool right??  Now head over to the CAS-ual Fridays Blog where you'll find links to everyone's creations and be sure to join the Crafting of Hue Facebook Group here where you will always find some fantastic inspiration and lots of fun!


Wednesday, January 15, 2020

I Ruff You - CASual Fridays Stamps


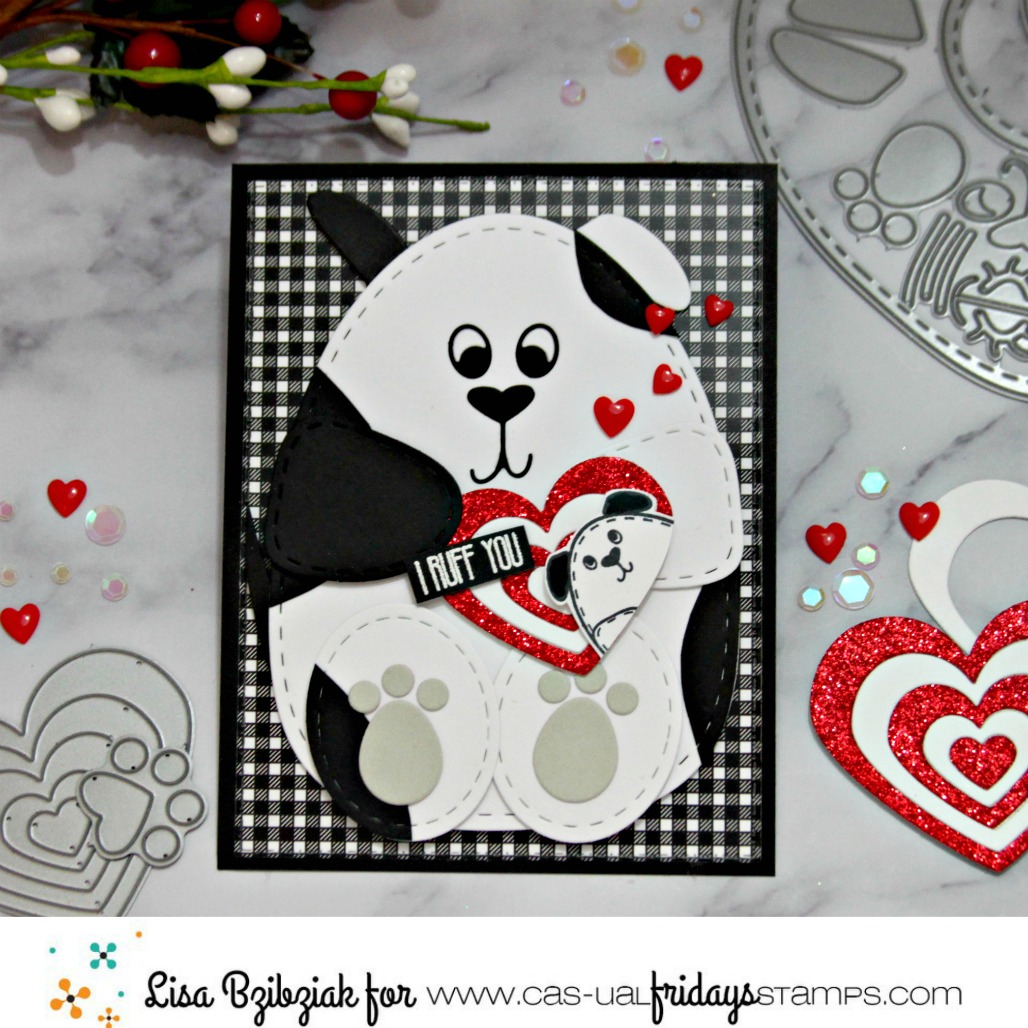
Lisa here!  I knew I wanted to create a Valentine for today and my first thought was flowers and then I remembered the adorable Huggable Critters Fri-Dies!


I was in the mood for this pup!  And I love him in Black and White so I made him spotted!  I cut one body piece in white and one in black and handcut some spots out of the black one to add spots to the edges of his body.


And I thought it would be so cute for my Valentine to be carrying a Valentine!  I cut the Heart Board Fri-Die out of red glitter paper and plain white cardstock and then alternated the little heart frames back together.  And of course he'd have a puppy Valentine with a cute little Punny sentiment from the Little Huggables stamp set.


So there you have it... a Valentine with a Valentine... I wonder if that little pup Valentine is carrying a littler pup Valentine??

Should you decide you need this pup... or anything else... I have this for you:


And did you know this is going on right now??


Thanks so much for stopping!  Hope you enjoyed your visit and come back soon and often for more inspiration!


Sunday, July 7, 2019

The Purrfect Amount of Sparkle with CAS-ual Fridays!


I know some of you hate glitter... and that's ok!  I'm not one of those people!  I love to keep my craftroom stocked with all sorts of glittery things.  I have a shelf full of jars of glitter; many sheets of glitter paper; and many glitter covered embellishments.  What can I say... I get mesmerized by the stuff and before I know it, it's in a cart.. real or virtual.  But I use it... so I'm good with that!

I wanted to use the new Hearts A2 Panel die over a glitter background, but just didn't have the right color of glitter paper that I wanted!  So I decided to create my own and it was easy!


I pulled out some sheets of double sided adhesive that I had and cut the Hearts panel from a sheet of purple cardstock.  I also cut an A2 size of the same purple cardstock and cut my adhesive sheet down to an A2 size.


Next I pulled off one side of the adhesive sheet exposing the adhesive.  To make it easier to handle, before I had the entire sheet off, I started lining up my solid piece of cardstock over it and then stuck it down as I peeled the rest of the backing off.


I pressed down firmly all over the back of the cardstock to be sure the adhesive transferred to it and then flipped it over and peeled back the second paper from the adhesive sheet leaving a piece of cardstock that was totally covered in adhesive.


Finally I positioned the Hearts A2 panel I'd cut over the solid piece of cardstock and pressed down.  It's ok that I was a little off on the edges.  The important spaces were covered (the insides of the Hearts panel).  It was easy to just trim off the sticky cardstock that was sticking out.


For the next bit, I laid out a piece of scrap paper for easy cleanup; sprinkled the glitter I'd chosen all over the top of it... be generous to be sure you have coverage.


Then I proceeded to just rub the glitter into the adhesive firmly all over the card where the sticky areas were, brushing the excess onto my scrap piece so I could see that I had the areas covered.  This process is called burnishing the glitter.  (Um shout out to me for taking this picture with my finger in it... it was no easy task and took some acrobatics!)


I used a paint brush to remove any additional excess glitter sticking to the places I didn't want it because of static and was easily able to fold the paper in half and place that back into the container.  What you're left with is an almost smooth sparkly surface on your card!  These new A2 panels are just perfect for this kind of a technique!


I cut some plaid paper using the Heart Board Fri-Dies and intended to adhere them all together as a background layer for my kitty when I discovered that the hearts from this die fit perfectly over the hearts in the A2 Panel... BONUS!  So my plan changed a bit and I decided to accent some of the hearts using the plaid paper.

.
I ended up cutting another set of hearts to use in a couple more places on the background.  Isn't that sparkle so pretty??


If you follow me you may remember this little guy from the new Little Huggables stamp set on Instagram... I colored him for the 30 Day Coloring Challenge... he's been bugging me since to get him onto a card so he should be happy now!


I just added a few sequins to bring in the orange and green from the plaid and made my sentiment strip in the orange color as well.  Those punny sentiments from the Little Huggables set... SO cute!

I'm playing along with the Simon Says Stamp Monday Challenge to Create Your Own Background!  That I did!

So glad you could stop by today and hope I've either given you a new technique to try out or reminded you of one that you haven't used in a while!  And if you HATE glitter but love the sparkle... just get yourself some glitter paper and use that instead... so many of them are made so that you don't have to worry about little sparkly bits falling off of them everywhere... although I really don't see the problem!  (Except when my husband wants to know why there is glitter in the living room.. um... did I do that?)

Should you decide you need something from the CAS-ual Fridays shop, I have this for you:


And be sure to check us out at these places:


Saturday, July 6, 2019

The Cutting Cafe Inspiration-"Ugly" Sweaters!


Welcome to some Cutting Cafe Inspiration!  This time around we're playing with the Ugly Sweater file.. it's not just for Christmas!  I've created four cards today using this awesome shaped card file along with some fun old papers, dies and stamps from my stash.


It was so fun to put these together and once I started getting ideas I just couldn't stop!


I'd buy that sweater!  You know... here in Arizona... Summer IS sweater weather... I don't leave the house without a sweater (for the air conditioning) and a bottle of water (because...well... the desert!)


For this one, I used some old stickers that coordinated with the paper and the sentiment is from the From Owl of Us Stamp Set from The Cutting Cafe Shop, which in itself is owldorable!.


I like owls... ya know?  I used dies to put together this one, but there is a cool Owl Shaped Card here in the shop that would work too!

Thanks for stopping and I hope you enjoyed it!  Be sure to head on over to the Cutting Cafe Blog and check out what everyone else has done with this cool file!  And while you're there, comment for your chance to win three files of your choice!

Come back here soon!


Saturday, June 22, 2019

CAS-ual Fridays Release Day 1 - Little Huggables Stamps and Little Critters Fri-Dies


Welcome to Day 1 of the CAS-ual Fridays Release Day 1!  Today we're sharing projects using the new Little Huggables Stamps and Little Critters Fri-Dies!  Here's how I was inspired:


I colored up these cuties while I was on vacation and knew I was going to use them all together.  I decided they would be stuffed animals sitting on a bed!  I used the largest Bubble Box die to cut my headboard... I cut it twice to make two layers and popped up both layers with some thin foam tape.


Next I used one of the smaller Bubble Box Fri-Dies to create my pillows...I picked some paper I thought would make pretty linens, cut three of the bubble boxes and layered them over the headboard.. I added them a little bit wonky because ... well... idk about you but my pillows are always wonky!  Then I added all of the critters with varying thickness of foam tape and a few flowers just 'cause!


I stamped one of the awesome punny sentiments and those cute little paws from the Little Huggables Stamp Set onto a banner from the Bushy Tailed Stamps and coordinating Fri-Dies.  I hung my sentiment over the bed using a couple of the whiskers from the Huggable Critters Fri-Dies and some Nuvo Drops.


Just love these critters!!  And love how the adorable punny sentiments in the set work so well with the Huggable Critters Fri-Dies from the last release!

I'm playing along over at the Shopping Our Stash challenge!  The Theme is You're So Punny and while the stamps are new, I've used some papers and flowers that have been in my craft room for quite some time!

I thought I'd show you:


Eep!!  So adorable!!  Love these Huggable Critters Fri-Dies and they're even better with the sentiments from the Little Huggables stamp set!


And with this guy, I'm playing along over at 2 Crafty Critter Crazies!  It's Anything Goes but must feature a critter... I think I've got one of those I think!...lol!

I hope you enjoyed your stop here today!  Be sure to check out what all of my teamies have created for you today and then come back tomorrow for more CAS-ual Fridays Release Inspiration!  AND be sure to head over to the CAS-ual Fridays Blog and to find out about a GIVEAWAY and how you can have a chance to win!!  Check it out here!

And should you decide you need to have these, they are available now!  And here's a little something for you:


Be sure to come back tomorrow for some more new release inspiration!