Showing posts with label Sweet Friend. Show all posts

Saturday, April 16, 2022

CAS-ual Fridays Hello Friend Part 2


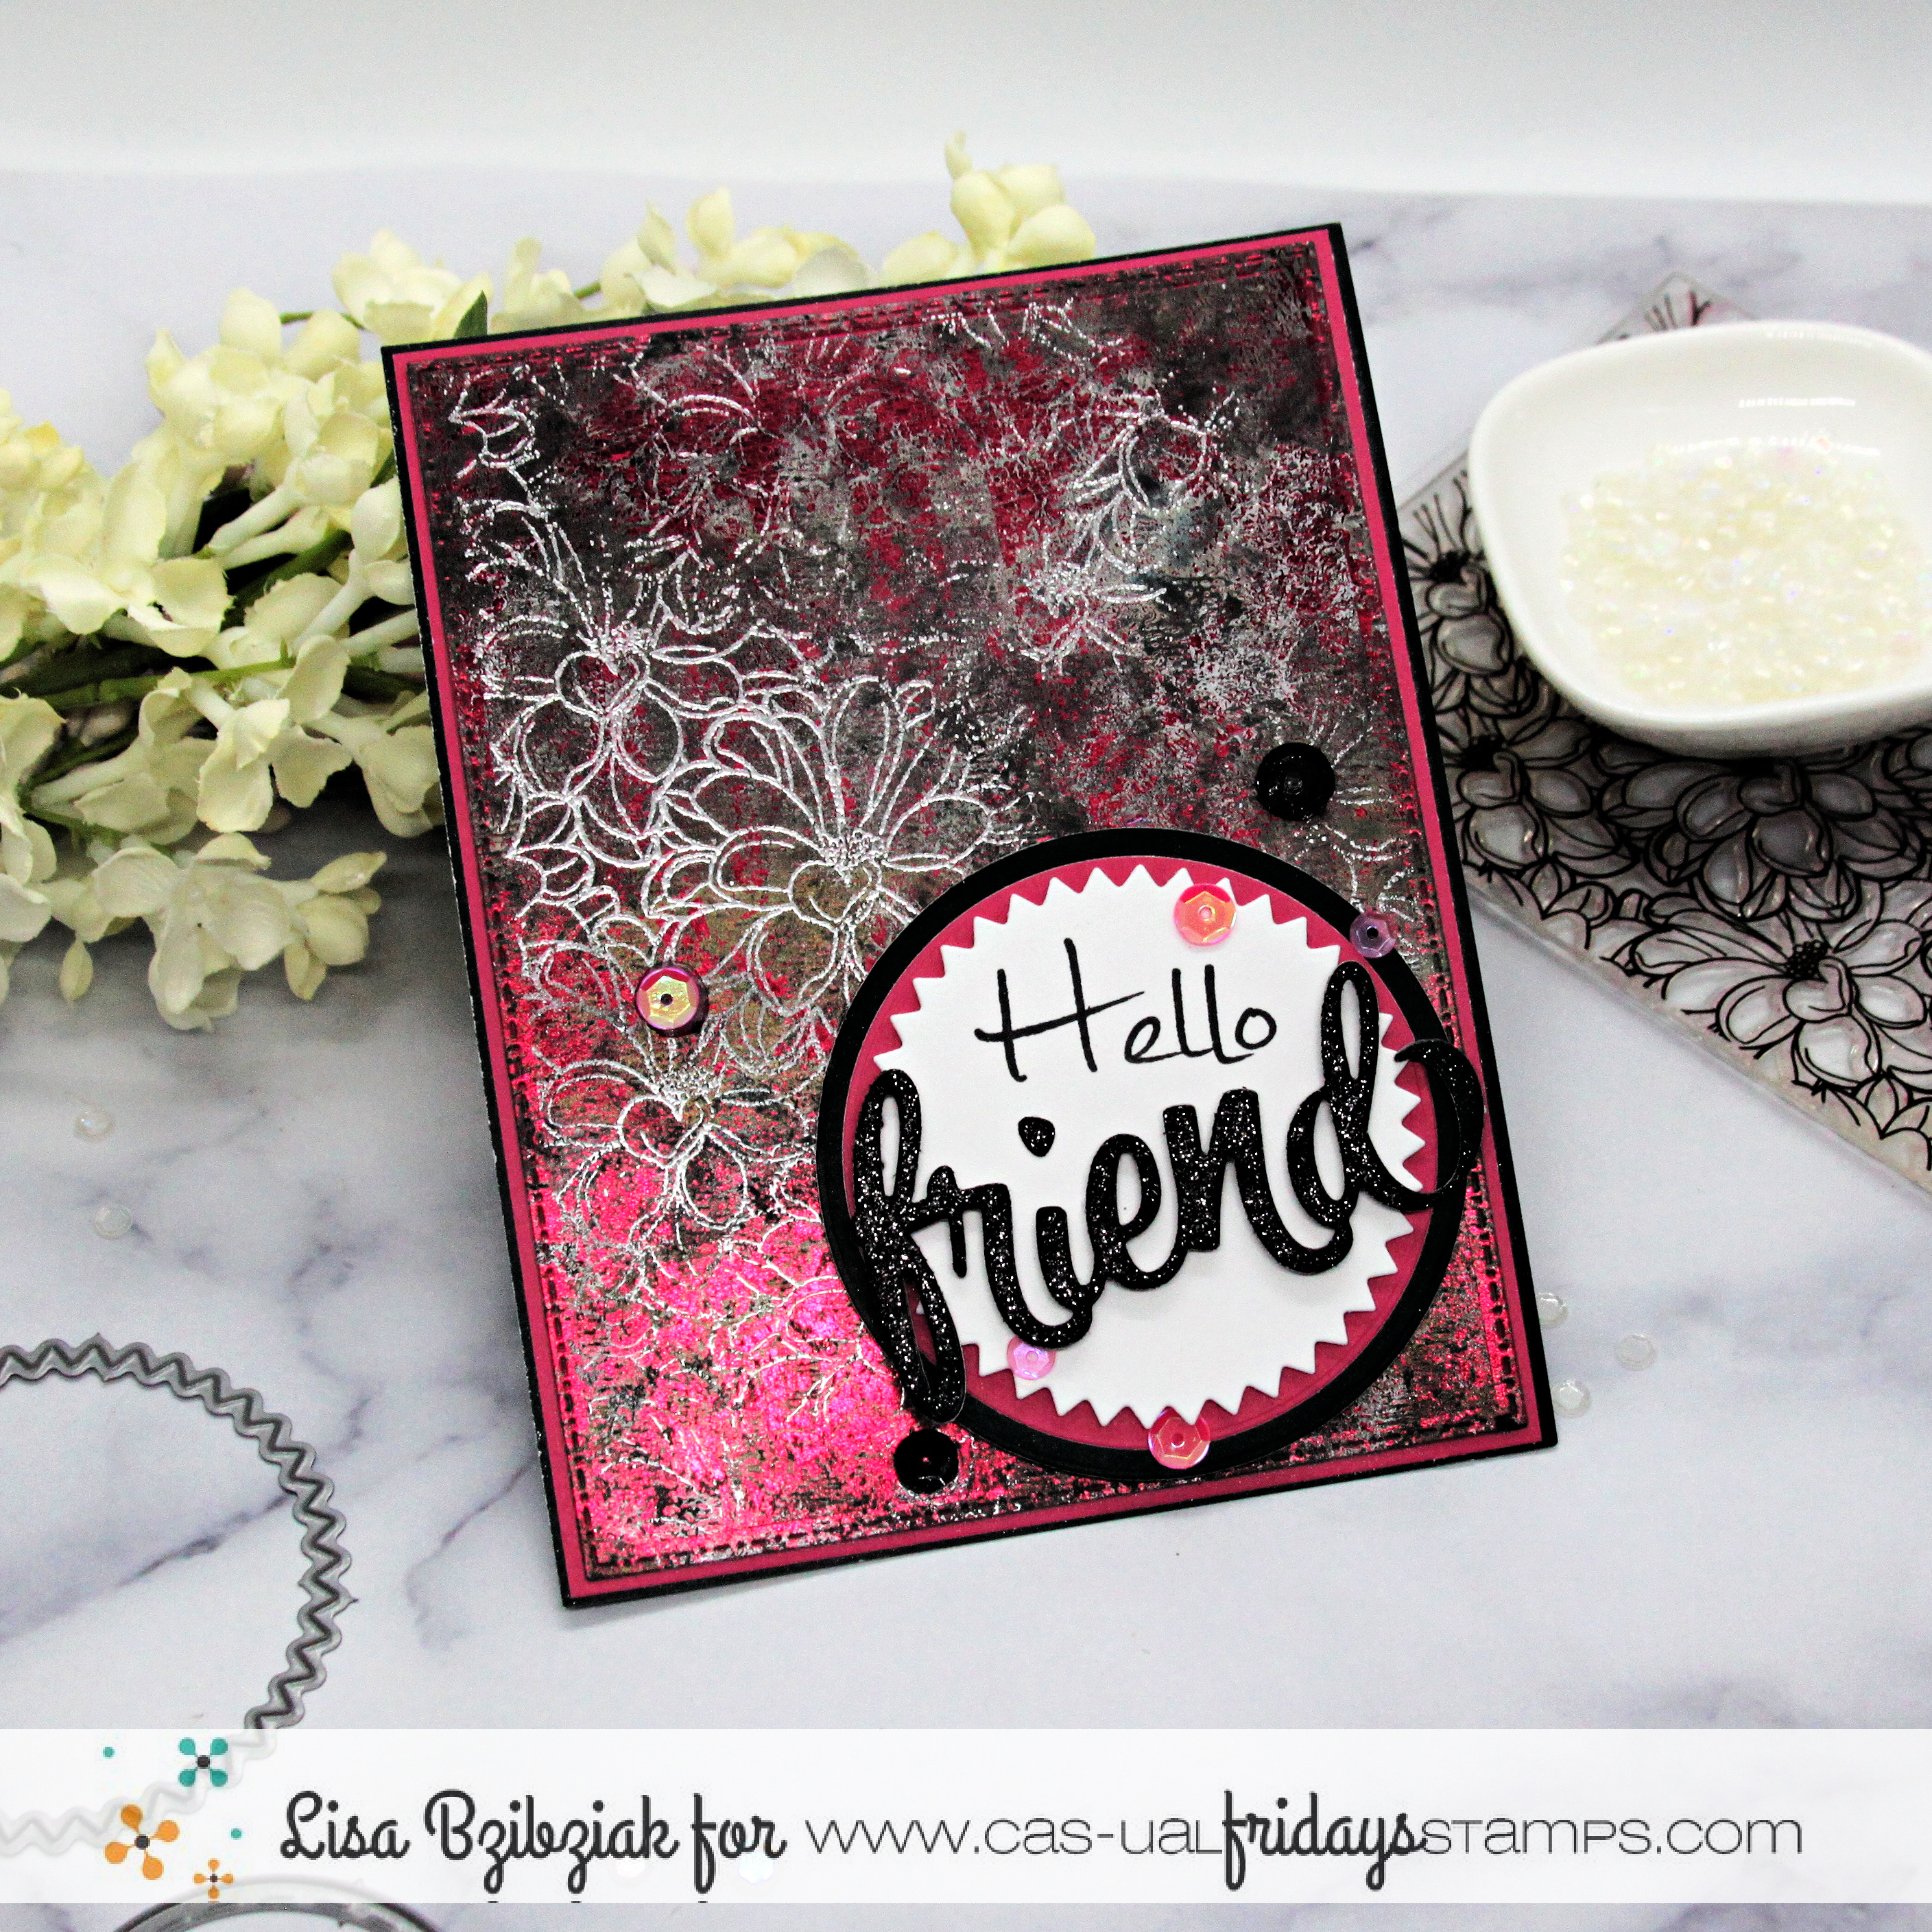
I'm up on the blog over at CAS-ual Fridays Stamps!  I've got this one that I made using the 2nd gel print that I foiled last time.  If you missed it, you can watch the video below to see how I made them!


I decided to heat emboss the Flowery Background stamp in silver for fun and love the way it came out.


Thanks so much for stopping!   Hope you'll come again soon!


Monday, April 4, 2022

CASual Fridays Stamps - Foiled Flowery Background


I'm up on the blog over at CAS-ual Fridays Stamps with a quick video showing how I'm playing with Deco Foil and Acrylic Paints!


I created this background along with a second that I'll be using for my next CAS Fridays projects.

Hop on over there for links and details and to watch the video!  It won't take long, I promise!


Monday, September 28, 2020

CAS-ual Fridays Stamp Release-Slimline Pinked Fri-dies!


Today is Day 1 of the new CAS-ual Fridays release!  And today we're sharing a fun new die set with you... meet the Slimline Pinked Fri-Dies!


I cut the largest pinked die from plaid paper and the next smallest die from white cardsstock.  I blended on some Spiced Marmalade and Squeezed Lemonade Distress Oxide Inks and then used the Modern Petals Stencil and applied some more Spiced Marmalade through it.  Then I centered a smooth circle inside one of the pinked circles to create a frame, taping it in place on my paper and then cutting two more just like it.  Popped them up onto the front of the ink distressed panel and added my stamped, cut and colored images from Mon Ami.


Finally, I cut the hello from Sweet Friend Fri-dies three times and stacked them.  I added the sentiment to the card and carefully covered it with Glossy Accents.  Just a few sequins scattered around and I was done!

Thanks so much for stopping!  Be sure to check out what my teamies created for you today!  And head over to the CAS-ual Fridays blog for more fun!

Should you see something you absolutely need, I have this for you:


Thanks for stopping!  Come again soon and don't forget to come back tomorrow for more New Release!


Friday, September 25, 2020

CAS-ual Fridays Stamps and Catherine Pooler Designs Collaboration Hop!


Hello!  I've got some fun for you today!  CAS-ual Fridays Stamps is joining Catherine Pooler Designs for a Blog Hop!  We've all used some beautiful CP Inks along with some fantastic stamps and dies from the CFS shop!  And both are giving away a $30 gift code!  Hop and leave some love at each stop for your chance to win!

You should have arrived here from Jen Carter's Blog!  Here's how I was inspired: 


I decided to pull out the Full on Floral background stamp for today because it's so pretty and I thought it would be perfect in these beautiful colors from the Party Collection Carnivale Mini Ink Pads.  I used the Misti and applied the Limoncello ink first and inked up the bottom right corner of the stamp and stamped onto a panel of white cardstock.  When I do this I like to apply the ink with a sponge to avoid lines and get a better blend.  It will take me a couple applications which is why I use the Misti.  I cleaned off my stamp in between colors and followed with Coral Cabana and Be Mine.


Then I left the stamp on the Misti and covered it with some Wow Embossing Ink and stamped over the inked background.  I added some Wow Changers Sparkle and heated it up.  It added a really pretty sparkle to all of the beautiful color.


I stamped, cut and colored that sweet bunny from the Somebunny stamp set and then diecut the Sweet from the Sweet Friend die set three times from white cardstock.  I added more of the same colors of ink again using a sponge to one of the word diecuts and then heat embossed it with the Sheen from the Changers kit and then again using some clear powder.  I stacked my three word diecuts together and then popped the bunny and "sweet" onto my base.  I stamped a sentiment from the Be A Unicorn set and cut out the top and bottom parts to arrange around the Sweet to build my sentiment.


I added a few sequins and this one was done!

I've been using these inks lately ... I just love the beautiful and rich colors and the pads are nice and juicy!  Here's a couple more projects I made recently using CAS-Fridays products along with these inks:


If you come here often, you know how I love my coffee cards!  That background was made using the By The Beans stencil and CP inks topped with a little translucent texture paste and some "texture" Wow Changers.  If you'd like more details you can visit this post here!


And oh look!  More Coffee....lol... and you can find this one here if you'd like more details.

That's me for today!  Now head on over to see what Karen Baker has created for you today!  Remember!  Be sure to hop and visit each post and leave some love for your chance to win one of two $30 gift codes to one of the shops!  You'll find all of the details when you stop at the CAS-ual Fridays and Catherine Pooler blogs... links to those are at the top of this post!

 Thank you so much for stopping by today!  I hope you enjoyed your visit and you'll come back real soon!

Monday, July 13, 2020

What's Up Friend - CAS-ual Fridays Stamps


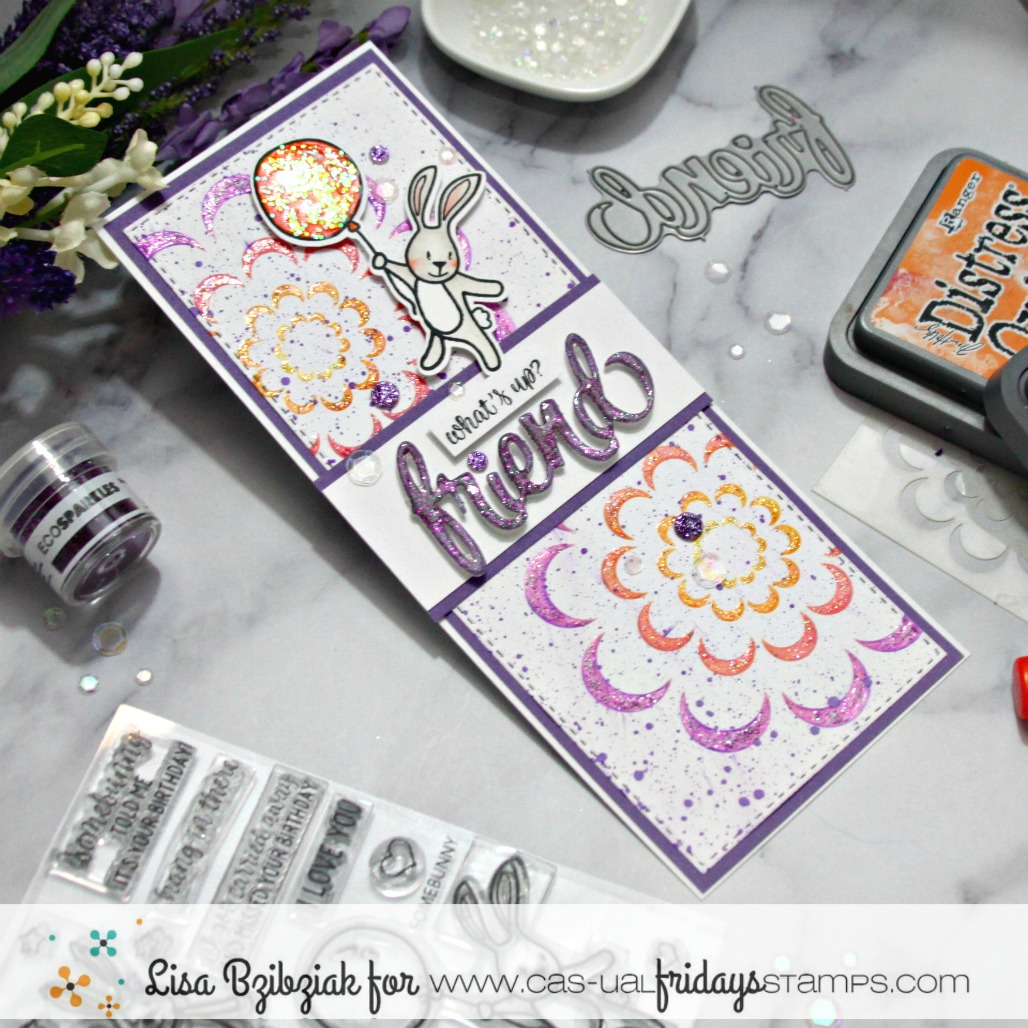
Welcome back!  Today I'm sharing another card using the Bold Flower stencil along with the Somebunny stamp set and a few other things!  I'm painting with Glitter again on this one because I'm playing with this technique this month and I love it!


I started by using Distress Oxides and the Bold Flowers stencil to add the two largest flowers to my slimline sized card.  I knew I wanted to use a few colors on the petals so I stuck with the largest flower on the stencil and added one off the left edge at the top and off of the right edge at the bottom.  Then I took a paint tray and added a little bit of anemone colored Eco Sparkles glitter from Wow and some Glossy Accents and mixed them together.  You don't need a lot and you can always add just a little water to the mix if you need to thin it out a bit while you paint.


After I got done "painting" the glitter onto the purple areas, I rinsed out my paint tray and grabbed pink, orange and yellow glitters from my stash and repeated the process with each.... rinsing out in between so that cleanup would be easy... and it was!  Before I set that aside to dry I sprayed some Distress Oxide Spray in purple over the panel and then set it aside.


I cut the Friend word die from the Sweet Friends word die set once from purple card stock and twice more from white and stacked and glued them together.  Then I decided it would be fun to paint the sentiment with glitter too, so I did!  I wanted even more dimension for this part of my sentiment so I decided to add additional Glossy Accents over the top of it and set it aside to dry.


I colored in my bunny and balloon and then decided the balloon could use a little sparkle too...lol!  So I broke out the chunky orange glitter and liquid glass and proceeded to paint that too... I can't get enough!


I absolutely love the shimmer of the glitter and glossy accents painted on!  It's much lighter than just adding glitter to your project.  The Glossy Accents is light enough that it doesn't buckle your paper, and there is no glitter to fall off of your project either at your house or your recipients!  It's all securely in place with the Glossy Accents... smooth and sparkly!

I used one of the short sentiment pieces from Somebunny along with the Friend word die to build my sentiment.


I just added some jewels and sequins and I was done!

So thanks for joining me today!  I hope you enjoyed it!  Should you see something that you must have today, I have this for you:


And you just might find some really great deals in the sale section too!

Come again soon for more CAS-ual Fridays Inspiration!


Saturday, July 11, 2020

Thinking of You - CASual Fridays Crafting of Hue Sponsorship!


Welcome back!  Today is a fun day because CAS-ual Fridays is sponsoring over at the Crafting of Hue Facebook Group (Be sure to check that out) again and this time around we're featuring Stencils!  AND all stencils are $5 through Sunday, July 12th!  (AND... shhhhh... you may or may not find some items in the shop marked down to a low... loooowwww price of $.99!!  YES.  Ninety-nine cents.  And don't forget my discount code at the end of this post!)  AND one lucky commentor from all of the hop stops will win a $50 gift code to the shop!  So be sure to visit and leave some love at all of your stops!

Now!  On with our stencil inspiration:


Oh... I'm sorry... forgot to tell you to put on your shades!  I've made a bright and cheery card today using some Neon Pop Flock, Transfer Gel and the fun and pretty Bold Flower Stencil from the CAS-ual Fridays shop!  (Along with a couple other items!)


I started with that bright yellow cardstock and applied some Deco Foil Transfer Gel through the Bold Flower Stencil and set it aside to dry.   While it was drying I cut the Hello from glitter paper with a die from the Sweet Friend Die set and then again from white cardstock and a third time from orange.  Then I stacked them together with the orange at the bottom and offset it just a bit to give the Hello a bit of an orange "shadow".


I stamped the sentiment from Pretty Posies in orange.  At this point, I still had some drying time to go so I started on another card for tomorrow!  Once the gel was completely dry, I laid the Neon Pop Flock sheet over the stenciled cardstock (flock side touching the dried gel) and ran it through my Minc after heating it up on the 4 setting.  It came out perfectly and I assembled all of the pieces of my card along with some clear sequins.


And that's me for today!  IDK why but I've been all about the yellow lately.. feeling kind of sunshiny I guess!  And it's so fun to feel the texture on these flocked flowers.. just love it!!

That's me for today!  Check out the hop list below for your next stop!  Get ready to be inspired by all of the stencil techniques!  And be sure to come back here Monday because I'll have some more CAS-ual Fridays stencil inspiration for you!  But if there are some stencils you want, grab them at $5 by tomorrow, Sunday, July 12th!  And don't forget, I've got this for you:


And don't forget to see what you can get at $.99!!!

And here are links to all of the goodness from my teamies:


Lisa Bzibziak (That's me!)

Thank you for stopping and come again soon!


Monday, March 30, 2020

Terrific Flowers - CAS-ual Fridays Release!


It's Day 2 of the CAS-ual Fridays Release!  Today we're sharing projects using the Terrific Flowers stamp set!


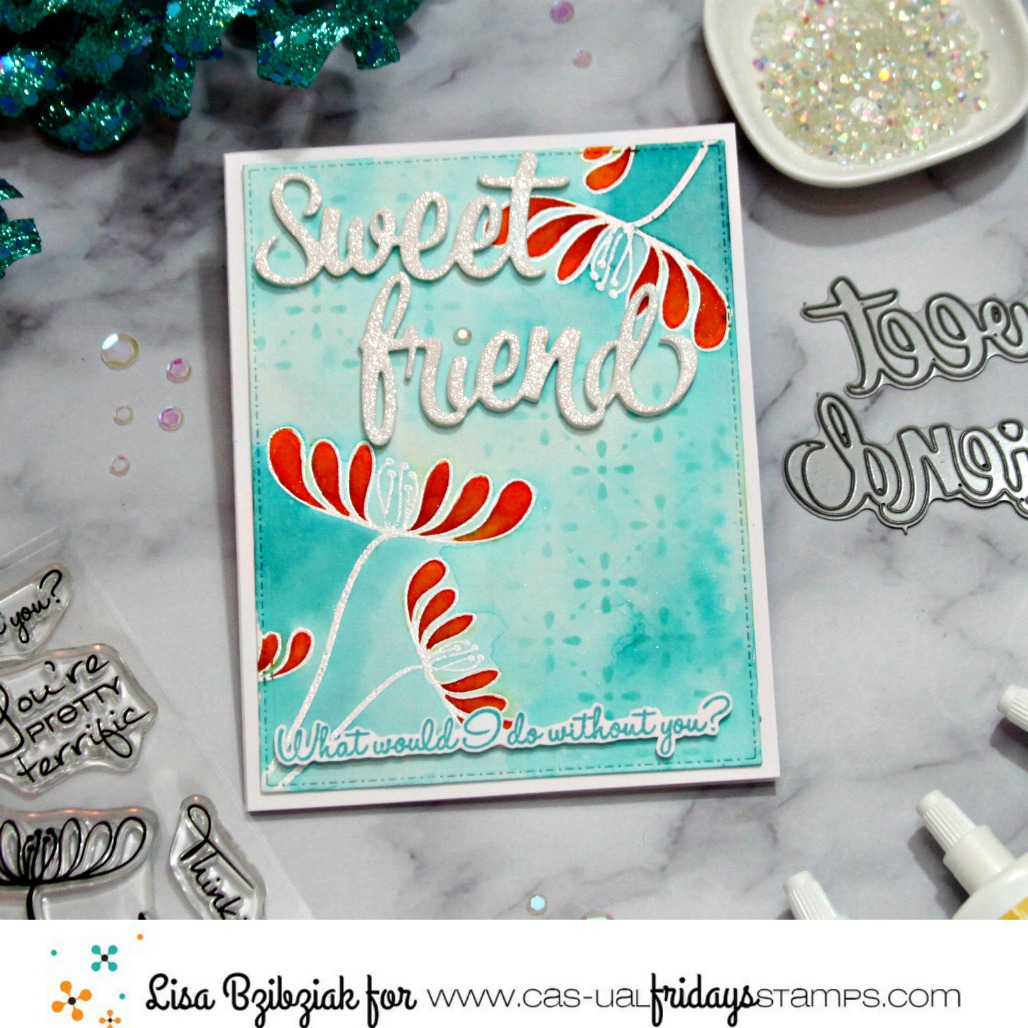
I've been playing a lot with my Color Bursts lately and I used them here.  I cut my background layer from Watercolor Paper and stamped and embossed the flowers from the set onto the Watercolor paper.  Then I used Ken Oliver Color Bursts to watercolor in the flowers.  I added a little extra color using my watercolor pencils.  Finally I colored the background with more Color Bursts.


After the panel was dry, I added a subtle pattern using the Tin Roof Stencil and some Distress Oxide Inks.  And for my sentiment I cut the Sweet and Friend words out of white glitter paper and twice more from white cardstock and stacked and glued them together before popping them up onto my base.


I stamped and cut out one of the sentiments from Terrific Flowers and added it to the bottom of the card.

And that's me for today!  Be sure to head on over to the CAS-ual Fridays stamps blog and see what everyone has created for you today!  And the entire New Release is available now in the shop here!

And should you decide there is something you must have, I have this for you:


Thanks for stopping!  And come back tomorrow for more Release Inspiration!


Thursday, September 26, 2019

An Autumn Hello With CAS-ual Fridays


Welcome to some CAS-ual Fridays inspiration!  Today I'm sharing a card I made using all Die Cuts... not a stamp to be seen!  And CAS-ual Fridays has some of the best in town!

I started with a neutral but beautiful background layering a base of Kraft with a Kraft layer of the Trellis Cover Die.  When it came time to cut the pieces of the Acorn Fri-Dies I thought I'd use some pretty design papers, but they were too distracting... cardstock was too flat... so I pulled out a 6X9 piece of white cardstock and a bunch of autumn colors in Distress Oxides and decided to make my own:


I started with some Antique Linen and Brushed Corduroy that I applied to the whole sheet.


Then I added some Fossilized Amber to the entire sheet except for one corner that I wanted to leave very light for the bottom part of my acorns and I wanted an area with some green for some of the leaves, so I added the bundled sage just to one corner.


I added Rusty Hinge and Vintage photo (for some leaves) to all of the areas except where the Sage and Antique Linen areas were.  And for my acorn tops and leaf veins I darkened up an area with the Ground Espresso.  So I had all of the colors I needed on one sheet and slowly started taping down the dies to the colors I wanted and ran them through my Gemini.


And I ended up with all of these!  And my favorites are the ones that overlapped the various color "blocks"


I cut a large Scallop Tag from some cool "graph paper" patterned design paper.  Added my leaves and acorns and splattered some gold, bronze and white glitter watercolors over the whole thing.  Then I added and a gold Hello using a die from the Sweet Friend Fri-Dies across them, using popup tape, cut very thin in the middle to support it.


I also cut a couple of the Casual Tree die cuts from some darker kraft and added those to my foliage clusters.


And I still have lots of die cuts left over for another project!  You'll be seeing that soon!


In the meantime, if you've seen something you must have today, I have this for you:


And there are lots of awesome things on sale here!


Monday, July 22, 2019

Watercolored Backgrounds with CAS-ual Fridays!


Welcome to some CAS-ual Fridays watercolor inspiration!  I'm really loving my Paul Rubens glittery watercolors lately and creating lots of backgrounds with them.  I'm sharing with you today one of the ways I've been using them (or maybe two).


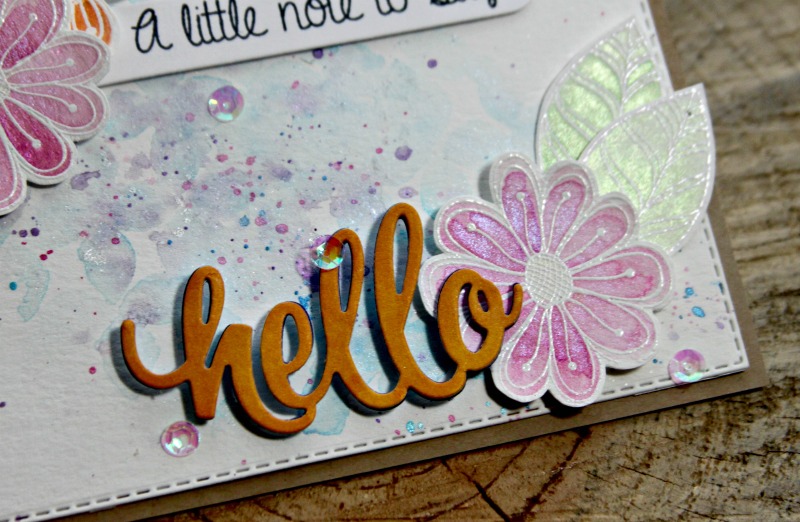
Nothing like a beautiful floral and this Pretty Posies set is SO lovely.  And with it's pretty and simple sentiments, the set is perfect for any occasion!


I cut my panel of watercolor paper and started by stamping the medium flower from the set in versamark and heat embossing with some Wow Bright White Embossing Powder.  When I'm random stamping I like to start with my largest image and stamp in a triangle pattern leaving room for my other images.  Then I go down to the next smallest image and do the same and fill in with the smallest.


Because the paper is white and it can be hard to see the images on the paper I heat emboss each set of images separately.  It also helps to keep me from smudging and ruining an image because my thumbs tend to get in the way.


Then I start to add my background color.  I don't worry so much about getting the background color over the images because a lot of the time it just mixes in with the other colors I add and creates some really cool colors.  Also because it's water, you also have the option to wet a space again and lift up the color with a paper towel.  I did that for my smallest flowers a bit because I was using orange and felt it would be a better color without mixing with the blue.  I'd let the background color dry and then see if I wanted to add any more color until I was happy.  Really the waiting is the hardest part as the song says...lol!


After I was happy with my background coverage, I started adding color back in with a smaller paintbrush.  Again, I would let my colors dry and then add some more where I wanted it.  I mixed in some purple with my pink and a couple different greens on the leaves... along with the blue I love the way they came out!


When I had everything colored in, I let it dry and splattered some more colors on with my tiny paint brush.  It's so much fun to play with watercolors this way!  


I stamped and embossed a few more of each of the images onto some watercolor paper to be cut out and popped up on my card.  I added this simple sentiment from the set and finished my sentiment ...


With this Hello from the Sweet Friend Fri-Dies... 


And there you have it!  I did fussy cut my images out because in my usual fashion I FORGOT I had the dies!!  Oh I wish I hadn't forgotten that...lol!  Although I don't mind cutting.. it sure would have been SO much easier had I just die cut them out.  Don't ask me how I forget these things... I just do...lol!


I had some extra flowers left over so I decided to create one more quick one:


Rather than creating a new identical background... I just used my watercolors with the Modern Petals Stencil for an even quicker and simpler background.. I'm gonna make a few more of these as well and I'll share those with you next time!


To make things easier for myself I kept the same design basically and this one came together quickly!


Have I mentioned how much I love the font on these Sweet Friend Fri-Dies??


So that's me for today!  I hope you enjoyed your stop here today and you'll pull out your watercolors and play a little.  I know I'm going to be doing just that very soon!

If you've seen something here today that you must have, I have this for you:


And come back soon for more inspiration!  You can find us at these places: