Showing posts with label Wedding. Show all posts

Monday, June 7, 2021

A Jillian Vance Design - New Release Fun In The Sun!


There is a fun new summer release over at A Jillian Vance Design and I'm up on the blog today with this one using Sweet Sunflower:


I've got lots of details and links over there and hope you'll give us a visit and check it out!

Thanks for stopping!  Come again soon!


Friday, May 7, 2021

Miss Ink Stamps - Happily Ever After


Welcome back!  I'm playing with the new Climbing Roses stamp set along with one of the fabulous frame stencils, Ins & Outs: Quaterfoil today and I've created this card for a wedding this month!


The Ins & Outs group of stencils in the shop are fabulous for creating a beautiful masked ink blended spotlight for any of your stamp sets!  Bunches of shapes and two piece sets that make it so easy to make a different colored frame and/or add some glitter paste like I did without seeping into your center piece.


Cool thing is there are lines on the stencil to help you center your stencil directly over an A2 card (if that's where you want it!).  And those roses???  I used some unexpected colors today.  It was meant to be a little more rainbowy, but my pink is maybe a little too purple to make it so, but I love these colors anyway, and they are perfect for the bride and groom that I'll be sending this one too!


I'll be sharing another one of these Ins & Outs stencils on the blog next week so hopefully you can see how easy they are to use.

And for those who want it:


My colors!

Thanks so much for stopping!  I hope you'll come again soon!


Wednesday, June 24, 2020

Happily Ever After! - Waffle Flower Stamps


Happy Wednesday!  We're halfway there!  I'm sharing a card with you today that a friend asked me to put together for her.  She had sent me a pic of the images from this adorable Waffle Flower Wedding Day stamp set and of course I had to buy it!  It was so sweet!


I mean... so cuuute right??  And the sentiment from the CAS-ual Fridays Ever After stamp set was perfect!  I heat embossed it in gold and fussy cut it out.  I created my scene using some dies and the images from the Waffle Flower set inside a rectangle frame.


And that Lacy Panel Die???  Love it.  And now I must mention that I wanted to make this one a little bigger so I went with a 5x7 size.  And how happy was I that when I was on vacation a while ago I visited Buffalo Stamps & Stuff and purchased the A7 Lacy Layers set as a souvenir...lol... worth it!!


And the best part is... she said it was perfect!  I mailed it off Monday and she'll have it for the wedding!

Thanks so much for stopping and hope you'll stop by tomorrow... there is a lot going on here!

Friday, January 3, 2020

On Your Wedding Day - CAS-ual Fridays Stamps


Happy New Year!  Today I'm up on the CAS-ual Fridays Blog and I'm sharing a card for a wedding and I've used lots of embossing powder on the background, sentiment and on the embellishments.  I used some gold mirror cardstock and was wondering how it would take the heat if I were to heat emboss it. 

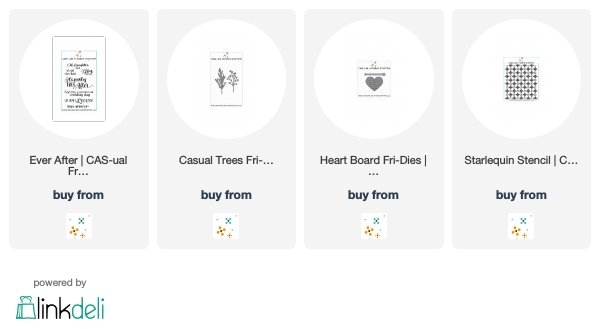
I started by creating my background using the Starlequin stencil and applied some gold embossing paste through it.  Then while it was wet I sprinkled on some Vintage Peacock embossing powder and heated it up.:


Next I die cut one of the CASual Trees Fri-dies from gold mirror cardstock, smooshed the ends onto my embossing ink pad and then smooshed them into the powder.  I didn't worry about full coverage because I like things imperfect and wanted the gold to show through.


As you can see, the mirror cardstock took the heat ok, however, some of the embossing powder seemed to slide around a bit as I heated it.  After it cooled, I applied more embossing ink and more powder and heated it again... this time keeping the heat pointed straight down at it instead of coming from the side as I tend to do and that seemed to help more stay put.....


And this is what I ended up with... I LOVE it!   I used the same powder as in the background, Vintage Peacock, and I mixed in some plain gold die cuts for contrast in my "bouquet". I love imperfect things in my project, but if you don't, then you may want to use plain cardstock for this technique for more even coverage of the embossing powder and you can just keep adding more until you get the look that you like!
  

I love to cut apart the branches of this CASual Trees die cut so I can make a full "bouquet" and love how it coordinates perfectly with the background.  The heart from the Heart Board Fri-Dies is perfect as a vase.


I embossed the sentiment from the Ever After set in white onto some teal cardstock and added a matte of the gold behind it, tucking a few more of the branches from the CASual Trees die cuts in the corner.
  

I'm playing along with the Wow Embossing Powder January Challenge which is Love/Valentines Day/Wedding/Anniversary.  I've got that covered!

If you entered the giveaway for the Season's Giving Blog Hop, be sure to stop back tomorrow to see if you were a winner here at the CAS-ual Fridays Stamps Blog!  And if there are things that you need from the shop, I have this for you:


Thanks so much for stopping by!  Come back again soon for more inspiration!

Below are links to the CAS-ual Fridays Stamps Products I used today:


Tuesday, June 26, 2018

Mini Album Makers Challenge June 2018


I have a quick post for you today!  I was asked by a co-worker to make her a card for her granddaughter who had just gotten engaged... and then this happened!

I'm linking it up to the June Challenge over at the Mini Album Makers Challenge Blog!  You can check that out here!


I've always loved making these Accordion Albums and they are really so quick to make and aside from a few challenges, pretty easy!  The papers I chose were from a couple old CTMH packs and then various flowers and embellishments... Prima, CTMH, die cuts.  And of course used some beautiful crinkly seam binding that I bought at an antique store near me.  It's not antique ribbon, but one of the booths has a selection of beautiful crafting supplies like the ribbon, bags of buttons and spools and such... LOVE going there!  Luckily I have a big stash.  All I had to do was print the pics and I had everything else I needed in my home!


You only need limited supplies and a few pics.  I've made them before as birthday cards and so I asked her to get me a few pics and told her I'd make one of these... she really had no clue what it was and agreed.  It's basically made with two square pieces of cardboard, three square sheets of paper and whatever embellishments and paper you want to use.  

As I'm getting ready to go on vacation right now, I don't have time to go into details on measurements and such.. and to be honest it had been so long since I made one, I used an older one I'd made and made it up as I went along, but I promise I'll post another in the future, keep better track of what I'm doing and include a photo tutorial with measurements for those interested.  I can tell you each space is around 4 1/4 x 4 1/4... the three sheets I folded were about 8 1/2 x 8 1/2 and the two cardboard pieces (to create the cover and back) were about 4 1/4 x 4 1/4.  Again, these measurements are approximate, but it's made to fit 4x4 pics... I'm positive you could do whatever sizes you want and create different sized albums...maybe I'll do that for my next one and change it up!


One of my favorite "pages" in this album is this one...lol!  This is the song for their wedding and I googled the lyrics, typed them up in Pic Monkey and added a couple pretty overlays.  Then I printed it on my laser and foiled it with some Gina K foil and my Minc.. Love it!


The hardest part of this album is that there are only four spaces that you can use a whole, uncut picture.  The rest must be cut diagonally, so you want to find pics that you can trim to 4x4 and that will lend themselves to being cut diagonally without say going through someone's face.. 'cause that would be just weird..lol!


I was quite challenging for this one because I didn't have a large choice of pics and they were all pictures my co-worker had taken from her granddaughter's facebook page so not the best quality... but I made most black and white or muted colors in picmonkey and I think I made it work!


The other challenge here is decorating without too much bulk on the inside... I loves me some layers and bumpy stuff, so I struggled a bit with that as well, but in the end it all came together. Hoping this will be a keepsake for them.  She delivered it this past weekend and they went dress shopping.. I got to see the pics and I'm already thinking maybe I'll get to make another one after the wedding!...lol!  But now I better start thinking about what my next one will be.. my fur babies.. my furless babies?  Maybe the flowers from the cacti in my garden... ooh... yes... I think that might be it!

Thanks to all of the girls over at the Mini Album Makers Challenge for all of the inspiration!  I so enjoyed making one of these again!  Now I have to finish packing!  Flying off tomorrow for a crafty weekend!  Come back tomorrow for an announcement regarding Three Amigos for July and a cute birthday card for my son!