Monday, February 26, 2018

A Little More Jillian Vance and My Last Guestie Project for Heart2Heart


Today is the start of a new challenge over at Heart 2 Heart Challenges!  It's also my last day as the February Guest Designer and it's been a lot of fun!  You still have some time to play along with all of February's weekly challenges!

This week the sketch is Everything But The Kitchen Sink which for me translated into Coffee... 'cause... well... you make it in the Kitchen...lol!  So I used some of my leftovers from last week's Sponsor Solo projects... And that pretty heart paper from the Paper Fundamentals papers at CTMH was perfect for this lagoon colored cup!


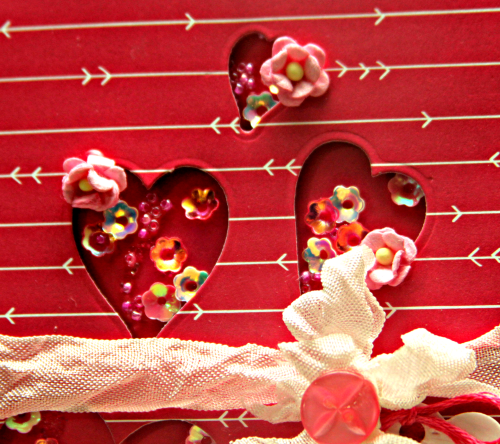
If you remember, I cut 7 colors.. 8?  IDK.. you can count them if you want.. using this Grandpa's Glass Cup of Love die from A Jillian Vance Design so that I could create a stained glass rainbow card which you can see the cards I created here if you'd like.  This is one of the frames that came from those cuts and I used it here and just filled in the white cuts for the coffee cup and didn't bother with the outside pieces.  I felt it brought the cup pieces to the forefront just a bit.


And that little piece at the bottom was the perfect size for this sentiment... a few paper flowers and sequins and done!  AND I put almost all of my other pieces to use on bases that will be used in the future:


I only had to cut extra white pieces for the frames and I've saved those as well as some others from the quilt die for future projects.. kind of like I used them on yesterday's card for the Calling All Sistah's Encouragement Challenge which you can see here if you'd like.

So I hope you enjoyed your visit today and I hope you'll join the gals over at Heart 2 Heart Challenges in this and future challenges.  Such a fun variety of Challenges and I love that you have all month to play along with every weekly challenge for that month!  It's been fun and I'll be playing along in the future as well... and maybe you'll even see some of these in my projects!


Sunday, February 25, 2018

Coffee Birthday Card with Cas-ual Fridays


I had some time to play along with the Cas-ual Fridays Calling All Sistahs Challenge that's going on currently.  I was inspired by the colors and ... well, of course the coffee!

I started with some of that watercolor paper pad I picked up at Walmart.  Honestly I don't do crafty shopping or any shopping there too much.  I prefer to buy from some of my favorite small crafty businesses and shops, but I was there late to pick up a couple things I needed including foam board so of course I had to stroll the aisles a bit and there it was for $5!!  It was perfect for the colors in this inspiration photo:


Perfect, right!?


I started by cutting my base with that awesome Reverse Confetti Lacy Scallop die (one of my fave background dies!).  And I started with just a plain white second layer, but then there was this leftover cut from my previous Jillian Vance project so I added that ...I think it makes a great backdrop for the AWESOME Coffee Cup die from Cas-ual Fridays!  I just love this cup with it's heart shaped handle!  Even better that I won this set!!  Thanks again to Michele for her awesome generosity!  And speaking of winning... this challenge has a $25 gift code prize... bumped up to $50 if you use Cas-ual Fridays products!

I filled my cup with a bunch of flowers cut using the Friendly Flowers dies.  I love this flower set... I didn't even cut the dies apart.  I just cut a bunch of flower layers at one time with each color and then mix and match!  


And I thought this sentiment from the Peace, Love and Coffee stamp set was just right... and since this is a birthday card, on the inside the sentiment is a simple Happy Birthday!   I'm also playing along with the Seize The Birthday Challenge which is always Birthday with an optional twist of Coffee or Tea this time around!

Hope you enjoyed your visit!  Hoping to join in on a couple more challenges this weekend.  Hope you'll get some inspiration and play along too!

Friday, February 23, 2018

Coffee Lovers Sponsor Solo With Jillian Vance

Helen and I are joining Amy today to celebrate one of our wonderful Coffee Loving Cardmakers Super Sponsors, A Jillian Vance Design!


So here's what I have for you today:


I have always loved this Grandpa's Glass Cup of Love Die.  I've seen so many beautiful cards made using it and there are a few up on the Coffee Lovers Blog today!  I stumbled upon a cool rainbow watercolor paper pad at Walmart for $5 the other day and I knew it would be perfect with this die.


  With this one, the time is in the cutting.  I cut it eight times for 7 colors and white.  I kept track of my pieces by placing each on a separate envelope after I cut them.  (Figured this way, if there were any left I didn't put together I'd slide the pieces into the envelopes).  I added the white frame to another white piece of paper first so I'd have something to glue the rest of my pieces to.  I used Liquid Glass which works great.  It is shiny so if you're not careful you will get a mess and if you use too much your paper will curl a bit when it starts to dry, but I was very careful and just used a small amount... it's such a strong adhesive you don't need much.  Another good alternative might be some Ranger Multi Medium Matte.  I chose the LG because of the thinner spout and I knew it would be faster.


And love the fun sentiments on the But First, Coffee stamp set!  This one was just the right size... didn't want to cover up my stained glass creation!

If you love puzzles, then you'll love this die!    And now that I have a formula for my colors, I can make 6 more cards with my leftover pieces!  (As long as I didn't lose any...lol!).  Hoping to do that this weekend and I just have to cut 6 white (or maybe black) bases... I will definitely share when I do!

And here's my second set of cards:


I've had this Star Quilt Die for a while now and my first thought was to use some pretty flowery shabby chic patterns, but then when I found that pretty paper, I decided to do this instead!  I started with a white base that I cut with a stitched background die.  I used the Quilt Die to cut a window from the base and then added my base to another base.  You could probably just add it to an actual card base, but I like the sturdiness of the three layers.


  Then I added my frame.  I chose the purple frame first and added my four colors in a pattern to the center star.  I was trying to decide how to choose what the outside pieces would be and I noticed I had all of the pieces from when I cut the square window in my base piece and there were those cute coffee beans on the But First, Coffee stamp set and I decided if I made a quilt (or more likely had someone make me a quilt...lol) I would choose some coffee bean patterned material in a cute bright color for sure!  And I chose purple beans since my frame was purple and ... well... as you can see I carried on that theme for the main color.  And then, just like with my first card, I have lots of pieces to make more:


So... I did... I snuck one more in before I went to work.  This one I decided to make green the focus (hmmm.. who should I send this one too?)  I'll put the rest of these together soon too!  

So, if you didn't already stop at the Coffee Loving Cardmakers Blog and read Jillian's awesome story (she is so young and so accomplished already!) then you need to do so and you can see Amy and Helen's projects too!  AND!  There is a chance to win a prize over there so of course you need to be sure to get over there!

Thanks so much for visiting and come back soon!


Wednesday, February 21, 2018

Caffeine Fueled Paper Play - Sugar Pea Designs


I'm up on the Coffee Lover's Blog today and playing along with the Mix It Up Challenge over at Sugar Pea Designs!  Hope you'll join me there for all of the details.  Here's a sneak peek of my project:


Cutting Cafe Inspiration-Animal Friends!


Welcome to some Cutting Cafe Inspiration!  Today we're playing with the adorable printable stamp set, Animal Friends.

I decided to color up this cutie pie for today and I love her!  I just printed out a whole page that has two of the animals and in two different sizes and then the circle sentiments with one in the center of that too.  This page had the Pig and the Lamb and Mitra requested I use the sweet little Lamb because she couldn't decide either and used a different one... so happy to not have to make a decision during tax season, I obliged and I'm so happy I did!  Thanks Mitra!


I colored her with my Copics.. W1, W3, W5 and W7.  I used a couple techniques I learned from the most awesome Jennifer Dove.  For her face and ears, I colored her up and then used a piece of terry cloth and some blending solution.  I wet the terry cloth, fluffed it up and then pressed it onto the inked area for 3 seconds and moved around the area like that.  You don't want to over saturate and if you feel you need to re-do any area, you just wait 'til it dries (it doesn't take long) and do it again.

Then for her fluffy parts, I used dots... starting with the dark where I imagine the sun don't shine and starting out with the dots larger and closer together and then smaller and further apart as I move out... then with the next lightest doing the same and so on... I'm pretty happy with how she came out!  And I've learned contrast is good.  I used to be an over blender and I'm slowly learning that it's pretty cool looking to have a bit more contrast as long as you don't have lines... so dots and flicks are my buddies!  Thanks Jennifer.

I'm playing along with the Outlawz Twisted Thursday with a twist of Fur with this one!  You should check this Ning site out!  What a fun and great group of ladies!


Then I used the sentiment circle with the lamb in the middle for my sentiment, but since I didn't need another lamb, I added the yellow heart paper to the center.  I placed my sweetie amongst a little scene of grass, fencing and of course flowers.

Thanks for stopping and be sure to stop at the Cutting Cafe blog to comment for a chance to win some free files!  Then you can check out what everyone else has made as well!  There are some adorable makes this week!

Come back soon!


Monday, February 19, 2018

Heart 2 Heart Guestie-Sunny Days


Excited to be guesting again this week over the Heart 2 Heart Challenges!  This week it's all about Sunny Days!  I created this one using the Little Acres Creations February release stamp set, Piles of Smiles!  As soon as I saw this stamp set, this idea started formulating!  And OF COURSE it has a coffee theme... I mean... are you new here??

I started this one using Distress Inks and a Tim Holtz Sunray stencil.  I ink blended my background to look like a sunshiny morning and then added the sunrays using the stencil and some more of the same ink color where I would be putting my cup.  You know... Sunny Days!

Then I die cut the ink blended background with a scalloped die and layered that on top of that beautiful Canary design paper from the CTMH Stargazer paper pack.  And those pretty gold hearts are chipboard and are from the CTMH Springtime Complements pack.


I cut out two more of the same mat in Pear cardstock and then a few grassy layers using Lawn Fawn's grass border dies and layered them over each other at the bottom of the mat.

This stamp set is SO adorable!  Love this pile of friends helping each other to reach the top of this huge coffee cup and get themselves a warm cuppa.  That cute little bear.. he needs one badly.. that cute little teeny weeny cup was a gift from a crafty friend and it's perfect when my little critters want to indulge in some liquid gold!  It's from Memory Box and I love it!


The huge cup is also from Memory box.  I knew I wanted to use these beautiful sunflowers from the Little Acres Summer Blessings stamp set to decorate my cup.  I like that they also fit the Sunny Days theme.. because they are SUNflowers!   And that cute little foxy fox is also from the new Piles of Smiles set.  He's waiting patiently to get his cup filled too.


And this sweet sentiment from the new set says it all I think.  Love this one and the other sweet sentiments on this set.  I think it's gonna be one of my fave sets!

So thanks for stopping by!  Hope you enjoyed today's make and check out all of the beautiful over at Heart 2 Heart Challenges.  Extra wishes that you will support this awesome challenge and play along!  You have an entire month to play along with all of the weekly challenges so lots of time.  The first week was all about awesome Make It From Your Heart sketchesLast week was True Love and now we have Sunny Days.  It's not too late to play along with all of them!

See you again soon... it's a busy week!

Friday, February 16, 2018

Paper Sweeties February Blast From The Past Day 3!


Welcome to Day 3 of February Blast From The Past at Paper Sweeties!  Today I'm using a few of my very favorite sets... I started with the set I use most often.. the Sweet Borders sweet cuts are my go to for the banners... those pretty stitches!!  Love the rectangle cut as a backdrop... and those scallops... and those are only a few of what's with this set and I love every single one of them!


Pretty Posies stamp set also gets inked up quite frequently here!  And I love all of the scalloped frame sweet cuts sets... they make awesome backdrops or accents.. I had this one in my stash of leftovers and it was perfect to frame the florals... oh those red Copics give me fits, but I do love the way they look when I'm done...


And the sentiments on the Hello Friend stamp set are the perfect size for this banner or the one that comes with that set... LOVE that one!

Hope you enjoyed our ode to past releases and so many of our favorites!  Check out what everyone else has created for you today!


Thursday, February 15, 2018

Paper Sweeties February Blast From The Past-Day 2!


Welcome back for Day 2 of the February Edition of Blast From The Past at Paper Sweeties! 

I started this one by sanding that gray piece of cardstock and then stamping the bicycle from the Hugs and Kisses stamp set over it.


Just love this sweet bicycle with the little heart on the wheels!  I love how it has a kind of vintage feel to it and it was perfect on this distressed cardstock.


Then I added a couple tags cut using the Tags #1 Sweet Cuts in some coordinating papers and stamped this simple sentiment from the Hugs and Kisses set.  Some yummy seam binding in Robin Egg blue, sequins in strawberry and some premade flowers from my stash.


Thanks for stopping again!  Don't forget to check out what my teamies have created for your viewing pleasure:


Wednesday, February 14, 2018

Paper Sweeties Blast From The Past-February Edition


Happy Valentines Day and welcome to the February Edition of Paper Sweeties Blast From The Past!  We're sharing some projects made with our favorite previously released Paper Sweeties sets over the next couple days!

I started this one by using various heart Sweet Cuts from a couple sets and cutting out my heart shaped shaker windows.


And what do YOU do when you forget to put the window plastic on before you add your foam tape?  Do you start over?  No starting over in this crafty space!  I turn it into a faux shaker!  I adhere my window layer onto my cardstock and then glue a few sequins here and there making sure some are tucked under a bit and add some beads.  I used liquid glass to attach everything. 


I try to be a little random about the placement... a stray sequin here and there and same with the beads.  And right now it sounds a little shaker-ish because I've lost a few beads in the mix.  They're floating around and yes, eventually they will end up on someone's floor...lol... 

When I got done I added a few paper flowers to each of the "windows" for fun.


I used this pretty tag from the Stitched Tags #1 Sweet Cuts and love this sentiment from the Happy Mail Stamp Set.

That's me for today!  Be sure to check out what everyone has created for you today!


And come back tomorrow for some more fun!