Showing posts with label Jumping Jacks. Show all posts

Friday, September 2, 2022

CAS-ual Fridays - When You're Sad-Coffee


I've got some CAS-ual Fridays for you today!  You may have heard that Michele from CAS-ual Fridays has decided to close the shop.  She's having a huge sale and everything in the shop is 40% off with no code needed.  You can find the announcement here.


Head on over to the blog for links for this one and hurry because many items are already sold out.


IDK about you, but I'm going to miss Michele's great designs and fun and sassy sentiments.  Be sure to head over to the blog to leave her some love!

Thanks so much for stopping!  Hope you'll come again soon!


Friday, May 6, 2022

Spring/Summer 2022 Coffee Lovers Blog Hop - CAS-ual Fridays Stamps

Happy Hop Day again!  Today's the start of the Hop!  No link ups this time around ... just inspiration and hopping and chances to win some prizes!


CAS-ual Fridays Stamps is a Sponsor!  Head over there for more inspiration and to see how you could win!


And be sure to head on over to the Coffee Loving Cardmakers Blog today and all week for more inspiration and more chances to win!

Thanks so much for stopping!  Hope you'll come again soon!
 

Tuesday, March 31, 2020

CAS-ual Fridays Release-Happy Birthday!


It's Day 3 of the CAS-ual Fridays Release and today we're sharing the new Happy Birthday Stamp Set!  All of the new products are available in the shop now!

I started this one by using some Distress Oxides and the Curtis Stencil for the background.  I stamped the Happy Birthday from the set and fussy cut it out and then stamped one of the sassy sentiments onto a strip of black and popped that up beneath it.


A few Jumping Jacks cut from Glitter Paper and sequins and I was done!

Don't you just love the font on all of these cool new stamp sets??  

Be sure to head on over to the CAS-ual Fridays Stamps blog to see what everyone has made!  And should you decide you need something from the shop, I have this for you:


We've got one more day of Release inspiration for you so be sure to come back tomorrow!

Saturday, February 22, 2020

It's a Time to Celebrate! - CASual Fridays Stamps


Happy Saturday!  This weekend CAS-ual Fridays is the featured Sponsor over at the Crafting of Hue Facebook Group.  If you've never checked it out, you should and you can find it here!

So we're all hopping today and sharing creations with a Celebration theme and I've used some fun CAS-Fridays products on mine for today!


You know I love the Bubble Box Fri-Dies and it's fun to create a label like I did here!   I cut the largest from white cardstock and cut the ends off to tuck underneath my sentiment strip.  I also die cut the balloon die from the Bunny Fri-Dies from Copic friendly paper and colored them... then I added Jumping Jacks in silver glitter paper as well as "strings" for my balloons!  The Celebrate stamp set was perfect for the sentiment... love the size and fun font!


That's what I have for you today!  Be sure to hop on over to the CAS-ual Fridays Blog for all of the details and to find out about some great deals you can get on all of the CAS-ual Fridays products we've all used today!

Thanks so much for stopping and come again soon!

Monday, December 31, 2018

Casual Fridays - Happy New Year!


I'm up on the CAS-ual Fridays Blog today and wishing all of you the best in the coming year!  "May the Best of Your Todays Be The Worst of Your Tomorrows!"...my wish to you.. compliments of Jason Mraz!  

Today I'm celebrating with a little "Coffee"?  Maybe... or maybe not!..lol!  Sometimes my coffee cup doesn't necessarily contain coffee....


As I was looking through my coffee sentiments for my last card using this cup, I stumbled on "Possibly Vodka" from the Cup of Coffee Stamp Set and the idea for this card was born!  I started by cutting my layers.  I knew I wanted Black, White, Silver and Gold for a New Years card.  I cut my Bubble Box layer in black cardstock and then dry embossed it with a folder to play along with the final Friday Challenge that runs through tomorrow.

Then I decided to Jazz up my Coffee Cup Fri-Die with some foil.  So I cut the cup from some Thermoweb Black Toner Paper which is simply paper you can buy that is printed all black with Toner.  It's fun to die cut shapes from and then apply foil.


    The foil will cover the entire piece because the paper is covered in Toner (like from a laser printer).  Some people foil with adhesive, but my favorite way is to foil using my Minc machine or you can use a laminator.  I placed my cup die cut with the toner side facing the "back" of the foil I was using and then inside my transfer folder.  You can also use parchment paper as a transfer folder.  You then feed it through whatever heat machine you choose to use and when it comes out, you peel back the foil and the colors have transferred to the die cut!


The Brutus Monroe Thermoweb Dry Brush Transfer Foil I used was perfect with some silver, black, and gold!  I foiled the inside cup piece (where the coffee or other liquid would be) using some gold foil.

I chose the Taylored Expressions Snowfall Embossing Folder because I thought it also looked a little like bubbles.. and I didn't mind that the white core of my paper broke through in spots because I felt it made them look even more like bubbles!  Then I layered all of my pieces, popped up the cup, and cut a few of the Jumping Jacks die cuts from some purchased foiled cardstock in gold and silver and scattered them around along with some sequins!


So... yeah.  It might be coffee... or possibly vodka... maybe even champagne!  Either way, it's a celebration in a cup!  I hope you've enjoyed this non-traditional New Years Celebration and hope that whether you are out on the town with lots of friends or relatives or on your couch sipping some coffee with one or two of your favorite people (and/or furry babies...lol!) that you enjoy your evening ringing in the New Year!  Personally I'm in Arizona, but originally from the Buffalo area.  We're two hours behind so I'm thinking we may celebrate Buffalo New Years and call it a night!...lol!

AND if you're signed up for the CAS-ual Fridays newsletter you may know that there is a fantastic end of year sale going on right now!  Everything that is in stock in the shop is already marked at sale prices for at least 19% off!  There are some really great deals available there and no code is needed for these sale prices!  And to make it even better you can use one of the DT codes to save even more!  Mine is below or you can use the code of whatever DT member inspires you!


And you've still got until tomorrow to play along with the final Friday Challenge!  Let's give this long running challenge a proper send-off shall we?  And don't forget to make a stop at the DT's blogs to say thanks for all of the inspiration!

I'm also playing along with Anything Goes over at the Simon Says Stamp Wednesday Challenge!  You should check it out!


Monday, October 22, 2018

CAS-ual Fridays, a Homemade Stencil, and Some Foil


I'm up on the CAS-ual Fridays Blog and today I'm showing you how I used some CAS-ual Fridays dies to create a stencil and a cool foiled background.


I started by using the Jumping Jacks Fri-dies to create a stencil with some paper.  You may notice I haven't cut the dies apart.  Sometimes with smaller dies like this I'll choose to keep them together.  I feel like it's easier to keep track of them and I'm less likely to lose the smaller ones.  And because they're small, if I cut a few extras.. no worries!

 I turned the dies in various ways to create a random pattern for my stencil.  If you choose to use paper for your stencil, I suggest using something without a whole lot of fibers.  My first one was created with a red fibrous cardstock I thought would be good because it was heavy, but the fibers ended up sticking when I lifted it up.  So the next try I used some glossy paper and that worked much better...just old photo paper for the Inkjet I don't have any longer.  You could also use something like acetate or vinyl if you wanted to use it over and over.  You may have to play with your die cut machine... shims and all of that depending on the material.


Once my stencil was done, I placed it over my cardstock base and used some washi tape to hold down the corners.  Then I used a spatula and some Deco Foil transfer gel and scraped the gel over the stencil.  I did get some underneath my cuts, but I don't mind.  If you prefer a crisp and clean look you'll want to be a little more careful or maybe even use some temporary adhesive on your stencil.  As for me... I like a few splurts and splatters here and there.  Lift your homemade stencil (especially if it's paper) immediately so it doesn't stick to your piece.  Mine actually ended up drying a little stiffer and I was able to save it to use on another project!

It takes a while for the transfer gel to dry so you'll want to set the base aside for a bit while you work on the other pieces for your project.  Kind of like texture paste.  Once it was dry, I placed the foil over the entire piece and ran it through my Minc and voila!


Lots of sparkle and shine!  As I said, I like lots of splurts and splatters (not to mention sprinkles) so I also splashed some Gold Color Shine onto the piece with a paintbrush once it was foiled and set it aside to dry again.

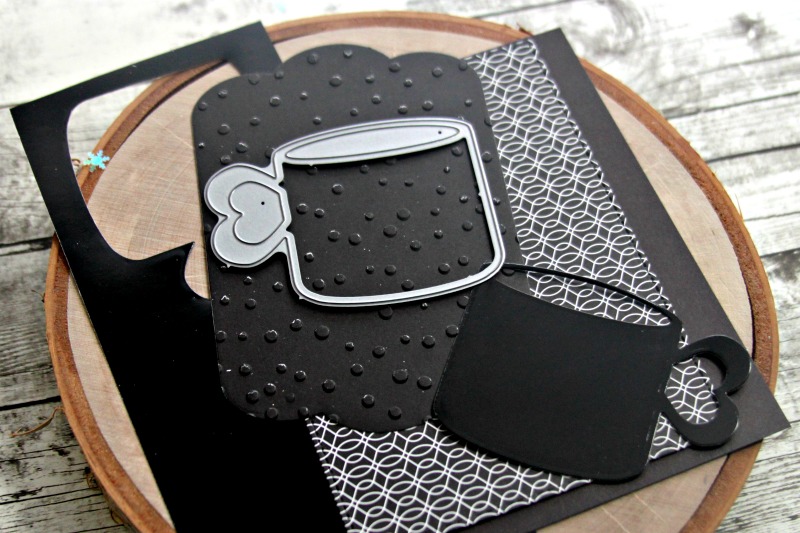
While waiting I die cut my coffee cup from the Coffee Cup Fri-dies and stamped the sentiment from the Coffee Talk Stamp Set using Versamark and heat embossed with some gold embossing powder.  I also smushed my oval coffee piece from the mug into the Versamark and covered that with gold powder and heat embossed it.


I love the Scallop Tags Fri-Dies and cut the large one from gold vellum to frame my cup.  A few more of the smallest jacks cut from some already foiled cardstock as steam (or maybe champagne bubbles??) and that pretty bow I stamped, embossed, colored and cut out from the top of the pretty image from the Mistletoe & Holly Stamp Set.


Oooh!  Aaah!  Pretty!  Sparkly!  ...lol!


One more look at the finished project!  Thanks so much for joining me today!

  Did you know that there is a Collaboration Hop going on with the CAS-ual Fridays and Coffee Loving Cardmakers Design Teams??  We're showing off the awesome array of Coffee themed stamps and dies available in the CAS-ual Fridays shop!  AND you have a chance to win one of three $25 gift certificates for hopping along and commenting at each stop.  There is nothing to lose and all kinds of inspiration to gain and possibly some free stuff!  You can check it out and start hopping at this blog post here!  You have until Friday October 26th to comment!


And should you decide to shop, here's this for you:


See you again soon!

Tuesday, October 9, 2018

A Day Filled With Happy with CAS-ual Fridays!

I'm up on the CAS-ual Fridays Blog today with my first post as a Design Team member for CAS-ual Fridays!  I just love to play with these products and am honored to be joining this team!


  Today I'm sharing with you a card that I think could be for anyone and for almost any occasion.  I started by choosing the papers I wanted for my A2 sized card.  I then cut three of my layers using one of my favorite sets, the Bubble Box Fri Dies... SO many different uses for this set!!  Here it was a great way to ground my layout and add some depth with popup tape.  I distressed the edges of my dark cardstock with a white core and used a cool embossing folder to add some interest to my larger white layer.

 I love this adorable Nate & Friday stamp set... these pups... LOVE them and I had to have the set because my dog Slim has a similar look.  He's not a Boston Terrier like Michele's pups (who inspired her for this set)... in fact... we don't know what he is...lol!  But he's got some browns in him so I added some extra color:


Oh my!  This is such an easy set to stamp and play with because you don't really have to even add any color, but I wanted to play with one of my favorite Copic coloring techniques on this set.  Basically you color in the image the way you wish... you don't worry so much about the perfect blend because when you get done coloring, you take a rag... in this case a loose terry wash cloth and dab some Colorless Blender onto it.


You want to be careful not to get the cloth too wet.  I dab it with the solution, gather it in a bunch and "tickle" the fibers a bit.  Then you hold the cloth down over the colored image for the count of three and lift.  If your cloth is too wet, some of your color will bleed.  Work in small sections and if you feel it needs more texture, let it dry completely and then go in again.  It's such a forgiving technique because you always have the option to add more color and try again!  And sometimes a little bleed can be cool!  "Perfect" isn't always best!


And then my sentiment!  I love to leave my cards open if I'm not making them to be used right away.  And I wanted my sentiment to fit on the smallest Bubble Box Die I used from the set.  So I used masking and a couple different stamp sets (along with my Misti) to build the sentiment I wanted.  Wishing You A Day Filled With is from Peace, Love and Coffee and the Happy is from the Celebrate set!

I added a few of the Jumping Jacks Fri-Dies cut from some pretty shimmery paper and scattered them around as well as a few clear sequins.  And there you have it... I could stamp the inside with a Happy Birthday for one of my boys or my nephew... or I could add some sort of inspirational or thinking of you sentiment for one of my girlfriends who loves dogs as much as I do!

Hope I've inspired you to try out some texturizing if you haven't ever done it before!  It really is fun!

I'm playing along with a couple of challenges with this one!  My colors were inspired by this challenge at Color My Heart Color Dare and I'm also playing along with Anything Goes over at the Outlawz Twisted Thursday!

See you again soon!