Friday, August 30, 2019

Caffeine Fueled Paper Play Challenge Reminder with Miss Ink!


Super quick post today to remind you that you have today and tomorrow to play along with the Caffeine Fueled Paper Play Challenge over at the Coffee Loving Cardmakers Blog!  Miss Ink is the sponsor and you could win the fabulous Java Joe's stamp set!  I have a little inspiration for you today!


The Java Joe's set is SO fun!  It's a little cafe along with quite a few related images and some great sentiments!  I decided to make a quick and flat (aka easily mailable) card!


I stamped the building and pot images offset on my panel using Copic friendly ink.  Then I masked off the potted plant and building and added a few of the included bricks AND used the Jitters stencil to add a little "sky" to the scene.  (I imagine the sky might look like this in the atmosphere around a coffee shop.. if you look closely!) I colored the whole thing in with light colors (channeled my inner Amy for this one and really had to work hard to not make everything too bright because it's not the look I was going for)!  Finally I added some dots at the bottom and colored in a bit to ground my images.  Easy peasy!


And I decided on this fun sentiment and that it would span the entire card (because I ripped my paper a bit around that area...lol!  Sometimes the card chooses the design...lol!  I just added a few beautiful Buttercup sequins from Kat Scrappiness and I was done!


I love that I can just drop this one in my mailbox and don't have to trek to the post office to mail it!

Now it's your turn to play along!  You have until 11:59pm on the 31st of August!  Link up here at the Coffee Loving Cardmakers Blog!  Just create something new using any past or present Coffee Loving Cardmakers Sponsor's Coffee, Tea or Cocoa themed product!  AND if you use something from this month's Sponsor, Miss Ink, you get an extra chance to win!  You've got plenty of time!  Hope to see you over there!

Monday, August 26, 2019

Courage Doesn't - Rubbernecker Stamps


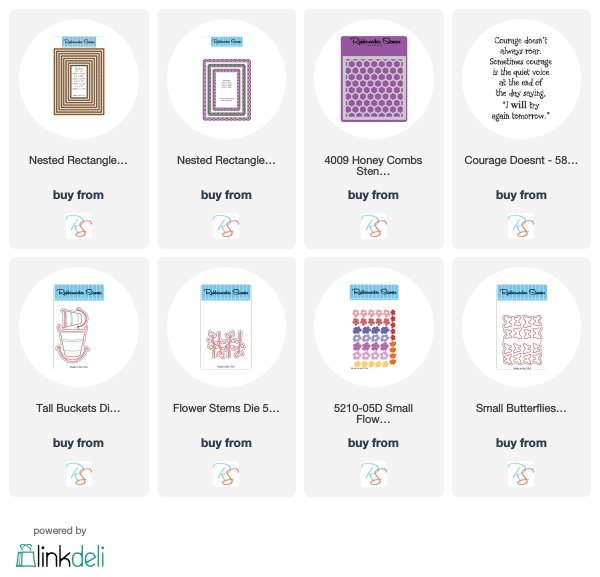
Welcome to some Rubbernecker Stamps inspiration!  I'm using another one of the new stencils available in the shop... the Honeycomb Stencil... along with a bunch of other awesome stuff!

I started by cutting my scalloped and stitched rectangle layers.  I used the Honeycomb Stencil and some purple distress inks to add the octagon pattern to the background layer and then layered them all up, popping up some layers.


Before I added my top layer, I stamped one of my favorite sentiments... just a little encouragement for someone having a rough time.


I had the smaller bucket from the Tall Buckets dies left over from a previous project and it was perfect for the corner of this one.  I also had some leftover flowers, leaves and butterflies from previous projects.  And I added a few of those beautiful rhinestones from Trinity Stamps.


I just love the ultra feminine look of those card... with the scallops and flowers... it makes me happy!


So happy you could stop by today!  Hope you enjoyed your visit!


I've provided links below to all of the Rubbernecker Stamps products I've used today.  If you purchase using these links, I will receive a small compensation at no additional cost to you and thank you!

Sunday, August 25, 2019

Crafty Elves' Countdown to Christmas - August 2019 Edition


Welcome to the August edition of Crafty Elves' Countdown to Christmas!  My friend Debra Davison and I decided we were going to create a Christmas card a week for the year so that come December all of our cards would be made and it has been awesome!  I've so been enjoying the chance to use some of the products I purchased during the season last year and love our monthly posts!  

For me, this month's post is all about elves! So without further ado:


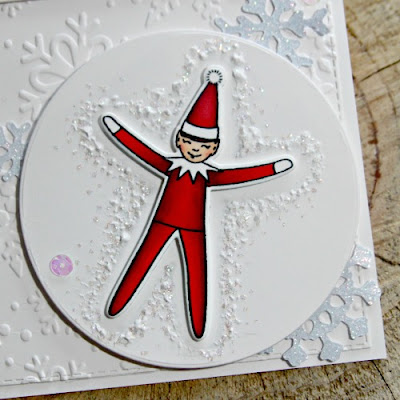
I picked up this Elf'd set from Ellen Hutson after one of the first Coffee Lover's Hops I participated in.  It was a while ago... and this is the first I've used it.  It's not even available any more and I'm just NOW using it.  The good news is I just got the coordinating dies on clearance!  I don't know why I hadn't used it... I love it... that's why I bought it...lol!  So I'm very excited to be using it now.


I used the die for this guy and laid it on some Copic friendly cardstock and traced the outer edges with a very light cool Gray Copic... C0 I think.  Then I used C00, C0, and C1 and dotted around the outline using the darker color on the crevices and lighter as I moved outward.  Then I used some Alene's True Snow and dabbed it around with a paint brush.  Next I used some glittery clear stickles and dabbed it around.  And Voila!  Snow Angel!  I popped up that cute little elf right in the middle.

The snowflakes and sentiment banner are from Paper Smooches.
The sentiment is from Picket Fence Studios.
I used this embossing folder from Taylored Expressions.


Of course I had to have a cup or two for you!  I used the Holiday Cheer papers from Sunny Studio Stamps.  This one was fun!  And did you see how perfect that sentiment die is for one of these cards?


There is Elf right there in it!!  I added some mirror cardstock over the glitter on the "elf" area so it would stand out just a little bit more.

The Treat Yo-self Die is from Ellen Hutson (also not available any more...lol!)
The heart and mug are from MFT.


For this one I used the Sunny Studio Stamps paper and the awesome Letterboard Essentials Dies from Ellen Hutson and that Christmas Light Border is from Craftin Desert Divas.

And guess what I got since your last Crafty Elves visit:


I got my hands on one of these adorable Crafty Little Elf stamps from Unity Stamp Co.... you know... the namesake of our little monthly post!  


Well... the splatters are obvious...lol... but some of those splatters are with some pearl white watercolor... hard to see, but it's in there!

I've also used:

Christmas Over/Again by Brutus Monroe for Unity Stamp Co.
Sending Love from Birch Press Design.
Nested Rectangles and Nested Deckle Rectangles from Rubbernecker Stamps.
Wow Gold and Wow Sparkling Snow Embossing Powders.

And finally... yeah... he's not an elf, but I love this Winter gnome from Picket Fence Studios A Gnome Winter Stamp Set:


Isn't he just so adorable??

For this one I also used the following items:

Cable Knit Embossing Folder and Snowflake embossing folder from Taylored Expressions.
Funky Flakes and Coffee Cup Fri Dies from CAS-ual Fridays.

Now it's time to announce the winner of some Happy Mail from last month's Crafty Elves post:


Lagene!  Please e-mail me at bzscrapper66 at gmail dot com with your mailing address!

We're doing it again... next month I'll choose someone from the comments on this post to win some Happy mail from me.

Thanks so much for stopping and come again soon!  Be sure to head on over to Debra's place and see what she's created for your viewing pleasure!


Friday, August 23, 2019

The Cutting Cafe - Checkbook Inspiration!


Welcome to some Cutting Cafe Inspiration!  This time around we're sharing projects using the Checkbook Register file along with some fabric!  

I am not a sewer..   I mean... I've sewn... I just don't enjoy it.  To much following instructions I think and I suppose if I spent some time doing it I might like it more, but I don't need another addiction...lol!   So when Regina said, "Let's use fabric" I have to admit... I was a little stumped.  But then I thought... well... I don't HAVE to sew and I have some pretty fabric that I bought ... well... because it was pretty!  And I thought... I can use that in my projects... (see what I mean... I don't even sew and I justified buying pretty fabric!...lol!).  So I got out some old fabric from CTMH.  Used the Checkbook Register file to cut out my base and put it together and just cut some fabric out and adhered it to the base using binding tape.  Oh... and I knew I couldn't cut a straight line and that was ok since I love the distressed look... so I roughed up all of my edges by pulling out some threads.  I decided to leave the one pinked edge because I liked it!


Then for a fairly flat decoration on the front, I decided to use some Paper Smooches dies from my stash to cut a flower and leaf from felt.  I finished it off with a button and tied a scrap piece of the fabric through the button holes... and I thought that this sentiment was perfect for a checkbook register... Adulting IS hard!!


This file is SO cool because not only do you get the cut for the checkbook register cover which has two pockets on the inside flaps, but you also get the register pages you can print on whatever paper you want!  I don't write a ton of checks so I just printed one sheet and I can print another when I need one... next year maybe!...lol!  and I though this will also be a great place to hold receipts... those I have a lot of!...lolol!


I decided the inside called for another bloom.. this time I used a flatter button and no fabric bow so it would be less bulky... and then chose the inside sentiment also from PS because I thought again it was perfect for those stressful days.

And there you have it... be sure to checkout everyone's projects up on the Cutting Cafe blog because we DO have some sewers in the group and they've created some beautiful things!  Comment there for your chance to win three files of your choice!

I'm playing along over at Paper Smooches monthly challenge which is School and/or Words... I've got some awesome words here!


Thanks for stopping and hope you'll come again soon!

Wednesday, August 21, 2019

Caffeine Fueled Paper Play - Art Impressions


I'm up on the Coffee Loving Cardmakers Blog and playing along with the current challenge over at Art Impressions!  Here's a little sneaky peek!  Hope you'll hop on over there and check out the details!


Peace, Love, Coffee and Color Burst


Welcome back!  I'm sharing with you today a card I made using some of my very favorite CAS-ual Fridays products!  I started with a background I created using some Ken Oliver Colorbursts and the Modern Petals stencil.  (I have a short photo tutorial here if you didn't catch it the first time around).  I love to get out my colorbursts and stencils and play and make a bunch at one time so when I'm ready to use them, they're ready for me!


Then of course... the coffee cup... I love the To Go Cup Fri-Dies available in the shop... the size is fantastic to be the star of the show on a card... and since coffee is the star of most of my mornings... it's perfect!  And that beautiful fox from the Foxy stamp set... perfect for my coffee wrap that I cut from Copic Friendly paper.


I love the 4 Petal Fri-Dies!!  Handy for all kinds of flowers... I cut these from red cardstock and covered them with some Wow Vintage Candy Cane embossing powder.  Added a few branches from the Casual Trees Fri-Dies and my favorite sentiment from Peace, Love and Coffee as well as the additional Peace sign... both stamped in Versamark on black cardstock and embossed with Wow Opaque Bright White powder.


I love how bold it is, yet somehow (to me anyway) it still evokes peaceful thoughts... I think it's that beautiful quiet fox....

I hope you enjoyed your stop!  And did you know now is a good time to get some of your favorite sets that you've been wanting but just haven't gotten yet?  There are some products in the shop that are retiring and are 25% off right now!  Once they're gone they are gone!  They're making room for some awesome new products so get what you've been wanting before it's too late and at a great price!

And here's this for you as well:


And you don't have to use mine!  Use the code for whichever Girl Friday inspires you!  

Come back again soon for more inspiration!


Monday, August 19, 2019

May The Peace - Rubbernecker Stamps


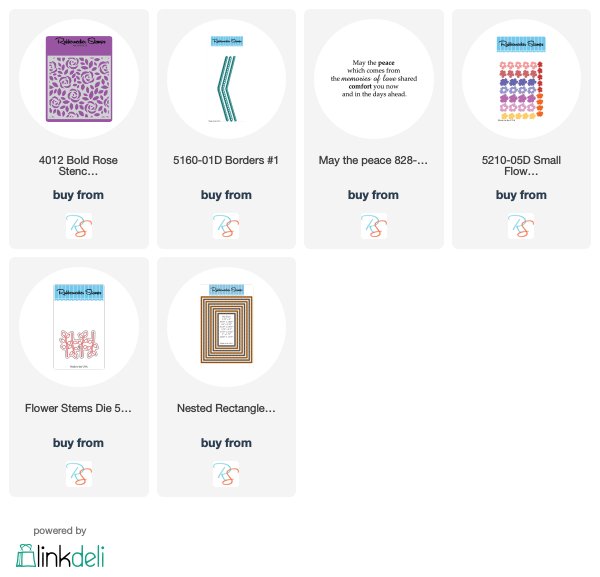
Welcome back!  Did you know that Rubbernecker Stamps now has stencils?  Today I've used the beautiful Bold Rose stencil to create the background for this card.


I taped the stencil down over my base and used a small square of cardstock as a mask.  I slowly started blending inks... a couple greens for the leaves and a couple purples for the flowers... covering the flowers when I colored the leaves and covering the leaves as I colored the flowers.  When I was done, I used a sponge and a little bit of water to add some Nuvo Gold Mousse randomly.  My mousse dried up pretty quickly, but I've found that it's fun to use this way... I just take a wet sponge and swipe it over the dried mousse a few times and then apply it where I want it using the sponge.  A paintbrush works nicely too!  Finally, I added some translucent texture paste for shine and texture.  Then I lifted the stencil and set it aside to dry.


I cut the top piece using the Borders #1 die and ink blended that with the same purples.  Then I blended a couple more pieces of cardstock with the purples and greens to die cut my flowers and leaves from.... adding some of the gold mousse as well.


Finally I cut one of the smaller rectangles and stamped this beautiful sentiment in Versamark and then heat embossed it with Wow Superfine Metallic Gold embossing powder.  I used another strip of ink blended cardstock to ground the sentiment and added my flowers, leaves and sequins.


It was fun to color this stencil pattern using ink blending brushes and distress oxides and pretty easy just using a small piece of paper as a mask!

Thanks so much for stopping and hope you'll come again soon!


Below are affiliate links to all of the Rubbernecker products I've used today.  If you use these links to make a purchase I will receive a small compensation at no additional cost to you.

Double Trouble Challenge Blog Guestie - Challenge #36


I'm guesting this month over at Double Trouble Challenge Blog and it's time for a new challenge!  The Challenge is Round and Round.  Use something round on your project or create a round card!  And the twist should you decide to give it a try is to include something related to School.  And for even more chances to win, play along with the Tic Tac Toe Board over at Joy of Sets Challenge.

I covered all the bases... and here's how I was inspired:


I started with that Gingham plaid... of course I chose plaid... are you new here??  My second layer is a cool die from Lil' Inker Designs called Sunburst.  I believe it's retired now-so happy I got it before it was!

I went with the bottom row; plaid, red and school.  I added a circle using a Cottage Kutz die.


That adorable apple is from Lil' Inker as well and that cool chalkboard (easel) is from Paper Smooches.  The stars and face for the apple and sentiment are also from Paper Smooches.  And the A B C is from MFT.


I thought this would be a cute card to give to someone on their first day of school... either a kid or a teacher!

I'm also playing along over at Paper Smooches August challenge with a theme of School or Words!  I've got both!


I'm also playing along over at Kat Scrappiness where the challenge this month is "Back to School"!  Check it out!

Be sure to head on over to the Double Trouble Blog to check out what everyone has created for your viewing pleasure!  Get inspired and play along!


Tuesday, August 13, 2019

Miss Ink Stamps-Mugs and Kisses


I can't seem to put these new stencils from Miss Ink Stamps away so I didn't!  I created the background for this one using the new Waves stencil and some Distress Inks.  I popped my frame up over the stenciled panel.


I wanted to ink up the Gardenia set... so easy to color up and SO beautiful!


Well, of course I added these from the Brewtiful set!  Why wouldn't I?


Did I mention how all of these new stencils gradually become thinner... such a cool look!


Thanks for stopping!  Did you comment over on IG on the giveaway post at Miss Ink Stamp's Account?  Be sure to check back there to see if you are the winner!

And don't forget, Miss Ink Stamps is the sponsor for this month's Caffeine Fueled Paper Play Challenge!  Link up a new project using any Sponsor (past or present) coffee, tea or cocoa product!  All of the details are in the challenge post here!


AND I'm playing along over at Simon Says Stamp's Wednesday Challenge to Add A Die Cut!  You should too!

Come back soon!!