

Excited to be up on the blog today and I'm sharing a shaker card I made using the Rectangle Combo One Piece Die #3 and the Lattice die. You'll find step by step instructions and a list of Rubbernecker products I've used (with links) at the end of this post!

Isn't this Poppy Bouquet stamp beautiful! I actually had planned on using a different sentiment with this image, but once I got the shaker put together I realized the sentiment I had in mind would take up too much real estate so I'll be sharing again soon with that one. I opted instead for this beautiful Hugs die and decided on white so that it would not distract from those bright red poppies but used glitter paper because... well.. glitter!
I'm playing along over at Simon Says Stamp's Wednesday Challenge which is Fun With Florals. You should check it out!

I love all of the white with that huge pop of color from the poppies. Red Copics are tricky but I love them and they are definitely worth the trouble! I always have cleanup to do when I get done coloring and do so with a combination of the Colorless Blender and a white gel pen...lol! Always! So don't be afraid... just do it!
If you are interested, the reds I used are R27, R29, and R59 and the greens I used are YG01, YG03 and YG17. These are two of my favorite combos.
Here's how I created the shaker:
- I started by cutting the Rectangle Combo One Piece Die #3 and the Lattice Die from white cardstock using an electronic die cutting machine.
- I decided how many of the frames I needed to make a window the right size for the Lattice die cut to fill in the center and laid them on my workspace upside down, nesting each frame inside the other. Then so they would be easy to handle, I used scotch tape to adhere them together as one frame.
- Next, I added the Lattice die cut in the center and taped it down.
- I cut a piece of acetate slightly larger than the Lattice Window and adhered it over the back of the window using double sided adhesive.
- Finally to complete the shaker window panel, I added strips of foam tape to the back of the panel around the outside of the window, but close to it.
- Since the window is a smaller space in the middle of the panel, I was left with a lot of space on the outer edges of the panel and so that my panel edges wouldn't bend downward I added a second line of foam tape around the outer edge just inside the scallop holes solely for structure.
- I cut a piece of white cardstock to 5 1/2" x 4 1/4". I adhered a piece of wood grain design paper in the center of that big enough to fill the shaker window space.
- Now it was time to add the sequins! It's always hard for me to decide how much to add. You want enough that they show, but also want room to create that awesome shaker sound that makes my heart happy. I lay the sequins down over center of the wood grain paper keeping them away from where I know my foam tape will be (I like to leave the protective layer on the foam tape of my top panel until I'm ready to cover the shaker so that I can easily hold it over the sequins without them sticking to the tape and eyeball whether I have enough sequins.) Before I add the top layer, I like to turn over as many of the sequins as I can so they are not upside down in the shaker... I don't mind if I miss a few...but it makes me happy when the cup is up!
- Once you feel you have the right amount of sequins it's time to take the protective layer off of your foam tape and carefully place the window panel over the top. I take a lot of time to be sure my window is straight because once it's down... it's down. (Although between you and me, in desperate times, and because I'm pretty sure my head is crooked, I have cut away the bottom layer.. just the edges that show; added adhesive to the paper that's left, and attached that to a new base! It does much less damage than trying to rip it off of the base)
- Once the shaker was together, the Poppy Bouquet image that I had stamped with my Misti, cut out with the Brother Scan N Cut and colored with Copics was added to the bottom left corner with foam tape.
- I cut the Hugs die once from glitter paper and two more times from plain white cardstock and stacked and glued the three layers together for dimension and added it to the card with glue on the side that would lay on my bouquet and some very thinly cut foam tape on the right side.
- All that was left to do was add a few sequins and I was done!
I've learned that different people put their shaker cards together in different ways and I've tried them but always come back to my Eyeball Method... crooked head and all it seems to work for me.. most of the time for most things...lol!
Thank you so much for stopping and I hope you enjoyed your stay! Come back again soon and often for more inspiration!
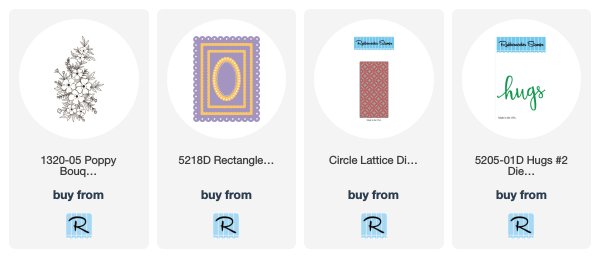
Below are links to the Rubbernecker products I've used today. Should you choose to shop using these links I will receive a small compensation at no additional cost to you. And thank you!
7 comments:
Wow! This is stunning! LOVING the background details and LOVING the flowers!
WOWZERS! Beautiful, I love all the framing elements of your shaker and the poppies are beautiful!
This is so gorgeous with the wonderful colors and all those layers. And, to top it off it is a shaker. Wow!
Very beautiful!
W-O-W! Spectacular!
this is absolutly beautiful - I love the layers!!
WOW! Those flowers simply POP with beauty!! Gorgeous card!
Theresa
Post a Comment